N ot much time spent on the racer this weekend, as I’ve been trying to crack on with the mini, and I chose to sacrifice a day’s spannering time to help help out Tim in his pre season shakedown test over at Rockingham Motor Speedway. It was great to smell hot tyres and brakes, and hear an RGB car a full chat again
 ![]() ….. gets the automotive urges surging
….. gets the automotive urges surging ![]()
Still I do have some progress to report… on both the reverse system and the wiring.
This has taken ages, all these little bits of fabrication with few datum points to work from always do.
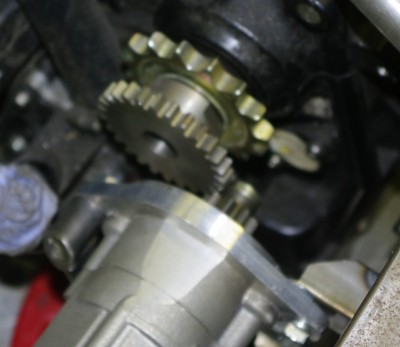
You can see here (with the actual motor removed) it is basically a triangular structure to absorb the reaction forces as the reverse motor engages. 
Yes I Know its not a full triangle, so I may have to add a reinforcing gusset in the bottom leg. If you look a bit more carefully you can see a section of thin hex bar, joining a boss half way along the long leg of the motor mount. This is purposely weedy as I don’t want the reaction forces transferring through this component to the gearbox, as it is only attached to the relatively light weight mounts that are normally used for the chain cover. The purpose is to apply tension to the reverse mount to stop it displacing sideways under load, rather than act as a “main” mount. All that’s left on this now, to to weld the chassis mount up and paint it all. I’ll test it when I get a new battery for the racer.
Here’s a picture of it all complete and bolted in place. In fact I think I’ve made it a tad “tight” to the main reverse cog. and I’ll need to just space it back by a couple of mms.
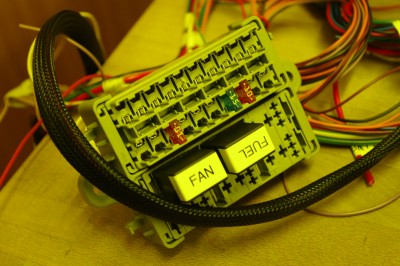
 In other new this week I’ve made a start on the wiring loom. This is based around an MTA modular fuseway system from PoleVolt lts, which allows various modules to be linked together to form a custom wiring centre. It also comes with bus bars which make life easier. I’m using the mini relay module, and the 20 way mini fuse module. one bus bar is driving unswitched circuits (mainly lights and DL1), 1 busbar driving the ignition circuits, and one driving everything else. It is pretty lightweight and comes with a range of brackets and covers. Its a bit tricky to put together, but once I realised that you need to crimp all the terminals on the busbars it is relatively straightforward. So far I’ve basically made the master supply and control loom from the battery location to the main switches. Incidentally I’m using the expandable woven sheathing for the cables. I expected it to be a right pain in the backside to use, but actually it is much easier and a lot less hard work to use than the tape I have previously used.
Andy has facebooked me, to tell me that he has the exhaust bends I need to make the exhaust are in stock. So next week is likely to be spend cutting up bits of stainless steel, and trying hard not to cock it up. I’m also expecting a new radiator, and a new fuel pump, so I can crack on with those systems too.
