I promised to keep you updated on progress on the mini, and there has indeed been some significant progress.
The new wing was welded on last time, and I currently working towards putting hed back on her wheels, so that I can get her structurally checked by local MOT tester before I start chucking expensive paint at her. Of course its only when she starts to change colour with new paint that the last 12 months of work will start to show its value.
 So on the critical items towards putting her back on her wheels are the following.
- Repair, POR 15 and prime the engine bay, ready for body colour top coat
- Seam seal the appropriate joints in the engine bay.
- Top coat the engine bay, with final body colour.
- Complete refurbishment of the front subframe.
- Refurbish steering rack, and change rack gaiters and steering arm joints.
- Refurbish front swivel hubs and driveshafts.
- Refit that lot .
- Then refit front to back brakelines and fuel lines and POR15 the remaining underside of the car.
- Then drop her of the stands.
Then with just a last few bits odds and sods welding and cleanup she will be ready for the final strip down of things like windscreen and other glass and she’ll be ready for painting. So we’re getting there…. finally. Of course then there’s the reassembly work and every effort to avoid scratching the new paint.
So what on that list have I achieved?
We”ll I’ve spent the last couple of weekends finishing up the front subframe.
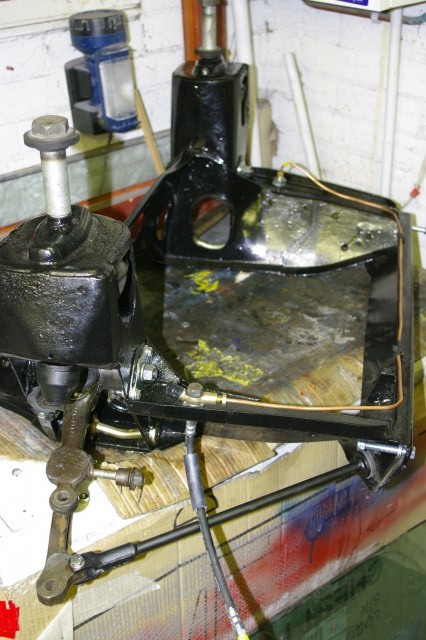
In this one photo there are
- 2 new flexi brake lines, mounting nuts and lock washers
- 2 new front tie arms, complete with new hard/soft stability bushes.
- 2 new lower arm pivot pins, again with new bushes, in the suspension arm
- 2 new poly progressive bump stops
- 2 new suspension cones
- 2 new impact rubbers for upper arms.
- 2 new upper arm pivot beams, 4 new bearings, all new fixings.
- 1 new brakes hard line, complete T piece.
- 2 new damper mount bolts.
 This frame is now ready for refitting. and I shall next be moving on to the swivel hubs, steering rack and drive shafts.
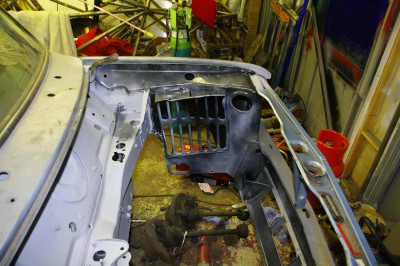
I’ve also finished the first stage of engine bay prep, this has all been cleaned down with a brass rotarry brush de rusted, por-15d and key primed ready for final prep and top coating…. I’m really looking forward to that moment… its always exciting to start chucking paint around.
On the floor underneath the engine bay are the grotty hub which will get my attention next.
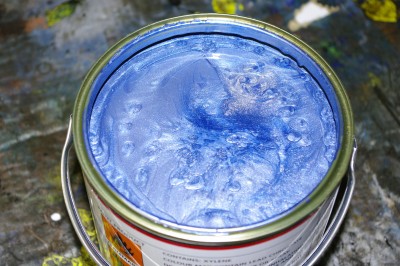
Lastly talking of paint I finally found the right paint for this car, there is not a single reference to the paint colour anywhere on the vehicle itself or its documentation. The external paint itself has degraded to almost become dusty and unstable, So I was reduced to comparing the paint from the unfaded ares behind the seats with internet pictures and photos. After much research via google, and several forums dedicated to various dodgy 1979 BL cars that would have all gone through the Leyland paint shop at the same time I finally came up with something that is right.
It is BLMC 249 Denim Blue….. even the name is dated as modern Denim jeans s actually much closer to a rich indigo blue rather than the light faded blue of 70s and 80s “stonewashed” jeans. Here it is., it could really look fab.
