 I promised that I’d keep you up to date on mini progress.
I’ve taken three days off work to try and achieve a big jump forward on the mini.
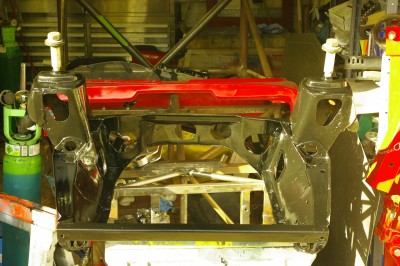
I”ve recently taken the front subframe out, and stripped it down, and in the 4″ of snow a couple of weekends ago I degreased it ready for painting.
Here it is, slathered in a layer of POR15, two layers in fact. It makes the front of the Sabre look somewhat over engineered ![]() .
.
The plan is now to refurbish all the front running gear, I’ve a big box of mini bits sitting in the corner. I’m hoping to fit the engine to the frame and lift them both into the car as a unit, rather than dropping it from above. This is the way they did it in the factory.
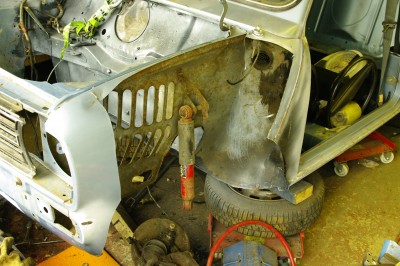
 Today I attacked the front left wing. T he wing has an ariel fitted and is also dented, and I finally decided that it should be replaced, rather than patched. The easiest way to do this is to simply cut the vast bulk of the wing out with an angle grinder. What you then do is find all the spot welds, around the headlight mount, the front valence joints and the inside of the engine bay top edge.
BTW the lightly speckled bulkhead has already been stripped an POR15 painted, as I’m aiming to to repaint the whole engine bay before the engine is refitted. The mottled effect comes from a light dusting of etch primer to give the next coats of paint a good key. PO15 normally dries like glass.
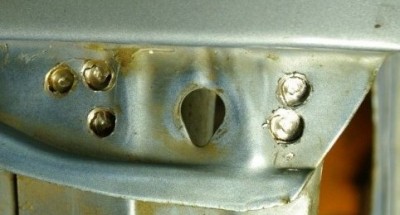
 The welds are drilled out with a modified drill. These are easy to make, you simply grind a standard drill flat at the end and them curve back the edges a tiny amount to leave a centralising pimple, and flat cutting edges. Then you centralise it on the spotweld and “work it” around so the flutes cut in the edges, without the pimple cutting through the centre. You then look for the line of rust appearing from between the two panels as the cut just passes throught the outer panel. I also like wedge chisel between the panels to load the joint, so that it “pops” when the joint is broken.
You can see the process underway, on the 5 spots at the front edge of the right hand wing.
And in this picture you can see the oringinal welds drilled out across the top edge of the wing.
Here the complete wing has been removed, and the underlying metal work scarified and cleaned with some brass brushes in a die grinder. The new “A”Panel I fitted much earlier in this restoration is on the right.
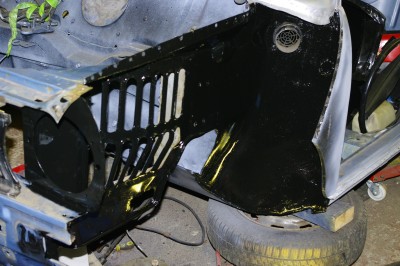
The the whole lot has been coated in PO15. With the wing off it was clear, that it was the right decision. The old wing, while not yet perforated or significantly thinned was, none the less in full on rusting to death mode. With no protective paint layer left and several layers of rust and scale present. It would certainly have perforated in the next four or five years. You can see that I POR15′d the whole of the wings interior, again this was beginning to show significant patches of rust that will only get worse. I’ll leave this to cure overnight and then grind it back where I need to weld, those exposed areas will get a layer of zinc weld-through primer. If you expand the image you can see a small repair I made in the inner wheel arch, but other than that I’m pleased to report this panel was sound, the first time I’ve found a penal that is. This gives me hope that once this wing is on…. the welding is done.

