I’m unable to do the full RGB double header race at Cadwell in July as I need to be at home on the Sunday, so instead I opted to do the All comers races on the Saturday. Allcomers are usually a bit of a hoot, plus it will get me in the paddock with the rest of my RGB buddies, and I get to go to the RGB BBQ that we run for the Marshalls as a thank you for all their unpaid volunteer work. We club drivers know that be couldn’t do what we do with the boys in Orange (or indeed the Clarks and Scruntineers too).

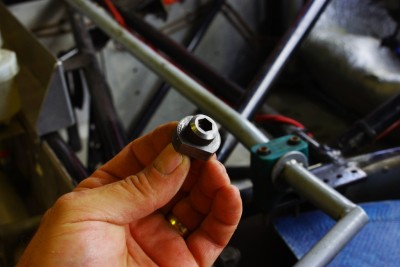
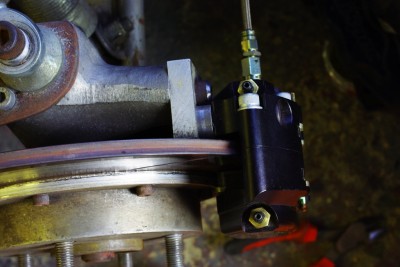
I had a couple of jobs to do in preparation for the meeting. The first involved upgrading the brake callipers to Wilwood Powerlights, the Wilwoods are dimensionally similar to my existing Hi Spec’s and I’d had a pair floating around the garage for a while awaiting fitment so I finally found time to fit them up.
Tim suggested that the Polymatrix E compound is pretty good and what is more the pads are cheap (by race pad standards), so I went ahead and fitted them all up.
 As it turned out they fitted pretty easily and all I needed to do was spin up some D shaped spacers, and which is more the pads just slotted in. I didn’t need to machine them, groove them, or grind them in anyway. They just fitted!…. which believe me is very welcome and not what I’mused too. Once they were nicely bled, I’m sure the pedal felt firmer too. but that’s probably wishful upgrade based thinking.
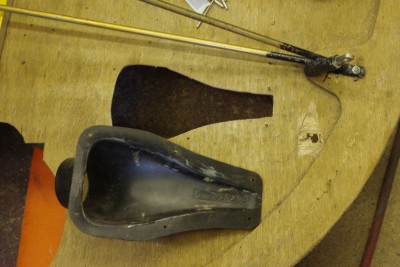
 The second thing to do with the brakes was to fit some cooling ducts, I’m pretty heavy on my brakes and with an enclosed wheel car, I frequently lose pedal firmness as the fluid heat builds up and it boild boilds. So as a first step I thought I’d fit some ducting. I have couple of commercial “Naca” ducts, which are made out of moulded ABS. Like 99% of the commercially made ones they are the wrong shape, and do not actually follow the correct Naca profile and so are inefficient compared to the real thing. But time is short, and I don’t have the time to make new ones. If I ever get around to moulding a new composite front floor I’ll do them properly. but for now I just cut some matching holes in the front floor and fitted some ducting to fire the air collected from the floor at the callipers.
 The last thing that needed to be done was to change the clutch, as I was getting slip according to my Brands data.
So I removed the clutch cover and set about extracting the clutch steels and frictions.
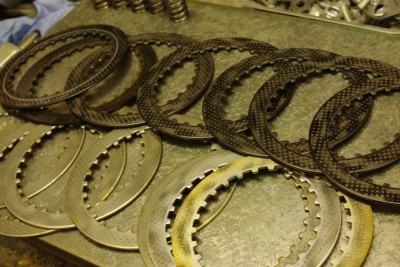
While the clutch friction plates were within the wear tolerances, the steel plates had plainly been badly over heated. the Haynes manual says look for dark marks and blue indication localised hotpsots, my plates were black everywhere! As you can see in this old vs new picture.
While changing these I noticed that the clutch centre basket needed replacing , as it was very badly notched, as I had a spare from the engine I blew last year I thought I’d change that too. Its done up to 127NM so I had to use an impact wrench to undo it. I swapped it out , and then used the impact to tighten the nut and then torqued it up manually. The clustch basked and central spinner where then locked solid. hmmm that’s wrong, so undidit and examined it all, it looked fine so I reassembled it.
Hmm same problem.. so I disassembled it, and then actually removed the complete clutch basket, this revealed the oil pump drive, with its 6 drive pins that are driven from holes in the back of the clutch basket.
Yes you guessed it, using the impact wrench had dragged the basket forward slightly with the vibration such that the drive pins and holes where misaligned. Worse than this three of the pins had broken off and dropped in the sump, good job I had a replacement for that too!
![]() Fishing around in the sump, allowed me to find two of them, but eventually I had to give in, jack it up, drop the oil, and spend a “pleasurable” few hours grovelling around on the floor, removing, flushing and refitting the sump pan, a job that was not helped as the chassis rail obscured 4 of the sump pan mounting bolts.
Fishing around in the sump, allowed me to find two of them, but eventually I had to give in, jack it up, drop the oil, and spend a “pleasurable” few hours grovelling around on the floor, removing, flushing and refitting the sump pan, a job that was not helped as the chassis rail obscured 4 of the sump pan mounting bolts.
But eventually we got it all back to gether and a job that should have taken an hour took 6, but I did find the missing bit.
Lastly in my quest to see if the car is under powered I whipped of the airbox, throttle trumpets and cam cover to check the valve clearances, as they can pull tight and cost you power. In this particular area all was fine.
Having dropped the old oil new oil was necessary so I changed the filter and completed the full oil change.
So off we go for a laugh at Cadwell, and fingers crossed I found all the bits.

