Well progress on mouldings for the new side pods continues. Since my last post we’ve laid up the complete right hand floor , buck, mould and moulding.
So the usual process applied, which was. Make the buck out of a sheet of contiboard, with appropriate joints and upstands. The buck you’ll recall is an exact copy of the part.
Where there were joints in the wood, you either cover these with a small bead of pasticene smoothed into a concave quatrant using a ball type tool, or if they are convex corners you cover them with clear cellotape. Then you wax the whole surface a couple of times (taking care not to leave cloth marks in the plasticene), and apply a very thin coat or release agent, and let that dry.

Then lay up, 2 layers of gel coat, Layer two goes on when layer one is still tacky, and soft enough for you to lightly touch it and leave a fingerprint, but when you remove your finger you have no gel coat on it. That then goes tacky, then you lay down some CSM tissue, and let that go tacky, and finally enough layers of CSM to make it properly rigid. I also added a layer of 3mm coremat. which appears to be a foam with pre stamped channels across its section. These fill with resin (hence the coremat’s monumental consumption of resin) which form a sort of honeycomb matrix. You then leave it to go off for a week
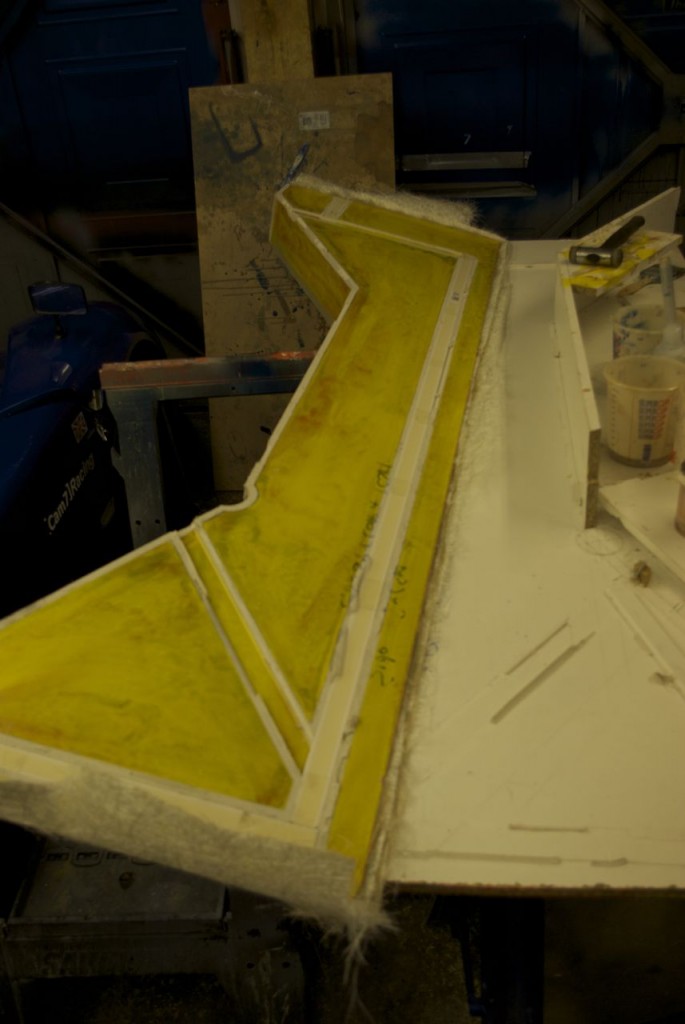
And eventually you end up with a mould. Here’s a shot of the buck with the mould released, you can see that the plasticene has pulled away from the buck and stuck to the mould.
The mould has yellow gel as the first layer and orange gel as the second.
Then you trim the edges, I’ve a little air powered die grinder that I use for this fitted with some little 3/4 inch diamond cutting disks. It fairly zips through the trimming of this 8mm thick mould without chipping.
Using hot water you wash off the release agent and plasticene and examine your creation. Argh to our horror we discovered that the surface of the mould was showing the classic orange peel effect of swollen wood grain. We had re used a sheet of contiboard that I had bought way back in November, and it seems the chipboard substructure had absorbed moisture in the garage, and swollen, marking the smooth plastic surface. It wasn’t obvious on the buck, but certainly was hugely obvious on the shinier surface of the mould.
Gah!. So break out the sanding pads, 600, 800, 1200 grit wet and dry, rubbing compound and polish. And after about 4 hours you end up with a bright yellow mirror!.
So with the mould now properly smooth, another four hours of waxing ensued, followed by a light application of release release agent. So now having made the tool. I can make the part.
The actual moulding is very thin, 1 layer of gel, 1 layer of tissue, 1 layer of CSM, coremat in the reinforcing channels, topped with a strip of CSM. And then a layer of woven rovings over the whole lot.
I was standing outside working in a bit of spring sunshine applying the last layer of wax before the moulding began, Duncan wandered over and was promptly dazzled by the reflected sun on the moulds glossy surface. ”Bl**Dy hell that’s shiny, I think you’ve got the hand of this now” said.
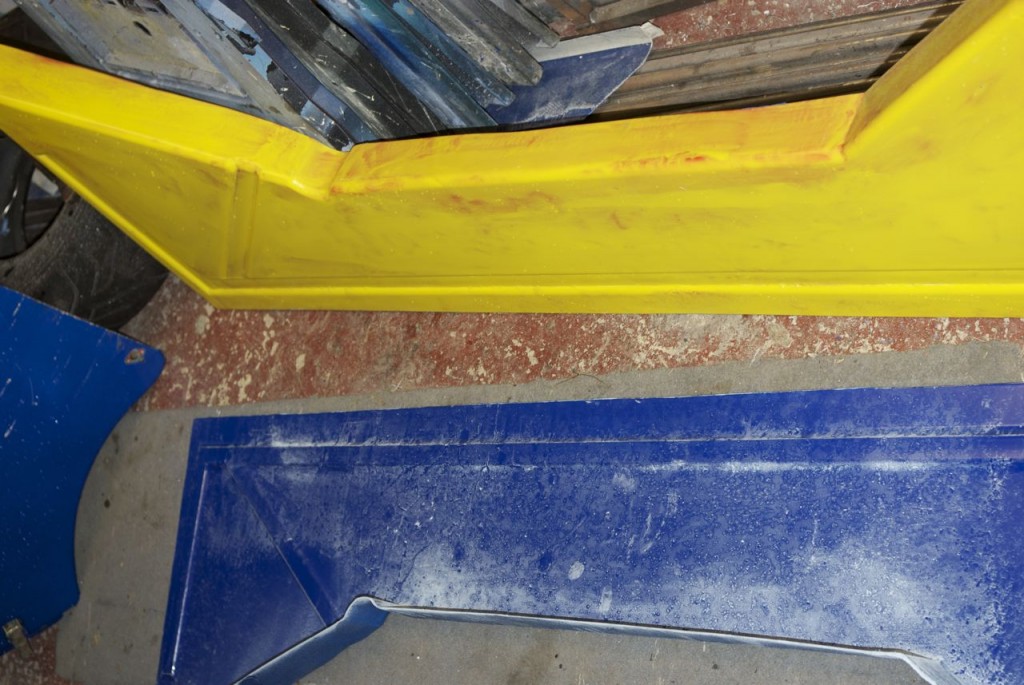
Below the trimmed and polished mould is yellow (it is also covered in raindrops) , and the new floor, still dusty from being trimmed is blue.
So, as this has plainly been a very large amount of work (we started in November, but usually only work saturdays) was it worth it to make 4 parts? Bearing in mind that I could probably made both floors in a weekend and the more complex curves of the interior channels, would have taken probably another couple of weekends. Hard to say, It certainly hasn’t been an expensive exercise as the materials are cheap, and I’ve pulled a few more kilos out of the car, but it is very time consuming. The pay back is that I can now make a new floor in a a couple of hours, and will have the ability to actually set the ride height legally now . Also I’ve learned a lot (which for me is always a valuable objective in itself) , and I’d now be confident about building larger components with a high quality face surface…. like exterior bodywork. ![]()
Plus I find it a really really interesting process as sticky, nasty smelly polyester resin goop, metamorphoses into a nice smooth part, If only I had some decent design skills I could almost say a thing of beauty.

