It was apparent, well blatantly obvious really given the overheating problems that ruined my 2009 season, that managing the airflow into and out of the radiators is of crucial importance. When we originally moved to radiators to the sides pods back in last December we simply cut holes in the existing body work, and put some sub surface ducts in crafted from aluminium. The problem with these is that the ramp angle is much too steep, and we think the airflow is stalling/ braking away long before it reaches the rads.
So for this year we have decided to take the quite large step of rebuilding the lower half of the sidepods, and the front floor section to make some deep side pod channels, that flow the air much more gently into the radiators. The idea is to remove some of the damaged lower section and replace the sidepod floors which are currently made of skanky aluminium. The result will be some very deep ducts, which if necessary can also be interchanged with proper NACA ducts if required. If I can get it to work right I may also be able to generate some additional front downforce too.
One problem with making new floors from GRP is that they are a little vulnerable to side impacts, so it pays to make a spare or two. And If I need to make a spare, then I’m going to need a mould. No Worries making GRP parts + moulds is just another skill to learn.
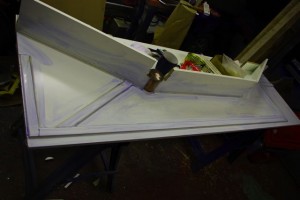
So if you’re making a mould you need to start with making a buck (mine can be seen to the right), which is an exact copy of the part required. This is a 3 stage process, make the buck, make a mould of the bulk, make a part in the mould. Its only remotely worth it if you are planning to make multiple identical parts. I want to beable to make new floors in case these new onse get damaged so the need for a mould is partly justified. I also want to use this relatively simple part as a test piece to learn the process, as I have long term plans to change other, less simple bodywork components.
In fact you need to make the buck bigger than the part, to allow both the mould and the part to be trimmed back to their respective final shapes,.
However it would be far quicker and cheaper to make the floor in Aliminium if only a 1 onff was needed.
 So as this is a floor we started with a flat sheet of contiboard, this is plastic faced, so should release nicely. To this we added some Contiboard upstands, an old pot of cutting fluid and some uPVC roof mouldings to give some 3D channels to what is essentially a flat GRP sheet and therefore would have
been really wobbly . All the joints were nicely filleted with plasticine to give smooth corners.
On top of this I brushed on a layer of PVA release agent, well two in fact.
The actual mould laminate is made of 5 layers of chopped strand mat, 2 layers of gel coat, and 1 layer of tissue, laid up in the the sequence Gel, Gel, Tissue and then CSM. Then left alone to cure for a week. I used two layers of Gel coat, one blue and the next black. This was in case I needed to repair the mould by sanding away imperfections…. once I hit solid black gel I’m nearly through to the matt.
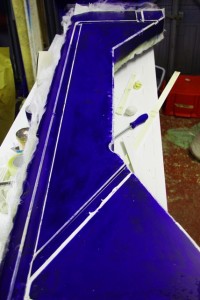
After 5 days the mould was released from the buck, and it came away nicely, you can still see the fluffy GRP edges, where the fabric overlays the edge of the mould. Do not be fooled these are a forest of sharp glass shards which are now both rigid and fragile and love nothing more than to embed themselves several mm deep in your flesh and then break off. Ouch!
The white lines are the plasticine fillets, where they have pulled away from the buck. These clean off easily with warm water and or panel wipe.
This mould has probabaly cost about 50 quid in materials and about 10 hours in man time so far. You can see that this is not something to undertake lightly.
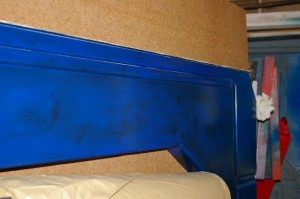
Anyway after a few more hours of trimming and polishing with 4 coats of release wax the mould now looks like this, and after one more coat of wax is ready for the first part to be laid up.
Closer inspection as part of the polishing, has revealed a few flaws in the surface. Mostly these are brush marks, which were left in the plasticine fillets when I brushed on the PVA release agent. These I’ve rubbed down and polishes as best I can, and next time I’ll spray the PVA.
I’ve also deliberately left some release wax in the sharpest of corners, to aid release. With all that wax on it is damn slippery now
So hopefully by next weekend I’ll have laid up a new floor, and maybe just maybe it will have released from the mould.


Looks good. Mind you, going by the category you’re a year behind yourself!