
So what’s been going on since the Birkett?
Those of you that have been following the Sabre build may have noticed along the way that there was a mini clubman loitering in the background. Sometime’s loved, sometimes waiting, but it’s been there all along, and been getting sporadic attention as we panic fettled the Sabre to get ready for the Birkett. Well now that that is all done.. It was time to get on with the mini.
For those that don’t know it’s a 1979 1275GT, with about 40K on the clock, and two genuine lady owners (more of that later). It’s exactly the same model and year as the car my wife had when I met her, but we sold that when the Kids came along. They’re now grown as it’s our Silver Wedding this year (god that makes me feel old)… so it was time to get another one for her.
I’ve been doing all the metal work over the last couple of years and refurbishing all the running gear, but now it was time for the “final push” to get it ready for Katie. So I took the bold decision to stick the Sabre in storage, where she lurks now, patiently awaiting the start of the new RGB season in 2013. That gave me loads of room in the garage, so the mini could take centre stage.
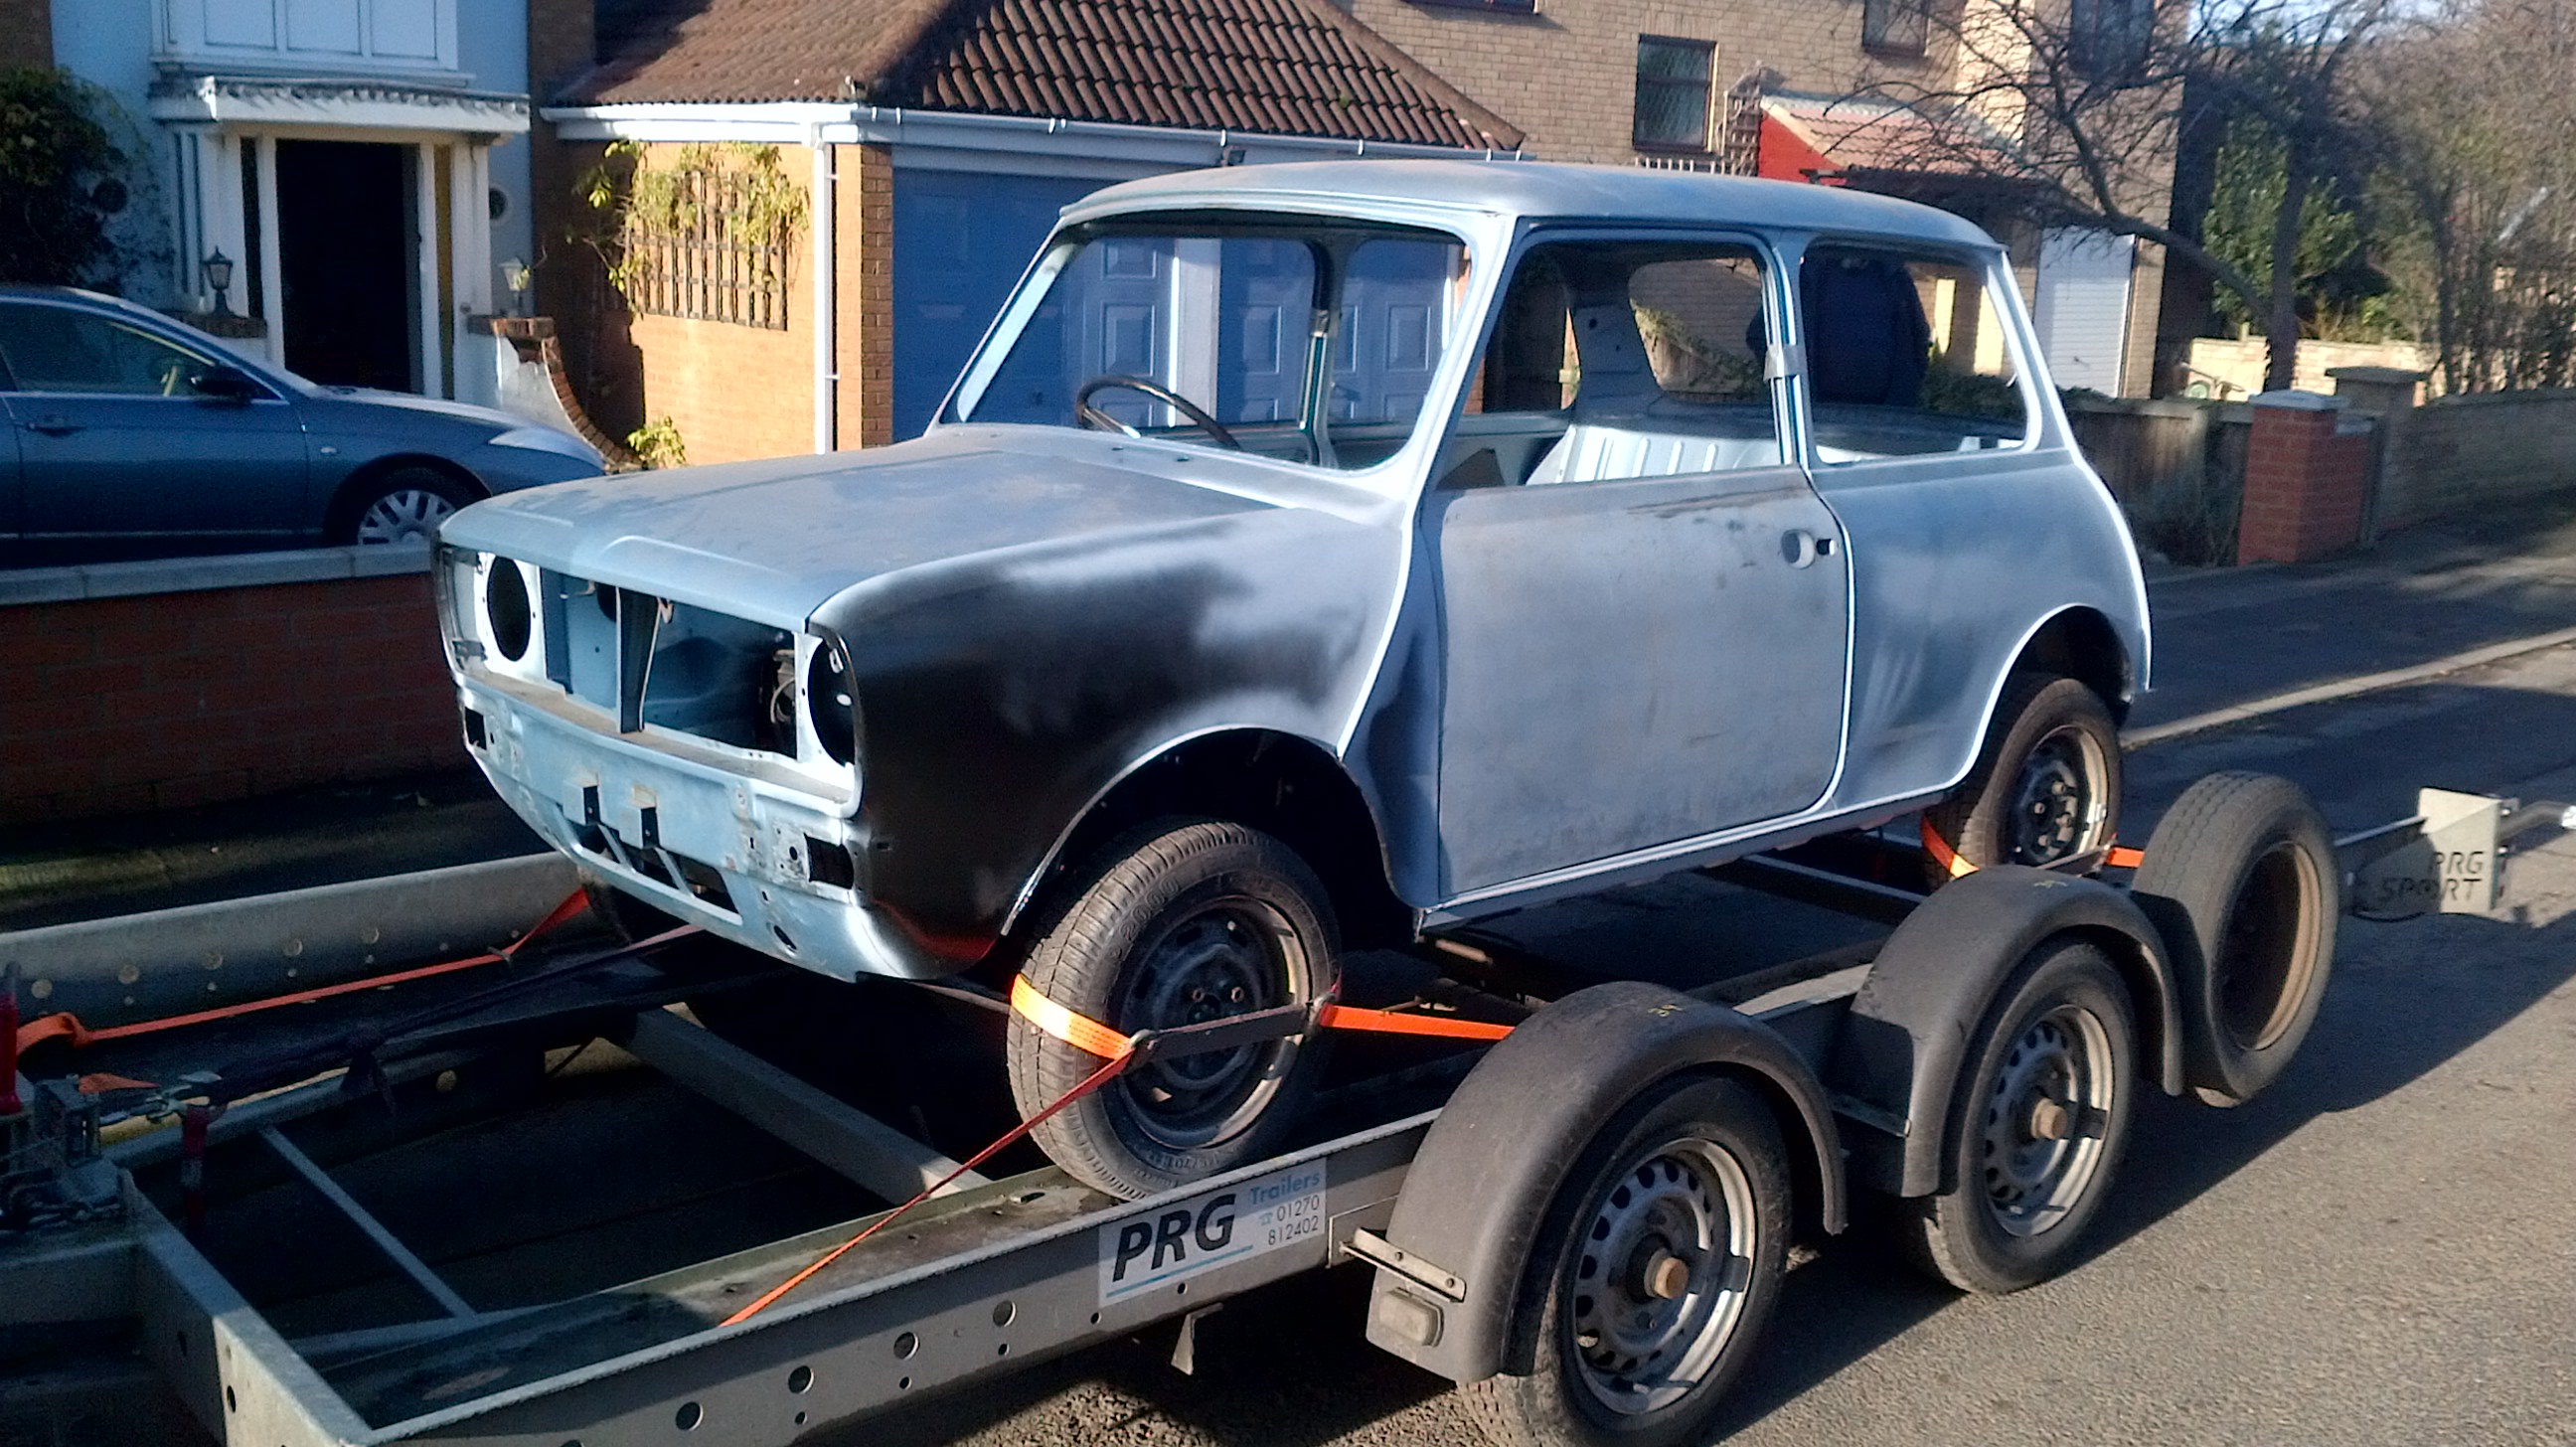
Not many pictures of this bit, as it’s a bit dull but there followed a few odds and sods of welding to finish off the metal work. Then I took her to my local garage, for a quick MOT style check and when she was pronounced “Sound as a Pound”, Duncan and I grinned and then trailered her off to the paintshop to have some colour chucked at her.
Here’s the big moment. ”Dr Charlie” departing on the trailer, that’s two years of hard work (On and off) sitting on that trailer.
I got her back last Friday…. Colin over at the paint shop had posed me a conundrum… “Do you want it in the original Denim Blue…. it’s a metallic and means that we have to do a base coat and lacquer…. which is very hard to repair, what about a standard mini colour? What colour do you want?” Well obviously given the choice, and that the whole point of this car is to recapture the glories of yesteryear, there is only one choice the original colour and a black roof. It turns out the the original colour of the old one was Cinnabar Red!
Kate wasn’t aware of this and I was hoping to surprise her…. that plan lasted precisely 2 hours, until she found the invoice on the kitchen table.
Well enough of all that, what you really want is a picture right?
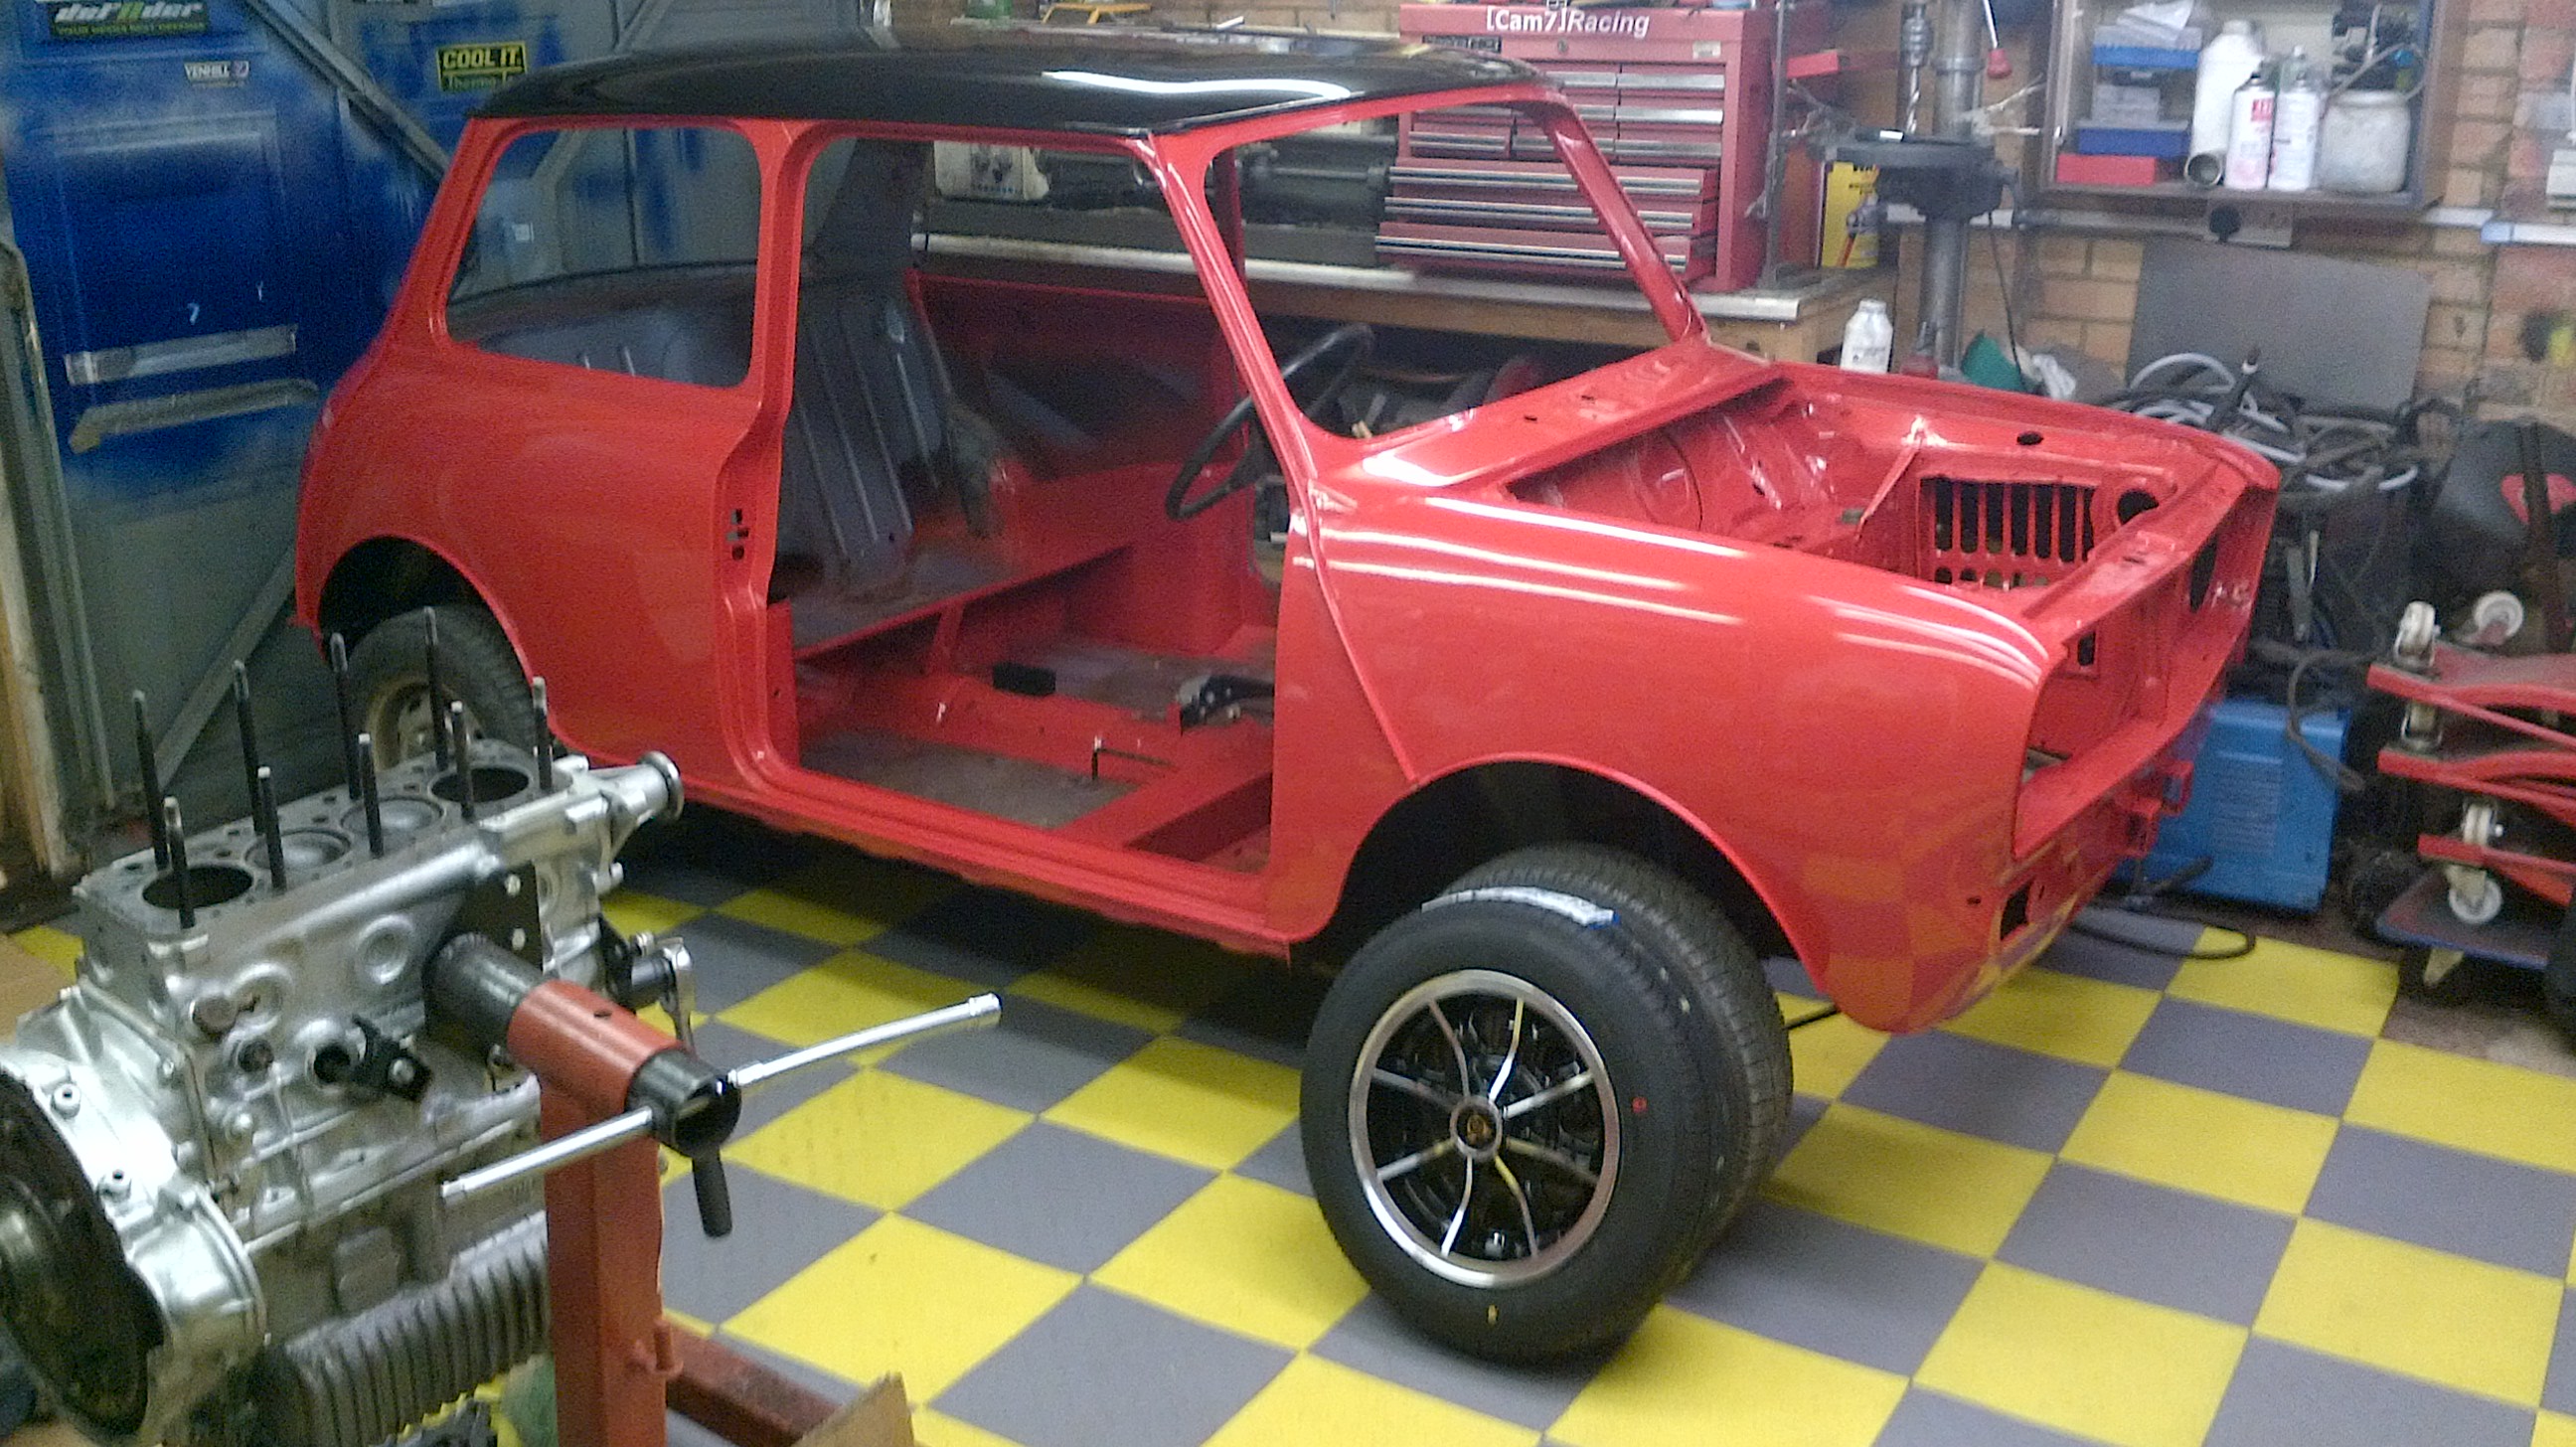
Here she is in Cinnabar Red , with a jet black roof, just like the old one ![]() . The doors, bonnet and boot are still at the paint shop, I’ll pick them up on Monday. The paint code is CMT (BLVC399), and is actually much more reddy/orange than reddy/pink in the flesh. It’s a lovely colour, and I’m actually considering painting the Sabre the same colour. The colour is age appropriate, although about 1 year later than 1979, and I think it looks great… it will be even better once it gets the gold stripes on it.
. The doors, bonnet and boot are still at the paint shop, I’ll pick them up on Monday. The paint code is CMT (BLVC399), and is actually much more reddy/orange than reddy/pink in the flesh. It’s a lovely colour, and I’m actually considering painting the Sabre the same colour. The colour is age appropriate, although about 1 year later than 1979, and I think it looks great… it will be even better once it gets the gold stripes on it. ![]() . There’s a couple of other things to note in this photo… the spiffy new garage floor tiles and the nearly completely refurbished 1275GT A-Series engine… I’ll talk about that in a minute, and again the age appropriate Dunlop D1 alloys. These are modern equivalents, because you can’t get the originals for love nor money, and in fact I’m not sure I’d want to fit 35 year old alloys anyway. The other thing you can see is my engine stand with a bespoke A-series mount, holding the engine. Unbelievably this mounts to just the oil filter and alternator mounts, but it does hold the whole block very successfully and allow you to rotate it around, to access each end and even invert it completely, to get to the gearbox.
. There’s a couple of other things to note in this photo… the spiffy new garage floor tiles and the nearly completely refurbished 1275GT A-Series engine… I’ll talk about that in a minute, and again the age appropriate Dunlop D1 alloys. These are modern equivalents, because you can’t get the originals for love nor money, and in fact I’m not sure I’d want to fit 35 year old alloys anyway. The other thing you can see is my engine stand with a bespoke A-series mount, holding the engine. Unbelievably this mounts to just the oil filter and alternator mounts, but it does hold the whole block very successfully and allow you to rotate it around, to access each end and even invert it completely, to get to the gearbox.
The car went off for paint about three weeks ago, so in the interim, I’ve been sorting the engine. As usual this started with “just give it a clean” and drop it back in mindset. But as you start to disassemble it, you find one or two things that need sorting, and eventually end up rebuilding the whole damn thing.
First up was cleaning, cleaning and more cleaning, before you even consider opening an engine it must be clean on the outside, so that the grot doesn’t fall on the inside…. so I went the whole hog, and cleaned and painted the block, in silver.
I thought long and hard before I even opened the engine, but as Tim and Duncan both said 80% of the work is actually getting the engine out and clean…. it’s not much more effort to spilt the gearbox off the bottom, and inspect the main bearings, the big ends, and the cam. The same applied to to popping the cylinder head off and checking the valves & bores.
Now remember, I said this car had had two genuine lady owners, well the last of which has used the car very very little for the last 10 years, and we have MOT certificates to prove that 200 miles per year since the turn of the century was not unusual. We know that the last lady owner basically used it every now and then to drive around the corner to the shops. I can hear the engineering minded of you all thinking… “Slow speed, infrequent journeys, never warming up properly and probably lack of oil changes is bad!” And indeed it was, really quite bad.
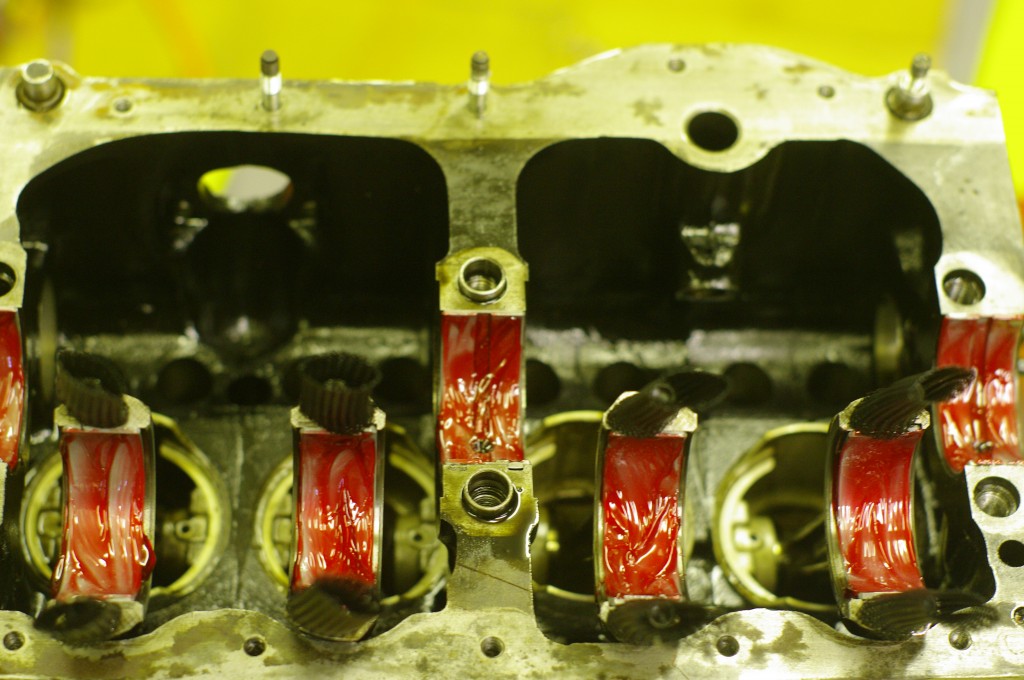
First I cracked off the main and big end bearings… all the mains were fine, but No 4 big end was scoring, it was both discoloured and lightly grooved.
Fortunately the big end pin itself looked mostly ok with only some mild marking and discolouration, and my micrometer said it was very close to the design tolerance, and mostly round. Nonetheless off it went to Lyndale engines for a grind or polish as necessary. It only took a week, and came back polished, and still at nominal standard size. Which is great, as we plan to keep this beast for a long time, so having a crank with at least one or two more grinds left in it is great for the long term. It looks like checking the bearings was a great idea, as we caught this failure just in time. Here’s the block awaiting it’s re-installation. That’s not strawberry jam… it’s assembly lube, and those are all new bearings, including heavy duty big ends.
 While the Crank was away my attention passed to the camshaft and its followers. Here you can really see the damage done by lots of small journeys
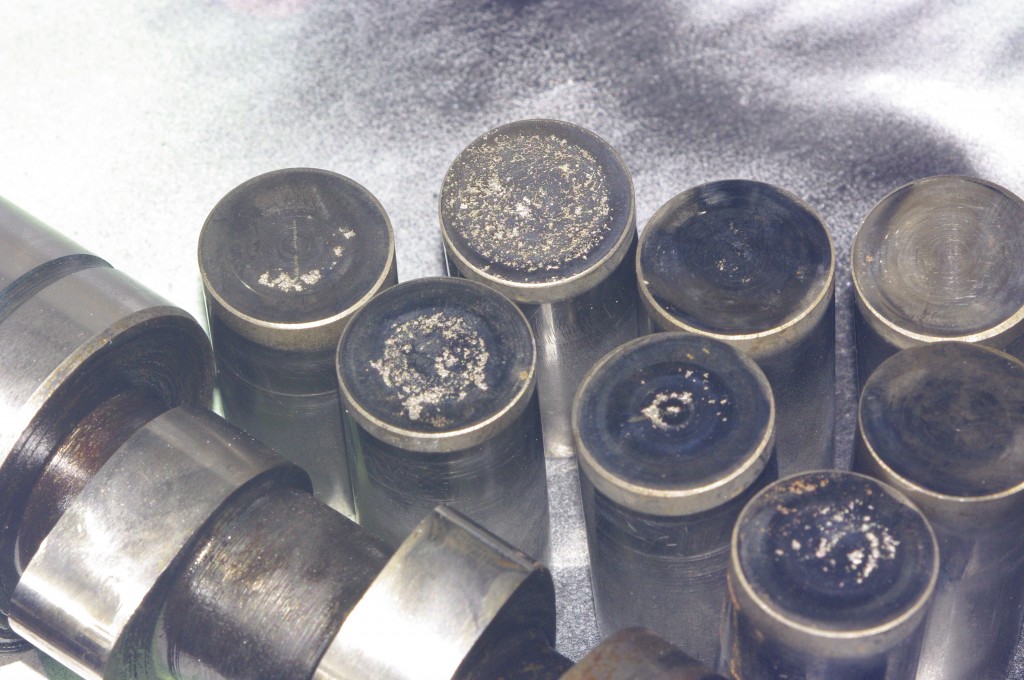
Very worn A-Series cam + followers
The damage to the followers is obvious, but if you look at the cam lobes you can also see the damage to the corners of the lobes. So a new cam was required. This is all because of the infrequent short journeys…. so If you have a mini you love… don’t just drive it to the shops once a month. Get in it, get out on the road and DRIVE it, and change the oil… often.
So it needed a new cam, and what to do, standard or a warm fast road cam? The big mistake most people make is to go for a race cam, or very high end, high performance road unit. On the public highway we mostly we drive road cars in the 2000-5000rpm range, and we’re interesting in cornering well, sweet acceleration, and flexibility…. not ultimate speed. Even in race cars you’re only in the top 10% of the RPM range for 60% -70% of the lap, so fitting a peaky race cam which only works in the 4800-6000 range in a road car is a very bad idea… the engine is lumpy and the drive very unsatisfying around town… overall it’s horrible… which is the precise opposite to what I want to achieve, which is a car that makes me grin every time I drive it.
Race cams make large BHP, but at the expense of low down torque and smooth idle. What you need in a road car is torque and smooth power delivery IN THE USABLE RANGE! Never over cam a road car, slightly more than standard is great… any more than that is a pain.
Enter Leyland Special tuning and Swiftune. When the 1275GT was launched in 71 (I think), it was to replace the Mini Cooper S MkIII, possibly the most loved sporting mini of all time. The 1275GT was based on roughly the same block (without the tappet chest covers), but the Cooper had a sportier cam, higher compression ratio pistons, larger valve head and twin carbs, to name the main differences which affected the performance. Essentially the 1275GT was a detuned Cooper S. The rumour has always been that Austin wanted to stop paying John Cooper the royalty he earned on every car sold that bore his name. Odd then that in the 80′s rover instituted a new age of Coopers.
Anyway to cut a long storey short, such was the public demand for the now discontinued Cooper S MK III. Leyland Special Tuning… (the guys that produced those famous Monte Carlo winning minis) produced a specification for converting a 1275GT engine to perform similarly to a 1275 Cooper S lump. And thanks to the wonders of the internet you can see the full specification here.
http://www.delius.pwp.blueyonder.co.uk/1275gt/tuning/cakd5096/front.htm.
So as I had to change the cam anyway, it seemed sensible to get an age appropriate one or something similar to the Leyland ST one, and in the end I opted for the Swiftune SW5 cam from Nick over at http://www.Swiftune.co.uk. Nick also recommended that I replace the feeble and badly worn, simplex timing chain with a duplex unit, as this would make it a “Fit and Forget” option, and crucially make it easy to time in the cam, as it was a vernier adjustment set. Of course as the camshaft also drives the oil pump, a new cam means a new new oil pump too. Again no bad thing.
Here it is all coming together and being “timed in”,well actually this is me checking TDC as the sharp eyed of you will spot that the camshaft pulley locktab is already in place. The cam should run at 106-108 deg after top dead centre, at maximum lift on No 1 inlet, I think we got it bang on at 107. You can also see the block deck is in very good condition with no pitting, and the new water pump is also fitted.
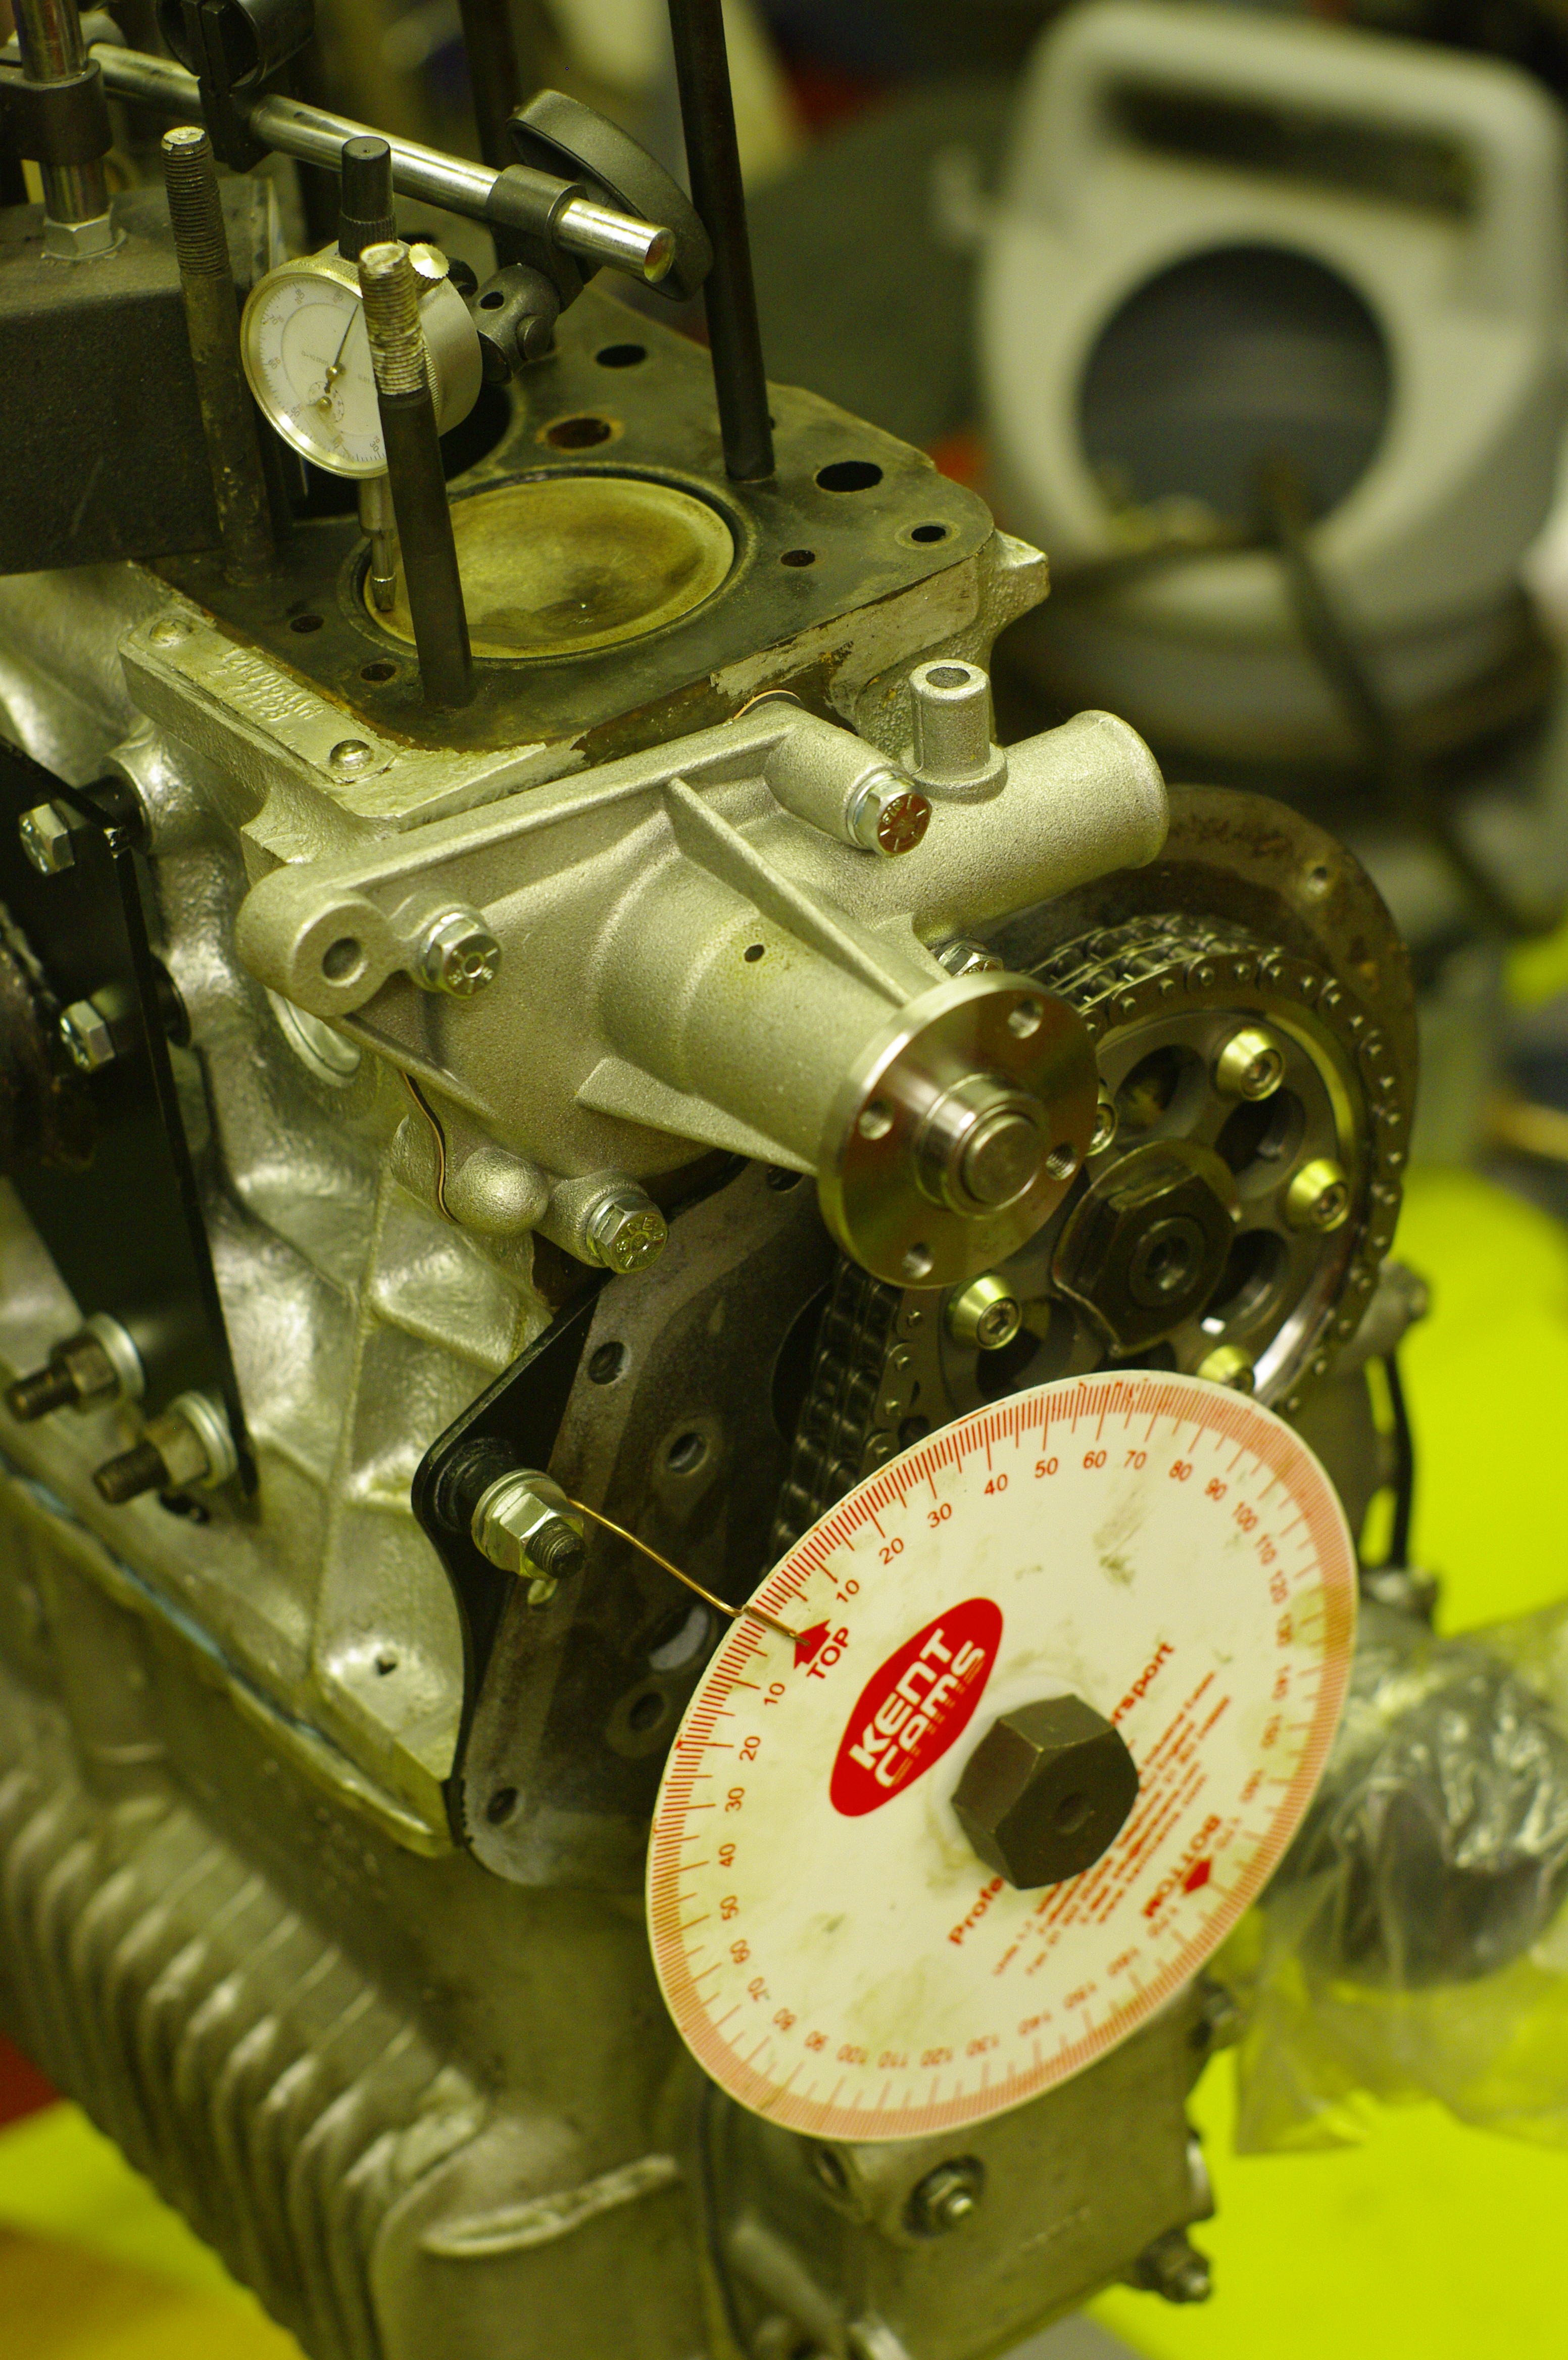
Timing in the Swiftune SW5 cam
If you squint behind the timing disk you can see the new pot drive shaft joints still in their plastic bags, which bear witness that I’ve also changed the Pot joints, the old ones fell apart when we took the engine out, and I’ve changed both the diff seal output shaft seals, and the selector shaft seal. I’ve even added the recommended O ring seal behind the selector shaft to try and keep this A series oil tight and continent for more than the first 50 miles.
So that’s the bottom end sorted out. now for the top end. No pictures of this bit I’m afraid. Basically following the normal Haynes procedure I dropped all the valves out… .Remember that this is a 1970s head designed for leaded 4 star fuel, it wasn’t surprising to see that the exhausts were all badly burned, as it has been run on unleaded for 15 odd years, and the seats were already on their way to being eroded. So Nick Swift at Swiftune has kindly agreed to fit the unleaded valve seats I need. I can’t do this, as like grinding a crank it is a machine shop job. He normally only does ”full on” race engines so I was pleased to get such an experienced engine builder to do the head work on a road car. It must be Christmas :-).
New valve seats means of course that they have to be cut to the valve sizes… so it would be churlish not to fit the Cooper S inlets and exhausts wouldn’t it (Back to age appropriate Leyland ST spec tuning). Nick is also going to skim the head slightly to drive up the compression ratio, fit new guides, and shim the double springs.
So that’s probably going to take a couple of weeks, and my plans for finishing this car over the Christmas holidays are in disarray, but hey “Do we want it quick, or do we want it right”.
That brings me to the clutch. I’ve a new standard three part kit to be fitted… but before I can do that I need to sort out the primary gear.
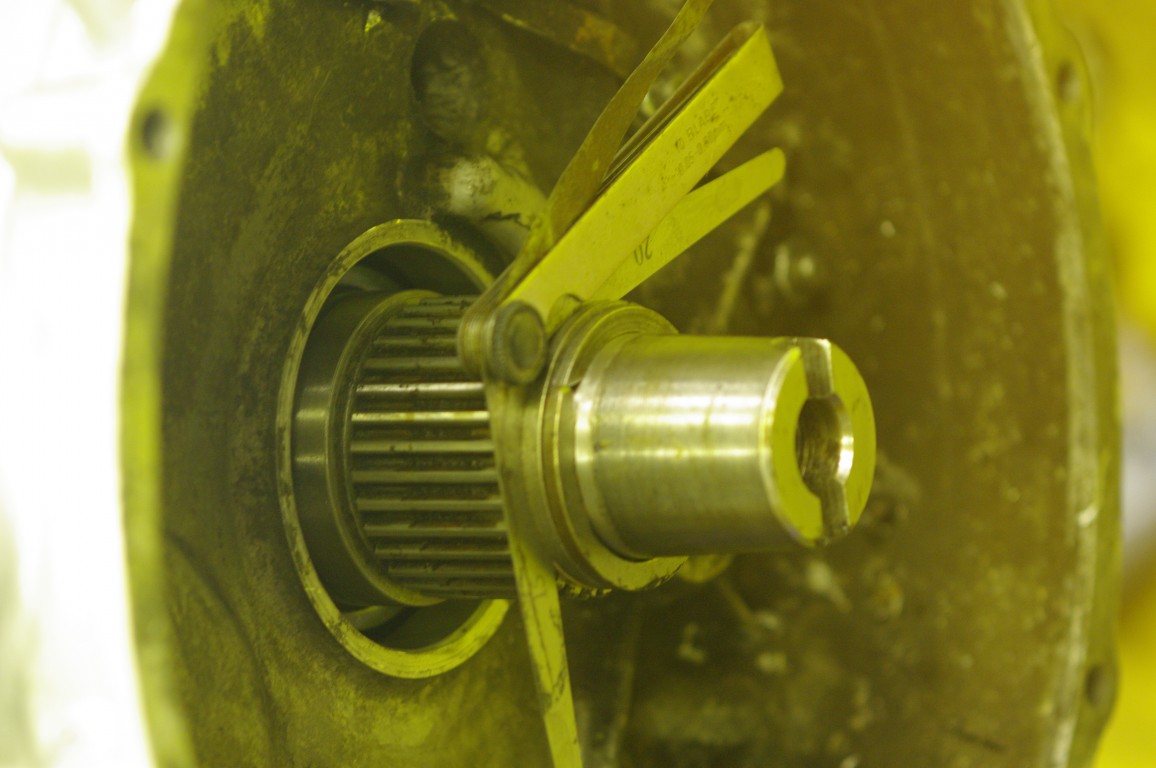
The primary gear transmits the drive from the clutch, via the transfer gears to the gearbox. Because of the limited space it runs co-axially around the crankshaft, and actually runs on the crankshaft nose, but it only rotates with the crankshaft when the clutch is out. When the clutch is in the primary gear and gearbox stays “still” or more exactly rotates at the speed of the wheels, and the crankshaft rotates within it at engine speed. That means the primary gear needs to run on bearings, or more exactly bronze bushes. You can see it here behind the feeler gauges, and in front of them is the “C ” washer and backing disk that lock into to the slots on the crank shaft to hold it in place.
The feeler gauges are measuring the end float.. which is the free gap between the primary gear and its mounts. It should be between 0.08 and 0.16mm…. There’s .45mm of feeler gauges currently in that gap. So I need a new brass shim to fit behind the gear to close the gap and the correct tolerance. Problem is, I’ve measured the one I’ve already got and it is already the largest available, so that must mean the C washer is worn. So I’m waiting on a new one. The end float, if it’s excessive causes crunched gear changes, and if it’s too tight the clutch doesn’t release, or the primary gear sticks on the crankshaft.
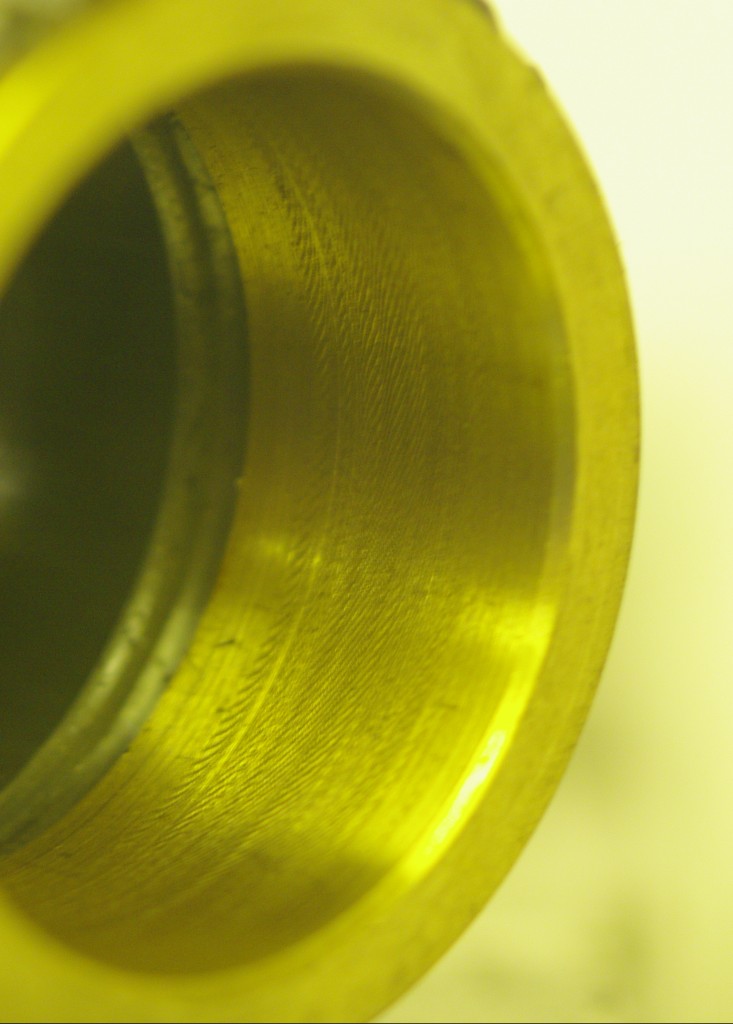
The other thing about the primary gear is that it runs on concentric bronze bushes, these need to a 0.1mm running fit on the crankshaft, the front is ok, but old rear one was badly scored by burrs on the C washer slot, (Which also indicate that it may be worn). The bushes are cheap and easy to replace, but after you’ve pressed the new in, you need to machine and ream it to size. 38.2 mm in my case. So I spent a “pleasant hour” setting it all up perfectly concentric in my four jaw chuck on the lathe, and then bored it to size. I was coming up on the size , when my last cut chattered…. you can see the chatter marks on the bore. These proved impossible to hone out, without it going .15mm over size, so I’m waiting on a replacement part for that too, so I can have another go… and I’ll use my old one to perfect my boring tecnique..
The other thing I’m waiting on, is a speedo cable. I already have one, in fact it was the first part I ever bought for this mini, but it, it seems is the very early type and the treads aren’t the same.
So currently I’m waiting on various parts before I can fit the engine… it looks like she won’t run until mid January now.
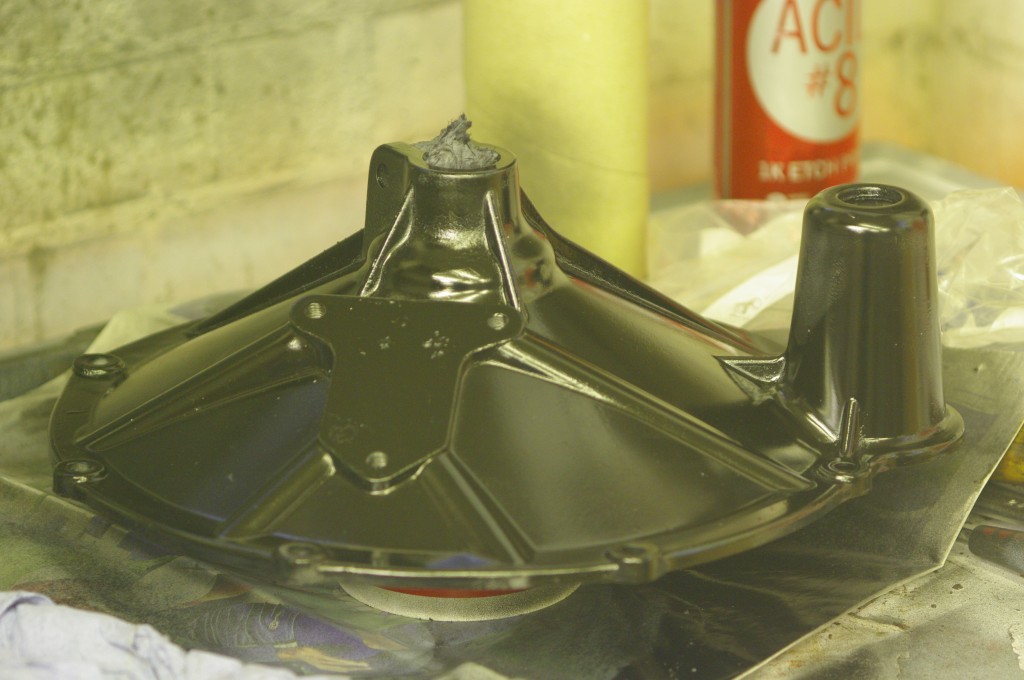
So to finish on a positive note, here’s the clutch cover all clean, prepped and painted. The rocker cover, breathers, and timing cover have all received similar treatment. Just the radiator, shroud and one or two other bits and bobs to go. Then the engine is done.
Where did you get the engine stand for your motor?