My Garage normally smells of paint, welding, hot metal, hot oil, petrol, thinners and brake fluid…. in fact looking at that list it is amazing that I haven’t set fire to my self more than just the three times so far. Today however there was a new smell… wood and woodworking.
The wood is the 6mm plywood for the front floor. I’ve been working towards finalising the front end of the car for sometime.
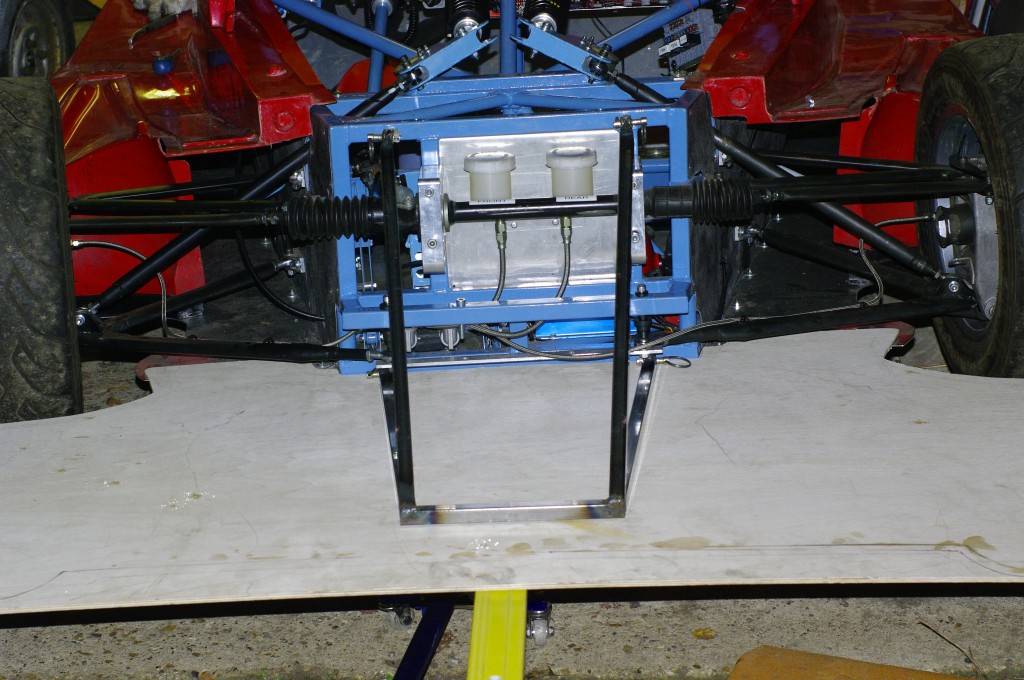
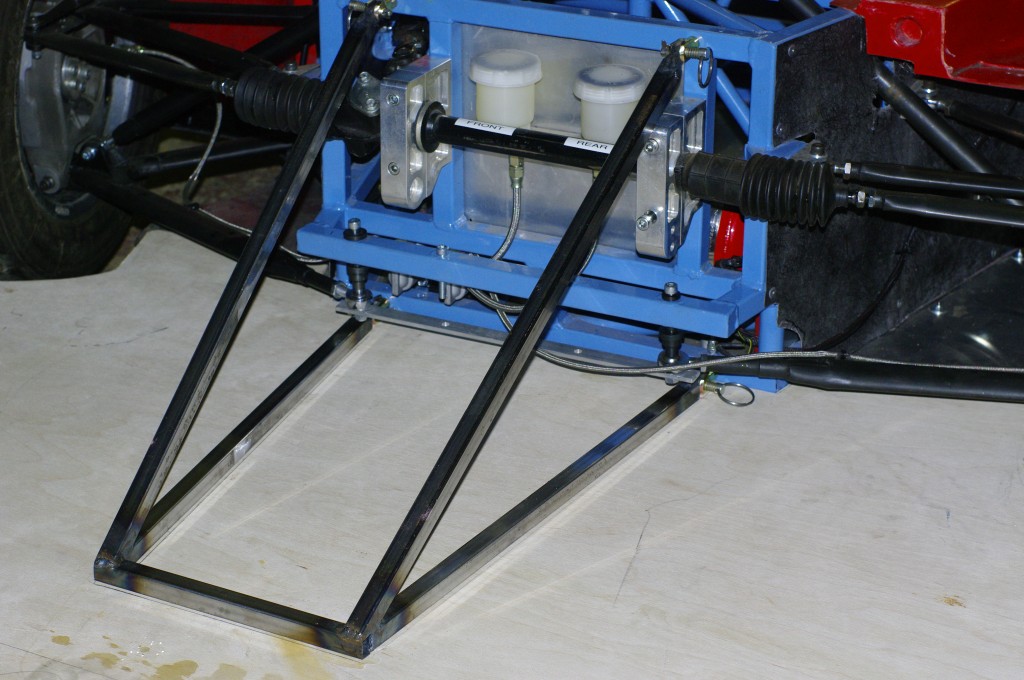
Here you can see the front frame, which also doubles as a crash structure and, erm triples as the mounting for the front towing eye. Duncan started this on Saturday, by laying out the lower frame., and I concluded it today by building up the diagonal and top connections. Also in this picture you can see the transverse Ali bar which links the lower front wish bone mounts and puts them in double shear. This just needs a couple of additional spacers to complete it.
If you stare at the the connections you can see that they are demountable with quick release pins and clevises. This is so that I can remove the front of the car, easily and therefore get it in my garage.
The frame has been constructed to ensure that the floor is flat and planar with the main car floor, it just now needs some little mounting tags to hold the actual floor on to it.
The floor itself should have been 6mm ply… except that the 6mm ply that arrived, was actually 8mm, and as a consequence was too thick to fit between the floor of the main body, and the mounting frame. So I spent a “pleasurable” hour or two cutting some 3mm pockets in the under side to allow the main ali floor to fit flush with the ply underneath, and give enough clearance above. I’ll fit some slide latches to link the ply with the the ali floors.
The whole point of fitting the frame & floor, is to allow me to mount the front bodywork and nose cone. I ran out of time to get this finished today, but I did manage to get a couple of trial fittings done, and its all looking good. To finish off the floor it needs
- To be fixed to the frame
- A transverse stiffener
- Tension wires to control the extreme corners
- Tthe mounting plates for the connection to the bodywork
- and of course the front towing eye.
OK so that was Sunday. On Saturday I focussed mainly on the front suspension. In fact, If I’m honest I focussed mainly on the lathe, as I had to produce what seemed like 50 spacers & top hats to fit the various ends of the two dampers, two bellcranks and two pushrods.

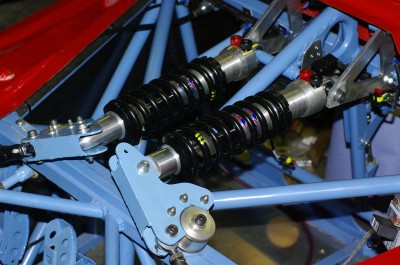
All of which were oil blacked in the normal way. The other thing I did at the front was to cut down and re drill the aluminium damper supporting triangles that appear on the top right of the picture. These are normally beautifully CNC made to simply bolt on the chassis, but because my chassis was built for different dampers, they needed to be rewelded, redrilled and cut down a bit… so now they aren’t quite so beautiful .. but they are functional.
You can also see the extended damper eyes to add damper travel without binding. What is less obvious is that new bell cranks were welded up and fitted to add clearance for the damper eyes.. The front suspension is now complete bar the ARB connections, but as with the rear I may need to make new pushrods when we come to setup the car next weekend
Which is great as I now have 8 days until the first outing and the car is not yet ready.


