Here we are at the first of October, and the Birkett is now just 26 days away. So here’s a bit more detail on the big push to get this car completed and tested in time.
Right I do have a fair bit of progress to report, and I’m starting to believe that this thing might eventually be finished.
On Friday, thanks to another day off work, I had a further 8 hours of activity to throw at the Sabre. My focus was to try and get the engine bay completed, so that I could close out the firewall panel which segregates the cockpit from the engine bay.
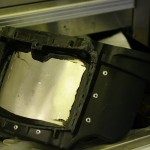
First up was the airbox. While I think I’ve found a way to incorporate the filter and intake I still needed to seal the normal input channel that feeds it in the bike installation. This I achieved with the aid of a bit of bent aluminium, and a bead of polyurethane sealant, after first hacking off the old intake channel.
Here’s a pic of the finished part, although for all of you old enough to have been hooked on Star Wars back 1977, after queueing all the way around the building to see it on the first day of release, I think it looks like a star fighter helmet with the blast shield down. I can almost hear Alec Guinness telling me to “Reach out with your feelings” when I’m fighting the hover droid in Jedi training.
With the airbox off, I also had access to the stick coils, and leads. The previous owner had hacked in an after market ignition controller which is illegal in RGB. So I first had to repair the coil control leads, and then change the plugs for shiny new ones. After which installed my power commander, and ran the earth lead down to the engine bay earth point. The last thing under the airbox, was to block off the pair valves on top of the engine. These bleed free air into the exhaust to help reduce emissions, and that will completely blow any lambda readings, so normal practice is either to remove them and tap holes in the head to plug with a bolt… or do as I did, which is to link them together with a blocked hose. Time is short… so I took the simple option… I’ll remove the head and tap it over the winter. During all this work, I also managed to resolve an intermittent misfire… which was clearly a wiring/loose connection problem.
As I won’t have time to get the engine mapped before the Birkett, I think I might have to ask Bob or Tony if I can borrow one of theirs for the best race of the season.
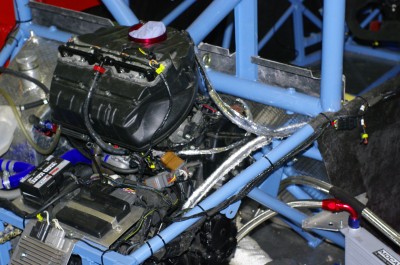 A little bit of heat shield on the crank and cam sensor cables, and the top end of the engine was ready for final fitting. On went the airbox, and the throttles, and at last I could attach the throttle cable. Again this was all nicely wrapped in NASA heat shielding. This of course allowed me to finalise the throttle cable routing all the way to the pedal. Once it was attached I couldn’t resist a few minutes sat in the car with the engine running, blipping the throttle and making her growl, just to revel in the fact that the engine is connected to my right foot
 ![]() . Here’s a picture of the completed engine bay… its always nice to see the heat shielding appearing, as its amongst the last things to go on so it always signals that we’re approaching the end of the build.
. Here’s a picture of the completed engine bay… its always nice to see the heat shielding appearing, as its amongst the last things to go on so it always signals that we’re approaching the end of the build.
So after a few minutes of grinning and practising going up and down the gearbox (remember the diff isn’t currently connected to the wheels as I have no drive shafts). I shut down the engine and cracked on with the rest of the engine bay wiring and tidying up. The last job before I could refit the firewall, was to add the exhaust wrap on the last collector of the exhaust. This is always a nasty nasty job as the fibres get in your skin, no matter how much protection you wear, anyway after 40 mins of continuous cursing the job was done, and the final two springs could befitted to the exhaust to complete the unit. With that and after a general clean up and wipe around the the engine bay. I could refit the firewall.
 Refitting the firewall, also prompted me to have a general clean up, and I’m pleased to report that the car is now looking very smart, once the 10000 rivet mandrels, cut off cable ties, and bits of wiring have been cleaned out.
The last thing I managed to finish off was all the connectors on the dash, and give it a preliminary trim. I’m just waiting to get the rest of the bodywork fitted to settle its final position, before I can take off the last 1/2 inch or so. Included in these connections, are the external kill switch and fire extinguisher trigger… which have now been tested and passed ok. Behind the dash, the DL1 Logger mount and cables have also all been finalised.
Hmm, when written down it doesn’t look like much. but in in the flesh the car is looking a whole lot more finished. Although, that’s not the final position of the extinguisher bottle, you can just see where it will end up; in the little blue tray behind the diagonal chassis member at the bottom of the passenger foot well. The extinguisher has just returned from its service, but in the meantime I have run the feed pipes to the nozzles, and the installed the wiring. So once I install the bottle that is another system finished.
Incidentally in this pic you can see that both the passenger and drivers footwell are nicely clear of gubbins, and so should allow me to passenger my son and daughter around the odd lap. ![]()
Talking of finishing stuff, all of the brakes are now connected, and the system has been filed with fluid and had its first bleeding session. I’m pleased to report no leaks. It usually takes a couple of bleeding sessions to get all the micro bubbles out of the system…. Of course now that the brake pedal is properly hard It’s immediately apparent I need to move the throttle slightly if I am to heel-toe it correctly when changing gear… but that can go quite a long way down the to-do list. I also checked the brake light switch for correct operation… again it passed the test.
I also spent a fair bit of time aligning and checking the steering, fitting all the bolts and finalising every part of the steering system from the wheel to toe links. Only two things remain, I need to set the toe angles, and shim the outboard ends to prevent bump steer. Both of which are part of the final geometry setup.
While working around the steering, I also stripped, checked and tightened the front suspension wishbones and hubs… So that is all done too. I’ll do the back once I get the drive shafts.
So I have three working pedals, a complete steering system, a complete engine installation, completed wiring system, completed exhaust, completed front hubs, completed brakes…. this thing is nearly drivable :-).
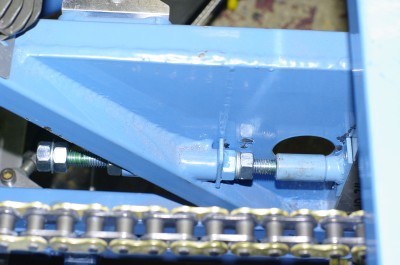
The last part of the drive train that I can actually complete, pending the arrival of the drive shafts is to fit the chain tensioners. You can one here. Along with the finished, and properly mounted chain.
It looks a bit complex, but from right to left. the components are; fixed pusher plate on the diff bearing carrier, then the cylindrical pusher which engages in the push plate. Then a lock nut and Nordlock washer. Then a captive nut that acts on the shaft and bears against the chassis tube to apply the tension pressure. Then, on the other side of the chassis, a second lock nut, and finally a pair of nuts locked together, pinching a washer between them. The two nuts providing drive to the M12 threaded rod that drives through the chassis tube using the thread in the captive nut, and the washer gives you somewhere to land your spanner on… which makes life a lot easier. The operation is to simply to undo the two lock nuts either side of the tube and then twiddle the far left ones using a ratchet spanner, which drives the threaded section to the right and thus applies tension to the diff carrier. Its a lot easier to use than it is to describe.
So the main things left on the two do list (apart from small stuff like towing eyes and roll cage padding) are finalise suspension build and setup, fit drive shafts, fit bodywork and lights.
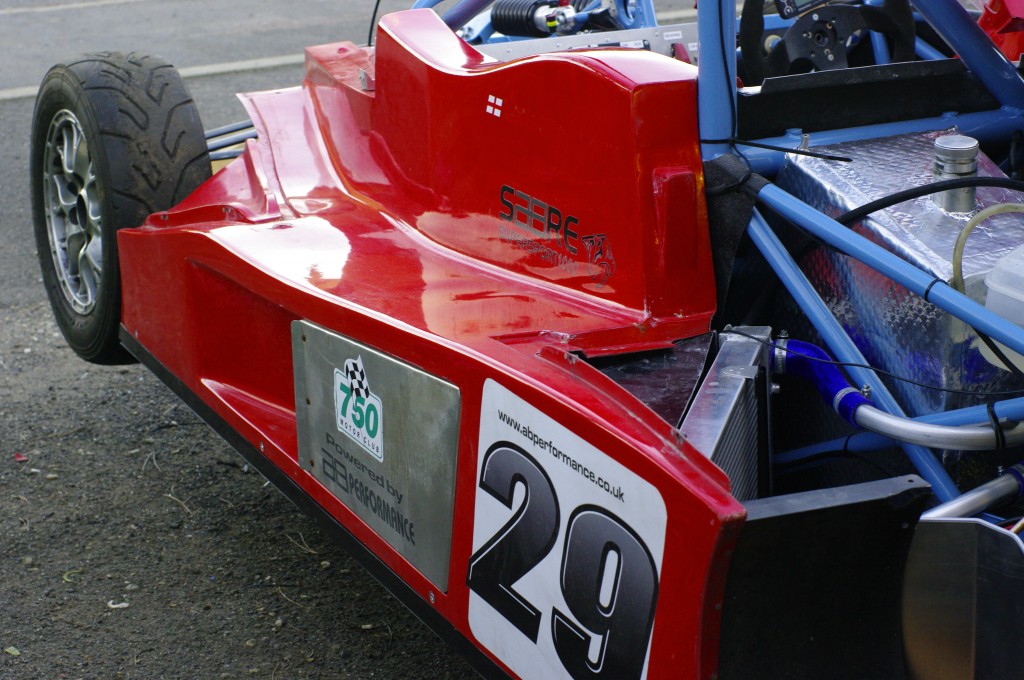
Now talking of bodywork. Duncan spent most of Saturday, fitting and fettling the left hand side pod.
As always he’s much better at that sort of stuff than me. I think the photo speaks for itself on the accuracy and neatness of the fit. Just behind the number you can see the coolant radiator and shroud. Again finalised and fitted by Duncan. As always, having worked out how to to do the first one… the second one will as always go much quicker.
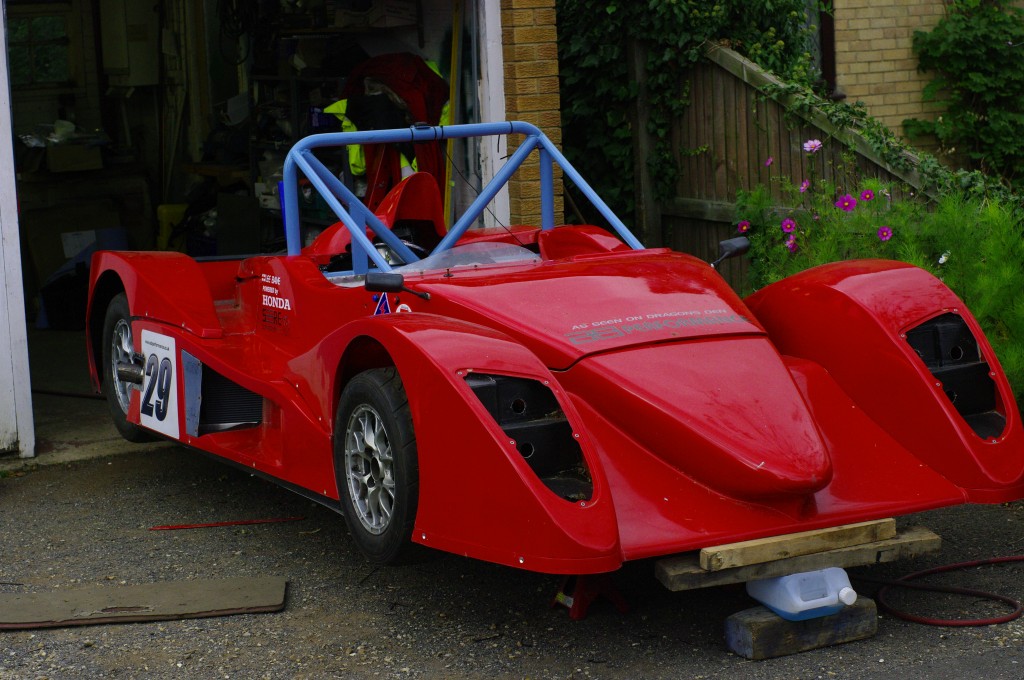
Talking of the second one, I am just waiting on the mounting plinth, otherwise I think we’d have had both sides done. but as we were playing with bodywork of course we had to dress the complete car…. just for the enthusiasm boost.
This was far from an empty exercise though, as it illustrated that the filter arrangement fouls the engine cover badly, so I will have to do something else for the Birkett (I’ve simply removed the filter for the picture)… perhaps just a shaped mesh with a large sock filter. It also proved that the car is pretty square and does fit the bodywork without too many concerns.
Of more concern is that fact that the fully dressed car is just 100mm (4″) shorter than my garage…. so I think I’m going to have to make the front bodywork and supporting bracketing and floor easily removable, if I’m going to be able to walk around the car.
Still with 3 weekends to go before Birkett and testing week…. we’re looking pretty good.

Loving the last photo, in particular the novel support to keep the nose up (was it closer to hand than more wood?)