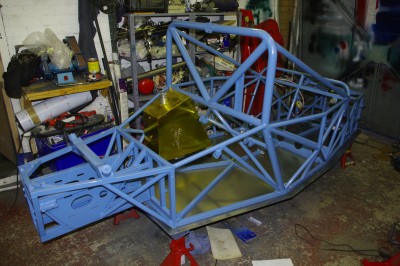
 Duncan and I picked up the Sabre from the powder coating folks as Fentec this morning. She looks resplendent in her new RAL 5024 blue and I have to say I’m really pleased with the colour. Its towards the greyish end of light blue, a lot like RAF blue. So once we got her home… and again it was in the rain, we gave her a good wipedown and set about fitting the floor.
Of course as you wipe her down you notice the imperfections, the odd bit of weld spatter or pin hole that you never managed to spot, or the odd inclusion in the powder coat.. Which makes you grind your teeth a bit…. but hey, the finish is generally very good, considering the rusty state she was when she went off and as Duncan always says “It’s a race car”.
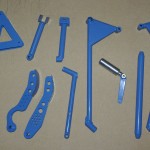
 The powder coating guys also did a varied collection of bits, including 4 engine mounts, a chassis member, the reverse mount and two pedals. I elected not to send the brake pedal as I didn’t fancy cleaning the powder coat off the main bearing tube…. Of course it only occurred to me afterwards that what I should have done, was cap the ends of the tube and get it coated anyway. Still that can happen later as I’m sure I’ll have one or two bits more to be coated in the future. .
So with the garage swept clean of the worst of the crap from the “dirty, gritty, weldy” half of the build we inverted the chassis and drilled the 300 odd holes for the rivets. Tim had lent me some cleco’s which came into good effect to keep it all aligned, and we then removed the floor and set about deburring all the holes. Andy recommended that I epoxy the floor panel on, and I had previously acquired some 3M 9323 B/A structural epoxy. Quite the most expensive glue I’ve ever bought at <cough> 90 +quid per litre… but you’ve got to love a glue called “Scotch weld”. So we abraded the mating surfaces and slapped some on in fact you san see it near the floor in the picture below…. its the pink line between the chassis member and floor. Then we set about the 300 rivets with an air riveter. A couple of hours later and after some acetone fueled cleanup we had the basis of a race car . The chassis was coated and panelled, mounted on trestles and we are good to start bolting stuff permanently on. I’ts time to properly start this build ![]()
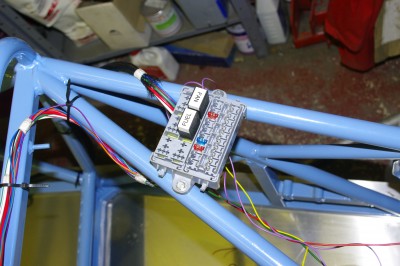
 So it was time to start permanently bolting on all the stuff that had formed part of the previous build activities and first up was the fuse box. This is partially populated with the main power loom and busbars. and I now needed to fit it in place, so that I can run the rest of the circuits. So two M5 rivnets, and a slap of the left over adhesive to help them grip, meant that it was mounted nicely on the upper chassis rails. Andy assures me that on the the Sabre this area stays bone dry, and come to think of it one of the the things I hadn’t noticed, or at least had noticed but not registerd is that when ever I see the Sabres… even just after racing, they appear not to be full of tyre debris like my old Genesis was…. this has got to be a good sign that the wheel wells are isolated from the cockpit …. and I might even keep my feet dry. Either way I wanted the fuse box at this location, because its easily accessible and viewable here, and also because I’m trying to keep the passenger space free of as many trailing wires and cables as possible. I want it to be very neat in this respect as I expect to be giving joy rides to my Son and Daughter and thier friends at some stage, and of course Duncan is owed a few turns around the track for all his help over the years.
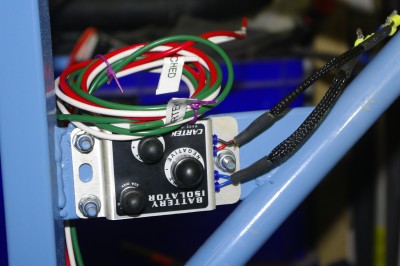
The fuse box of course needs a power supply, and at the other end is the main electrical Isolator. This needs to be mounted on three clean studs, as it forms and switches the main chassis earth, and this was mounted up in the engine bay, close to the battery position. Tomorrow I expect to get the battery tray, battery and main fuses mounted.


If Duncan keeps insulting your gear changing ability on the RGB site you might think twice about his passenger rides….Car is looking good, bet you can’t wait to bolt it all together and get out there again.
Hi Nick… yes we’ve been having a bit of a domestic in public on the forum haven’t we
Yep I’m hugely looking forward to the build accelerating a bit now…. in fact I started on the wiring yesterday.
A.
Looking very smart, hope it starts coming together now.
Mine seems a looong way off this stage at the moment…