Preparation for Cadwell

I’m unable to do the full RGB double header race at Cadwell in July as I need to be at home on the Sunday, so instead I opted to do the All comers races on the Saturday.  Allcomers are usually a bit of a hoot, plus it will get me in the paddock with the rest of my RGB buddies, and I get to go to the RGB BBQ that we run for the Marshalls as a thank you for all their unpaid volunteer work.   We club drivers know  that be couldn’t do what we do with the boys in Orange  (or indeed the Clarks and Scruntineers too).
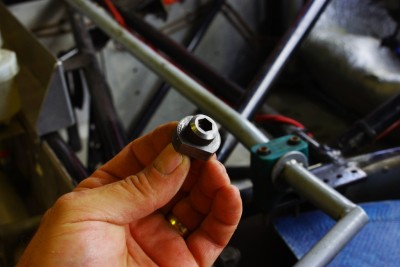
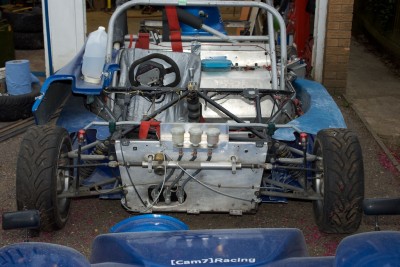
I had a couple of jobs to do in preparation for the meeting.  The first involved upgrading the brake callipers to Wilwood Powerlights, the Wilwoods are dimensionally similar to my existing Hi Spec’s and I’d had a pair floating around the garage for a while awaiting fitment so I finally found time to fit them up.

Tim suggested that the Polymatrix E compound is pretty good and what is more the pads are cheap  (by race pad standards), so I went ahead and fitted them all up.
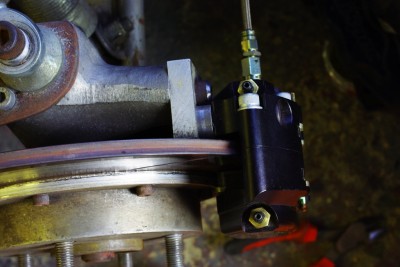
As it turned out they fitted pretty easily and all I needed to do was spin up some D shaped spacers, and which is more the pads just slotted in.  I didn’t need to machine them, groove them, or grind them in anyway.  They just fitted!…. which believe me is very welcome and not what I’mused too.   Once they were nicely bled,  I’m sure the pedal felt firmer too.    but that’s probably wishful upgrade based thinking.
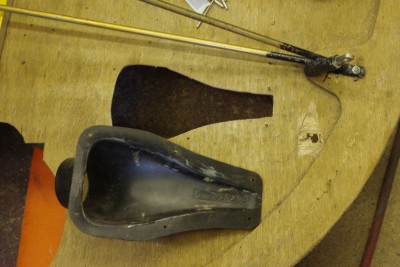
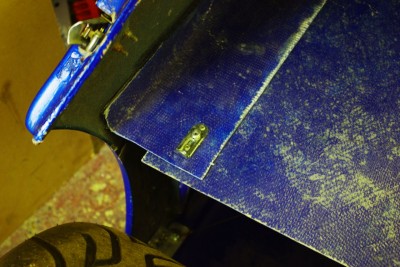
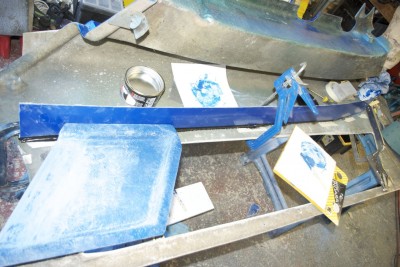
The second thing to do with the brakes was to fit some cooling ducts,  I’m pretty heavy on my brakes and with an enclosed wheel car, I frequently lose pedal firmness as the fluid heat builds up and it boild boilds.  So as a first step I thought I’d fit some ducting.   I have  couple of commercial “Naca” ducts, which are made out of moulded ABS.  Like 99% of the commercially made ones they are the wrong shape, and do not actually follow the correct Naca profile and so are inefficient compared to the real thing.  But time is short, and I don’t  have the time to make new ones.  If I ever get around to moulding a  new composite front floor I’ll do them properly.  but for now I just cut some matching holes in the front floor and fitted some ducting to fire the air  collected from the floor at the callipers.
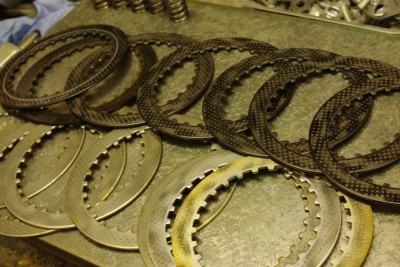
The last thing that needed to be done was to change the clutch, as I was getting slip according to my Brands data.

So I removed the clutch cover and set about extracting the clutch steels and frictions.

While the clutch friction plates were within the wear tolerances, the steel plates had plainly been badly over heated.   the Haynes manual says look for dark marks and blue indication localised hotpsots,  my plates were black everywhere! As you can see in this old vs new picture.

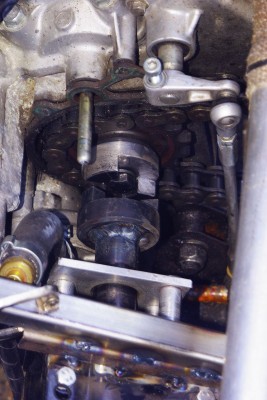
While changing these I noticed that the clutch centre basket needed replacing , as it was very badly notched, as I had a spare from the engine I blew last year I thought I’d change that too.   Its done up to 127NM so I had to use an impact wrench to undo it.  I swapped it out , and then used the impact to tighten the nut and then torqued it up manually.  The clustch basked and central spinner where then locked solid.  hmmm that’s wrong,  so undidit and examined it all, it looked fine so I reassembled it.

Hmm same problem..  so I disassembled it, and then actually removed the complete clutch basket, this revealed the oil pump drive, with its 6 drive  pins that are driven from holes in the back of the clutch basket.

Yes you guessed it,  using the impact wrench had dragged the basket forward slightly with the vibration such that the drive pins and holes where misaligned.  Worse than this three of the pins had broken off and dropped in the sump, good job I had a replacement for that too!

:-(   Fishing around in the sump, allowed me to find two of them, but eventually I had to give in, jack it up, drop the oil, and spend a “pleasurable” few hours grovelling around on the floor, removing, flushing and refitting the sump pan, a job that was not helped as the chassis rail obscured 4 of the sump pan mounting bolts.

But eventually  we got it all back to gether and a job that should have taken an hour took 6, but I did find the missing bit.

Lastly in my quest to see if the car is under powered I whipped of the airbox, throttle trumpets and cam cover to check the valve clearances, as they can pull tight and cost you power.  In this particular area all was fine.

Having dropped the old oil new oil was necessary so I changed the filter and completed the full oil change.

So off we go for a laugh at Cadwell, and fingers crossed I found all the bits.

Posted in Build or Repair, Cadwell, Pre Race Preparation | Tagged , , | Leave a comment

Cool Runnings!…. at Brands Hatch

Forgive the blatant mis quote of the  Jamaican Bobsleigh Team, but I’m very happy to report that all those hours since last November  slaving away over a hot pot of polyester resin to make new air ducting body work, have not been in vain.  At Brands Hot she kept cool  very cool… cooler than a Bob Marley fan in Calgary!

My Data logs show that the coolant temperature never  moved from the range 72-83 deg, this was over the course of 2 races and 1 practice at Brands Hatch which because of its bowl type nature is the hottest track we go to. Ambient temps were 25+ degrees c so this was a pretty stern test of the cooling circuit.

So, I’m pretty chuffed with that.  Also remember that the coolant temps are measured as the coolant is exiting the head before it reaches any radiators, so it much be entering the head at around 60 deg c.  This leads me to ponder if I have now got too much cooling in the car, and could possibly lose one of the radiators, and save the weight of both it and the fluids.   I think I’ll knock up an alternate cooling circuit that circumvents rad 2.  then when we’re next on a test day we can can quickly swap the configuration (leaving the rad in place) and decide if that extra weight is really necessary.Also I might re add the thermostat and bypass hose for those less hot days when she’ll be difficult to warm up.

Oil temp continues to be a bit of a puzzle.  Its is much more under control… last year I couldn’t complete the races because the oil rapidly grew to 150-160 deg C.  At Brands over the course of the race it grew to about 120-130 deg C, which is eminently better and completely tolerable, but still vastly different to the water, which after all is passing through the hottest part of the engine.   There is something else going on here I think.    The temp sensor for the oil is  tapped into the steel sump plug, which is very close indeed to the exhausts.  This part of the engine bay gets very very hot, and I have for example melted thermoplastic components in this area, so I wonder if the steel sump plug and castings are heat soaking the exhaust heat into the sensor, and giving a false reading.

SO I think I’ll pop some heat shielding on the sensor, and consider measuring the rest of the oil circuit at points such as the entry and exit of the cooler, the remote oil filter and so on.  Either way  it is no longer terminally hot so it will fall some way down my priority lists.  Infact it meant that I could concentrate on racing rather than temperatures!

We had only one failure over the weekend,  the front right brake calliper decided to blow a seal just as we were rolling the car off the trailer.  It had been fine at home the day before when we bled the brakes, but just holding the car on the brakes on the trailer saw the pedal go soft and brake fluid leak (pee) out.

Arrgh! This is the second time the callipers have done that to me, fortunately I carry spares and it is only a half hour job to fix and re bleed the brakes…. but if it had happened on the startline or at scrutineering that would be bad.  The fault is with a little O ring which is easy to replace, but I guess it “ages” and hardens and flattens out and then fails at unpredictable times.  I guess I should “life” the O rings and rebuild the callipers more frequently to prevent this problem.  More likely I’ll just replace the callipers with some Wilwood Powerlight callipers, which I’ve had floating around the garage for a while.

So onto the racing.

In practice I managed a 54.0 which is none to shabby , but in no way sparkling, considering its 8 months since I last drove the car, and I hadn’t had a chance to test,  but as usual RGB is monstrously competitive and it was only good enough for 16th  on the Grid( of 23) and 7th of the 10 man class B lineup.  The front of RGB class B  is now in the low 52s/High 51s.  Still it was a reasonable start.

Race 1 was interesting.  We were waiting on the grid, with the light showers that had been falling all day occasionally showing up, and it was a little drizzly when we got underway.  The track was a patchwork of varying grip levels, Paddock had just been rained on and  was  proper slippy, and front row man Paul Rogers in the black contour, did a full spin to the inside, and somehow we all missed him.  the rest of the corners were fine, but the entry to clearways was again slippy.  I had made a place or two on the start, and spent 11 laps trying to get on terms with Austin in front but he was gapping me by about a 1/2 a second a lap. eventually I fell into the clutches of Phil Alcock behind and he passed me on Lap 11 I think.   I had several attempts at passing Phil in his Class C car, but couldn’t quite get far enough alongside to ensure that he wouldn’t turn in on me at the apexes in his usual robust defensive style. And  then my brake pedal went soft and long as the fluid boiled in the callipers, such that I was lifting off early and “pumping” it up at all the corners.  As a result I lost another couple of places and ended up 17th. Best time was 54.32.    But it was very nice to be back, and even nicer to see the temps under control.  The weekend was being filmed by Motors TV so perhaps my Battle with Phil will get some coverage.  Here’s a shot (taken by Derek’s Dad) of me and the recovering Paul R entering Paddock.

Race 2 on the Sunday, was a similar affair.  and I was generally pretty tentative and my lack  of seat time is shown everywhere, by poor lines, and hitting the limiter etc.  I started OK, and this time the front runners all made it round Paddock pretty easily, but the same is not true of the exit Druids. Tim got pushed off the track by Matt Green in a fairly blantent move, and this left him spinning and recovering.  I arrived closely following Bob Mortimer, Bob Junked right to reveal a rejoining Tim, and I had very little time to do much..  We nearly had Blue on Blue contact, but somehow I avoided him.   Its at about 30 seconds in in this video.

After that I just seemed to be going backwards, I lost a couple of places, and got overtaken by James Walker and Neil, again I tried to keep with Neil and was way quicker through Paddock and the twisty side of the circuit but he opened several car lengths on me along the straight.  There followed about 5 laps of me continually pressuring Neil on the twisty part of the circuit, nearly having enough to get him at the turn in to Clearways only to be out dragged down the straight.

Eventually I ran wide at Druids and  that dropped me into the hands of Paul Rickers who eventually passed me a couple of laps later.    Again I was just outdragged by him for the remainder of the race, and he eventually caught Neil too and beat him on the line by  a 100th of a second. Great stuff from a racing perspective  but frustrating

Ohh and the brakes went away again so I had to continually pump up the pedal before each corner.

So my crap driving aside I was most concerned by my lack of straight line speed.  Both me and the car are Lardy and combined we’re at least 50 KG heavier than Neil in his nice new BDN.  I wonder if  I’ve finally reached the end of the development road with this heavy old chassis because weight simply hurts you everywhere.

Later examination of the data  (Neil and I are happy to share) showed a couple of points.

Even when I have a higher apex speed, and  am on the throttle harder and at WOT way earlier than Neil  He arrives at the next corner going quicker.  At Paddock he had a 5mph advantage over me (120 vs 115).   That can only be a power/weight/drag issue. :-( , and the friends I showed it too suggested my engine is down on power.

Also the data showed small rpm spike after each gear change which is clutch slip, and my speed plateaued for about half a second after each change.  That’s not helping!

So all in all a mixed weekend.

Temps under control – check!

Drove like a numpty – check!

Before the next meeting I need to check the valve clearances, ( as this can cost you power) change callipers and brake fluid, fit brake cooling ducts, change the clutch and …. have a long hard think.

Posted in Brands Hatch, Racing | Tagged , , , | Leave a comment

Finally Getting ready for Brands

Well, in the last three weeks we’ve achieved a fair bit of small but critical works, in the run up to the cars first outing at Brands next weekend.

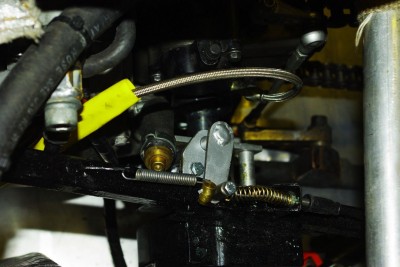
First up I created, an actuation mechanism for the reverse system, so that I could operate it by a simple tension cable, and solenoid.   I’m fairly sure that leaping out of the car, unclipping the bodywork and actuating the thing using  a screwdriver would probably fail scrutineering. So a day spent with a Tig welder, and some lumps of steel resulted in this beastie.

It is basically a bell crank with two actuating arms that run in a slot on the collar of the reverse.  It  is cable actuated and double spring loaded into the safe position.  Of course this then required routing of the cable , and building of a new actuation arm in the cockpit…. all of which wiled  away a few hours. And I also had to re route the clutch hydraulic line in the process.

With the reverse now operating correctly, it became apparent that it is of course in the way of the clutch cover, and so would need to be fairly frequently removed to change sprockets. so I’ve made mounting and demounting a simple two bolt affair, and the electrics all run through a nice high current two pole connector.  I have to say I was quite pleased.  the thing will drive the car up the slope on my drive and over the 50mm block simultaneously.   And I got quite carried away  with it, as it actually seems to make manoeuvring the beast on my own, quite a pleasant process, and pretty reliable to boot.

I obviously got over confident, and somehow tried to move the car using the reverse with it still in gear.  The reverse wound up, the dogs engaged, but the car didn’t move.  The reverse drive continued to rotate and it promptly stretched & sheared the connecting bolt in the end of the output sprocket.  ARSE!…. ARSE,  bloody hell!  That’s the output shaft of the gearbox b**gred…. now I need to change the entire gearbox casette… Arse.

Duncan runs home for his screw extractors and I attack the stub of the bolt with a centre drill, whereupon it spins,  I realise then of course, that the dog itself acts as a locknut, and because I haven’t thread locked it, the broken stub just spins straight out.  Phew!….. and on reflection quite a nice safe failure mode, in case I’m so stupid again.

Duncan cracks on with preparing the side ducts, by gluing in place the duct roofs, which link the side pods to the car, and I fit the  3 slide locks to both the left and right hand sides, to finish the mounting process. With these fitted up the completely remodelled side pods are now complete, and I have to say the new arrangement is fantastically rigid.  Far better than my expectations.

So we now focus on the 50 or so little snag and check jobs needed to get the beastie ready for Brands.

These include .

  • Painting the scratches and scrapes on the roll cage.
  • Bolt checking the  complete car
  • Making new radiator cowls for the rad exits to stop tyre debris damaging the rads,
  • Bleeding the brakes,
  • Cleaning the inside and outside (as best as I can with skanky  old ali),
  • Getting extinguisher serviced and refitted (the last service had now expired)
  • Refitting rear floor
  • Securing exhaust
  • cable tying, lock wiring, and chafe protecting everything in sight!
  • Fit 15 point sprocket for Brands & tension chain.
  • Finding, charging and refitting palms, video recorers and Dl1s
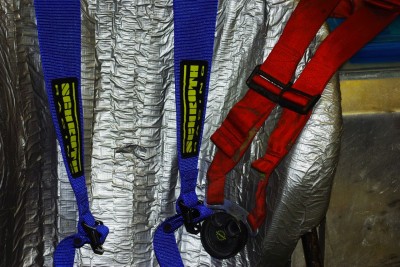
  • Fitting nice new Shcroth racing harnesses as my old ones had expired,
  • In addition i’ve taxed the Winnebago, and taken it for a drive, and checked that all is well with the trailer too.
  • Put new numbers on and Class B stickers.
  • etc etc

Interestingly Schroth now advocate using only 2″ lapstraps, as they fit better around the pelvis, and therefore most people can get them tighter, and tighter = safer.  Anyway the new ones are blue, which goes better with the blue/silver colour scheme of the car, than the old red ones. Judging by their colour, they  are showing all of their 5 years of hard service.

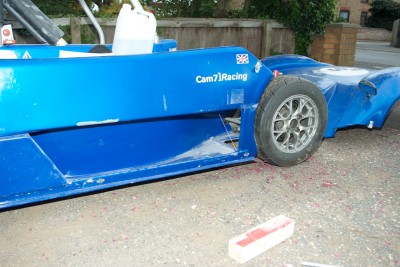
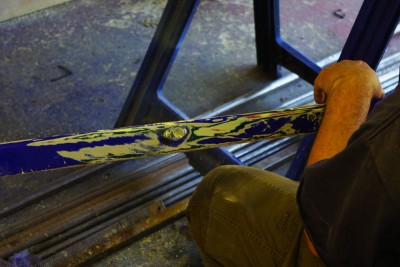
With that all done, and it now probable (barring mishaps) that we’ll make it to Brands, we might as well try and get the beastie to look as good as possible.   Last year at the Birket I got punted off by a Porche who left some nasty wheel rubs along the right hand side of the car, plus the new edges of the air way slots are a bit ragged so could do with some tidying.  So Dunc and I set about these, with a view to repainting the right hand side pod.  And  on a warm balmy evening I started chucking Subaru blue paint around again

So we went from this, in which you can read the life of this car like a stratified geological survey.

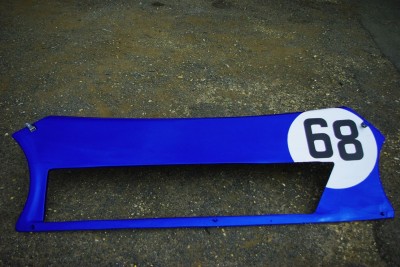
To this, as usual the paint has reacted oddly with something in one of the sub coats.

There is definitely something incompatible in one of the lower layers,   but its not too bad from a distance, and nothing that a judiciously placed sticker can’t fix.

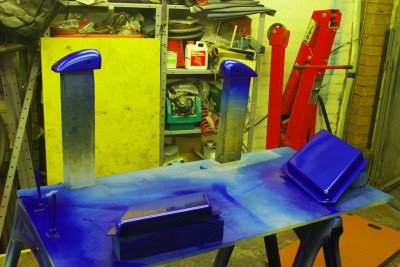
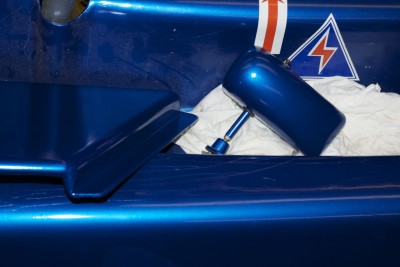
On Sunday I decided to paint the side quarter lozenges, that fit in the airducts, and even the wing mirrors, again the surface is hardly a mirror, but it’ll do.   Long term I may also paint the insides of the side ducts, but that is a much bigger job, so will have to wait.

So all that’s left is to refit the front floor, glue the newly painted bits in place, refit the wing mirrors  and clean+polish the rest of the car so that it is nearly as shiny as the new paint.  Oh and work out why the indicators aren’t working…. Something that we discovered last thing when doing a lights check.

Still  Brands is only 4 days away , and we’re pretty much ready.  I just now need to remember the routine of going racing ;-)

Ah yes.  Turn up, qualify poorly, get lapped by Tim….. now I remember.

Anyway a picture of the newly painted components is below.

Posted in paint, Reverse, Winter 2009 Rebuild | Tagged , , | Leave a comment

Blimey. Never done that before!

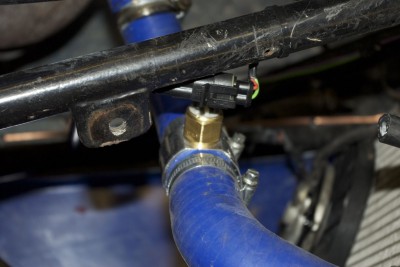
Ok there’s been a fair bit of progress since the last post, following the succesful test of the cooling system last time round I decided that I probably no longer need a manual fan override, and that I  should just probably rely on a thermostatic switch to kick the fans in and out at say 80-90 degrees and/or let the ECU  control just do its thing. So I ordered a a thermostatic fan switch and hose mounting adapter for fitting it into the top hose.  This is because my radiators don’t have a suitable mounting point for one.

So last Saturday I fitted it all up, and tested the system.  Despite the fan switch being rated as on 90 deg c and off at 80 deg c.  It actually kicked on the fans at 99 and turned them off at 92.   Sorry not good enough.  I need the beast to maintain 80 degrees on the hottest day on the grid.  starting the fans at nearly boil over is no good to anyone.

So I then had to pore over the Intermotor catalog until I found a fan switch with flying leads, a lower temp rating and the correct M16 thread.  eventually I found that Part No 50420 fitted the bill nicely. being rated as on at 85 off at 80.  THis was duly fitted up and tested, and on this particular switch the tolerance is a bit low, on at 83, and off at 78.

That’s no bad thing and now the car will sit on the drive, all day regulating itself nicely in that temperature range.  Phew…. hopefully we’ve finally kicked these cooling problems into touch.

So onwards onto this weekend.   There are few major things left, but the sidepods need finishing off, and I finally need to build a working reverse to meet the MSA regulations.  So Dunc did the bodywork and I did the reverse.

About a year ago in a MAchine Mart Sale I bought a small 500KG winch unit.  Last year I tried to make the reverse by welding a sprocket onto the end of it and then trying to engage that into the chain.  It wasn’t entirely successful, it would move the car if I could keep it engaged in the chain, but generally all it did was bounce around, disengage and chatter against the main chain rollers.  Not good.

This year I had the idea of making a dog drive unit that mounted directly onto the drive sprocket.  Its not unlike Tim‘s as it is basically threaded onto the the bolt, which is then bolted into the output shaft.  I owe a debt of thanks to Steve Wiseman (erstwhile RGB racer) who also happens to have a milling machine. So I span up some blanks on my lathe, and then decamped to Steve’s house to use his milling machine to cut the drive dogs. after a couple of hours of  hand wheel spinning, I’d completed a set of dogs. You can see  one of them mounted on the drive sprocket, and one welded to the driveshaft on the winch.  (The fact that the one on the drive shaft is blued, gives you some idea of the heat I had to get into the parts when welding these large lumps of steel)   This driveshaft is actually a 17mm socket, and slides on some suitable hex bar to produce a sliding clutch.  The hex bar itself is welded onto the output shaft of the winch. The sliding socket has a coller for the actuation mechanism (Which you cant quite see in this picture.

Of course to get this to work the dogs and winch motor  have to be axially aligned, and this of course meant that I had to mount the winch in free space, by bolting it to thin air.  So there then followed a day of head scratching while we worked out how to build the mounting hardware.    But at about 5pm, after much cutting and welding, we were ready to test it.  So we jacked up the car manually engaged the dogs and turned on the motor. Well actually we just shorted it to the battery.

Brumm the wheels go around …  BACKWARDS!      sweeeeet.

Ok lets try it on the ground.   Try again.. and yes she moves backwards nicely.

Ok the regs say  that it must be able to climb one wheel over a 40mm sqr block. so we tried it first with a 1″ square  section of chassis tube under both wheels.  spark it off the battery and over she goes.   No Trouble. :-)

Now the big test. I didn’t have a 40mm block, but I did have a 50mm block. lets try that. spark of the battery. bump… up and over she goes.  Bloody Hell I’ve built an electric off roader!  The only problem we found was that once I killed the juice the car has so much momentum, it carried on moving and because the dogs are radially  cut, the opposite side now engage with the stationary winch and this has the effect of undoing the drive dog on the out put shaft.  Hopefully once the sliding clutch is spring loaded, the dog will disengage automatically once the load is withdrawn, plus I might chamfer the back side of the dogs so that they get pushed apart by the motion.  Even so I’ve never had a working reverse before. I’ll also apply liberal quantities of thread lock to stop it unwinding due to over run loads in normal use.  :-).

Duncan spent the whole day working on bodywork,  firstly he cut, measured and glued in place with some tigerseal the right hand side pod channel roof.  This actually sits on the right side pode, and will be held in place  on the side channel itself with some nice little slide latches,  (Once I find them)

YOu can see that there is a gentle curve on the side pod channel, as it needs to slop upwards to accommodate the full height of the radiator.

You can also see in this picture the right hand air scoop.  While waiting for the tiger seal to go off, Dunc spent a fair bit of time adding filler to the edge of both the left and right hand units.  The idea was to build up the edge so that these units have a proper “aero” profile to allow them to work better than just a sharp cut GRP edge would allow. As usual anything that required touch, feel, patience and care Dunc is better at.  And anything that need cutting and welding I’m usually first in line for.  I do like my new tig welder.  Although I am not yet as good as I would like.

Last Job of the day was to fully weld up the previously tacked winch mounts, but lest finish this post with a picture of the baby’s bum smooth aero edge that Duncan took such care to create. Aplogies to my photo Friends for thw lack of depth of field.

Posted in Winter 2009 Rebuild | Tagged , , , | Leave a comment

Back to The Track at Last!

I’ve got a fuller progress report to post later this week, but I thought you’d all like to know I’ve entered the Brands Hatch RGB races on the 19th/20th June.

It’ll be great to be back at the track.   See you all then :-)

Posted in Brands Hatch, Racing | Leave a comment

WhoHoo! She Rolls and Runs :-)

I’ve made great progress today.

First up was the lefthand, side pod duct.  this was still only roughly trimmed to remove the rough edges from the moulding process, so it needed trimming to fit around the radiators at the back, and the suspension mounts at the front.  this takes ages to do, as you want to get it right without massive gaps.  So measure twice, cut once, fit up, re-mark, remove from car, re-trim, measure and fit up again, until happy.  Repeat for two – three hours <yawn>  but we got there in then end.  The moulding is now ready for bonding in place  to the floor, but lack of suitable adhesive meant that this had too wait.

With that done, I’ve got 99% of all the work done that she needs to be on axle stands for, so I decided to put the wheels on, drop her off the stands, and roll her outside.  Not least because I wanted to start her up.  my enthusiasm is in needs of a boost and hearing her run again would be just what the doctor ordered.  The Dr in question being Bob Mortimer a mate and fellow RGB racer who’s been poking me gently on Facebook to get the thing finished :-) .

So I dropped her off the stands and rolled her outside so I didn’t fill the house with fumes via the garage.  Here you can see the mostly complete right hand side, with the new ducting in place, the blue gelcoat of the duct doesn’t fight too much with the body paint, which is a good job as I doubt she’ll get painted before her first outing.

New fuel, prime the pumps and first push of the button she fired. Brmmmmm   Niiiice :-)

Oil pressure is good, and both the cooling and oil circuits are leak free.  The ECU kept the idle high until water temp got above 55 degrees, then she settled to a nice even idle. The temperature  then climbed really, really slowly to about 80 degrees, even me holding her at 3000 rpm once the oil had warmed up a bit only provoked it to climb slightly more quickly.    Ok its a breezy day, the covers were off and the thermostat bypass is disconnected, and the fans weren’t running, so a slow temperature climb is to be expected.

It also indicates tht the swirl pot is self bleeding the system just like Darcy said it would, last year I used to have to jack the car up, raise the coolant tank and play all sorts of games to bleed the system, and even then the temperature would spike very quickly as the airpockets in the head boiled and the then it would suddenly boiled over. It could take up to 3 cycles of that before she settled down.  Not this time!  All that happened was that the level in the tank dropped by about an inch.  So I topped it up… simples!

I turned on the fans and she dropped 3 degrees a minute back to 75.  At this stage I now wanted to pressure test the system, so I turned the fans off again and let her creep up again to 101. All fine, fans on and then back to 75.  So that is hopefully that :-) .

Well not quite she still needs some water wetter, and I think I’ll refit the thermostat and bypass hose, along with a thermostatic fan switch.  If I can keep the coolant locked in the range 80-85 degrees then that is reputed to be worth a few horsepower, plus its one less thing to think about.

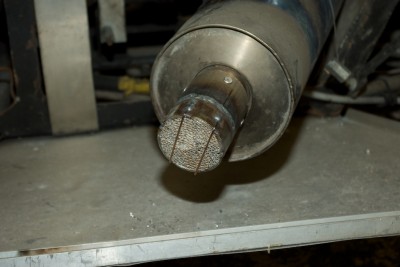
With that I cracked on with another important job, fitting the cat that is rather stupidly mandated by the MSA (Even after two years of proving they fail the MSA wont even answer our concerns) but we have to comply.  RGB experience is that the cats die quick and dirty if placed before the silencer, so now we all put a slice of them at the tail pipe exit.   It does no good at all, but meets the regs.  What this is doing  health wise to us drivers and the marshalls I don’t like to think. but it seems the only way to make the things stay together.  So mine is fitted to the tail pipe.

After that I gave her and the garage  a quick tidy and made a long list of stuff that still needs doing before the next outing at Brands in June.

All in all a good day, Oh, I forgot to say, you know the diamond panels in the side, which will hopefully act as air scoops (you can see them in the first pic above), well these need an aerodynamic leading edge if  they are to work most efficiently. so this is currently being built up with some coloured filler, ready for shaping.

Posted in Winter 2009 Rebuild | Tagged , , , | Leave a comment

Close to running her up now.

Ooh, getting close to starting her now.

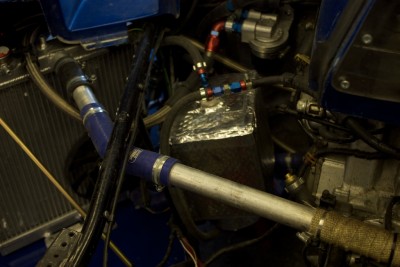
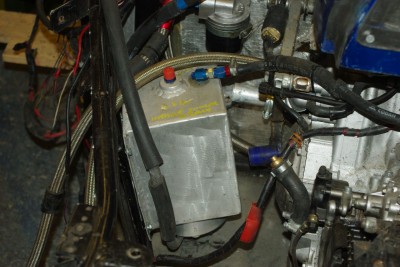
Much progress was made last week,  the oil cooler has now been positioned next to the left hand radiator, and the oil lines appropriately rerouted, thus completing the oil circuit.  This, only occurred after my customary clumsiness had seen me knock over container holding  ¾ litre of engine oil which I had just collected while removing the cooler in the first place.  Even when I try to be tidy I seem to conspire against myself <Sigh>

The fuel lines were rerouted and new unions allowed completion of the fuel circuit.   Jack, my nephew was staying over, and offered to help out  in the garage despite his self professed total lack of mechanical knowledge.  To his credit, he listens well, learns quickly, has good mechanical hands and does a good job.  He’ll be welcome in my Garage or Pit anytime.   Amongst other things,  Jack wrapped the supplementary fuel tank in heat shielding material to help protect it from the harsh environment of the engine bay. It looks all very NASA now.  We also cut open and inspected the old fuel filter and I’m pleased to say that it was found to pretty much pristine, with no visible grit or debris present at all.  All very promising.

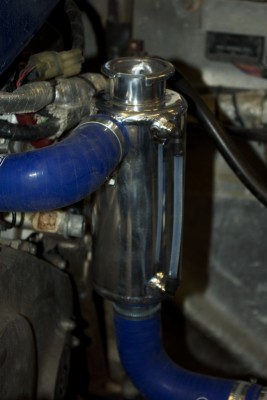
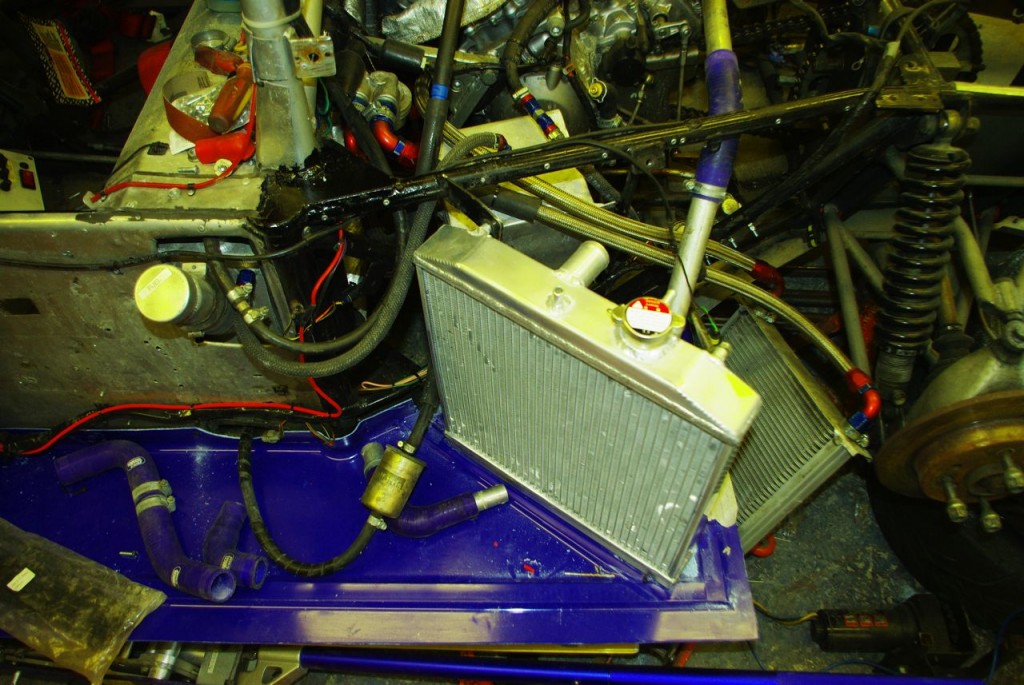
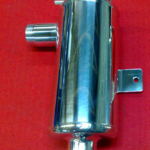
Of all the main fluid circuits that simply left the coolant,  those nice folks at www.spec-r.co.uk had made and delivered a custom swirl tank in less than four days, and this was duly fitted to the car. With the tank in place we rerouted most of the coolant pipes, and by 5pm had a 99% complete coolant circuit.  The 1% missing being the radiator cap, and the fluid contents.  I’ve become recently concerned about the amount of  hard water deposits in the cooling pipes. We live in a hard water area, and all the unions seemed to contain a mineralised dust, where the residual water in the system had dried out and left a deposit.  So I’ve ordered a family size quantity of distilled water, and will use this in the engine from now on.  Along with some Water Wetter.

After the coolant system was complete, Duncan and I cracked on, and  we got the left hand floor all mounted up.  It now just needs a shroud for the Rad, the back wall bonding in place and a couple of additional clips.  One more good weekends work, and she’ll be running and rolling on her own wheels again, and ready for a corner weight/alignment check :-) .  After that its the normal checks and replacement work that we do in the offseason, and a bit of paint/titivation and she’ll be ready for a shakedown test in mid May.  Which then leaves me a couple of clear weeks to fit the reverse & Cat ready for an RGB outing in early June.

Posted in Winter 2009 Rebuild | Tagged , | Leave a comment

Ok Lets Get back in the Game

Right,  Firstly I seem to have fixed (or at least circumvented) the image loading issues with WordPress, so I can get back in the game of updating this blog apologies for the interrupted service of late.

Secondly and more importantly watching the fist two races of the RGB season from the side of the track hasn’t been much fun… well it has been fun, but not as much as being in the car would have been, so its time to get this beast finished! Actually it was great fun watching Tim win first place in Class B in the first couple of races of the season. Well Done mate!

Duncan and I have been cracking on with the sidepods.  Mounting up of the right hand side is now complete.

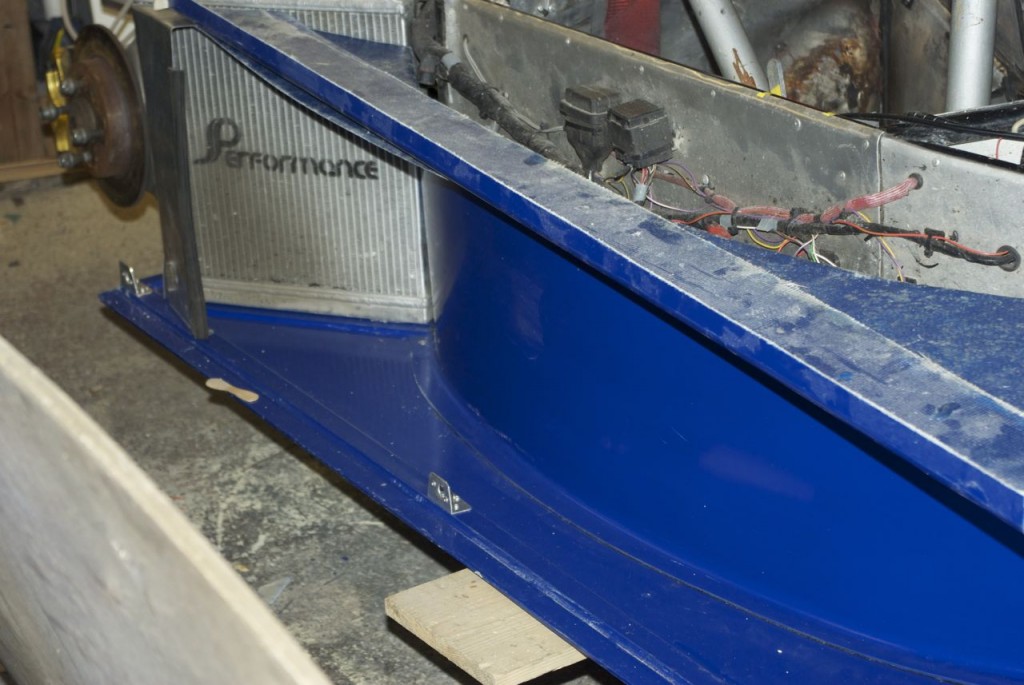
The new floor is fixed to the sides of the car using some aluminium strips and rivets. and its outside edge is supported by a tension wire at the front, and the frame of the aluminium radiator at the rear.

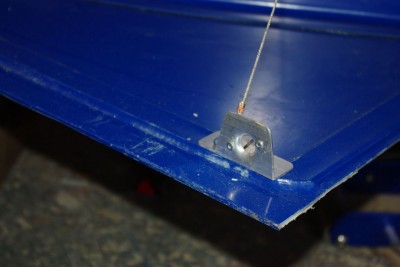
In the process we made up some natty little Ali brackets for the suspension wires and dzus fastener springs.

Then The rear curved wall was bonded in place, and Duncan made up a rear shroud to protect the radiator from debris thrown off the wheels.  And that was the right hand side pretty much done. I’m just wating on some clips for the top, but it is to all intents finished.

So on with the left hand side.

You may recall that the left hand side pod is a bit “busier” than the right hand side.  It contains the battery, the horn and auxiliary fuel tank. These of course now had to be moved to accommodate the new much deeper side pod channel.

The only place I could find to put the tank was in the engine bay, and of course true to form it basically wanted to be mounted in free space, with no suitable surface available to rivet it to.  So I spent a good few hours fabrication some mounting tags, with captive nuts to mount it to the chassis.  This of course had the usual series of down stream effects, which needed rectifying, before I could even start fitting up the side. The tank itself will also need some heat shielding.

  • The fuel pump wiring needed relocating and extending
  • The solenoids to control the reverse and main start motors needed moving, with appropriate wiring changes
  • The fuel lines need relocating and rebuilding
  • The coolant system will need relocating, as a pipe currently wants to go right through the middle of the tank.
  • The alternator cabling needed rebuilding
  • + a bunch of other small stuff.

With most of that out of the way I could get on with fitting up the floor.  Its now in place, with the appropriate tension fitting, and I’m now starting work on the left hand side cooling group.   I’ve ordered another Aluminium radiator from Ebay, as the existing plastic+copper one was damaged  when I got punted off by a Porker at the Birkett test last year.

So seen below is the current state of play.

The rad is all mounted up,  the oil cooler is not yet in its final position, the fuel lines (bar one) and electrics are all resolved, and the proposed reroute of the main coolant pipe across the rear of the engine bay is in progress.  I’m waiting on a couple of fuel unions, I’m going to to replace the fuel filter and I’ve still got the fan and cooler to fit in the new position and I could be in a position to run the engine again, for the first time since last year. Good Job too as I’m starting to target either a race meeting or a track day in mid May.

On the subject of cooling, I’ve ordered up one of these, its a replacement water header tank/swirl pot designed to do air bubble extraction.  I got the Idea after chatting to Darcy Smith over at www.barnwellgarage.com. Darcy  runs a Radical SR4, and his son Josh used to run a beautifully prepared Pheonix in the RGB championship, but now races his college’s Clubsport.  Both are thoroughly nice chaps and it was while I was bemoaning my cooling problems to Darcy at the Birkett last year that he invited me to crawl over the engine bay of his Radical, and have at look at his cooling circuit.  The Radical has a swirl pot  and Darcy commented that he had the same problems as me  on Josh’s Pheonix until he put one on that too.  Then problem solved :-) .

Mine will have a couple of bosses for temp sensor and a sight tube for coolant level. Lets hope we finally get these temperatures under control.

The last thing to report on this big update, is that I’ve done yet more composite moulding.  In about an hour last Sunday I knocked up this mould from the h usual contiboard and plasticene materials.

24 hours, and 2-3 layers of CSM later out popped this moulding, and a couple of hours after that, and a good fettling by  Duncan resulted in it fitting into the right hand side pod.  I’ve moulded it with a semi circular front edge, so that I can build it up with a little filler to make a proper Aerodynamic edge.  It sticks out about  35mm from the body work, but whether it is above the boundary layer is anyone’s guess.  It should however be slightly more efficient than the sharp cut edge of the GRP.

Posted in Winter 2009 Rebuild | Tagged , , , | Leave a comment