Farewell to the Sabre (Temporarily)

Well, after a week of frantic widget making and welding, I still ended up with loads to do on Saturday morning so an early start was required, but I had finally managed to find a local powder coating firm who were willing to hang around  on a Saturday to allow me to deliver the chassis to them.  So a big up to  Fentec.co.uk

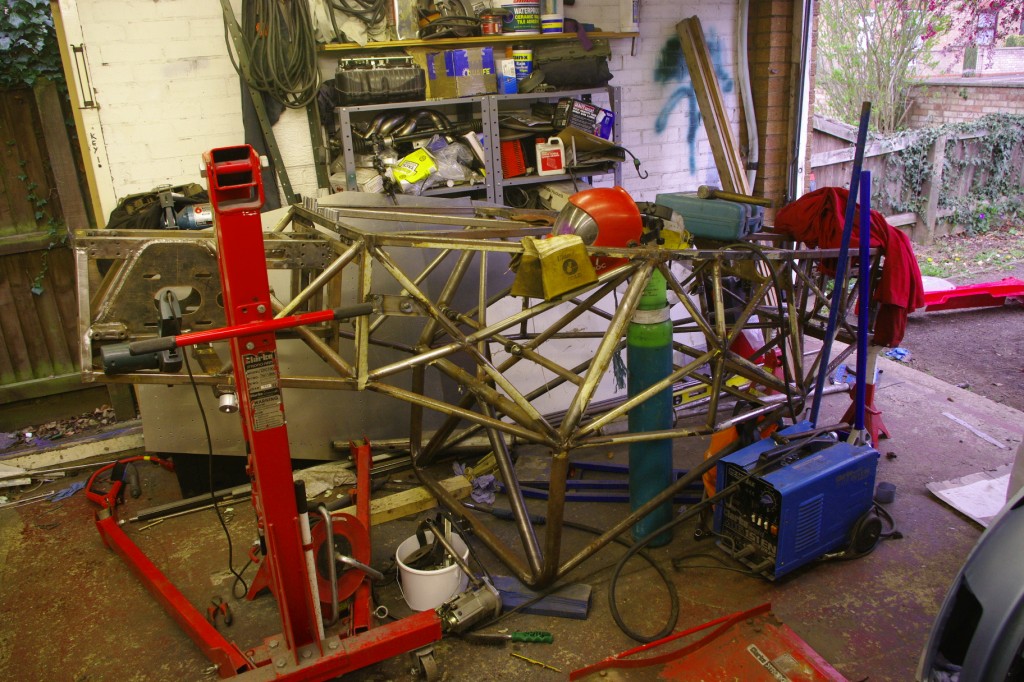
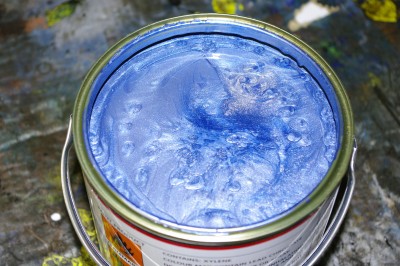
Duncan and I were just about to load it on the trailer when we spotted  the last missing weld, so quickly dropped it back in the garage rolled out the welder one last time.  But here she is about to depart to get coated in RAL 5024 Pastel Blue powder coat, which  I don’t think will clash too much with my favourite Subaru Blue that the body work will eventually be painted in.  And is still a light colour…. I’m hoping it will be close to RAF blue.

This is quite a big day, as hopefully most of the major fabrication is done.   She went off with a box of 10 other components including engine mounts, chassis mount and gear shift components.

And while she is away I think I’ll paint the garage floor.


Posted in AB Performance Sabre | Tagged | Leave a comment

It’s a Topsy-Turvey-Turney World

Ok so after a few days concentrating on the mini  I can happily say it is now back on it’s wheels :-) . So I’m now concentrating on the Sabre. All my mates spent last weekend having fun at Silverstone and I didn’t, and so I need to really make progress on this beast if I’m going to make the Anglesey meeting in August.

To that end, I’ve drawn a line in the sand in order to give myself a hard deadline, and I’ve booked the chassis in for powder coating next weekend.  Of course this means that the chassis needs to be completed before that happens.  More than that the chassis needs to be complete with ever little tag, mounting, threaded bush, hard point and every other widget that needs to be welded on because there are few things that are worse than grinding off the brand new powder coat in order to weld on the one thing that you forgot!

So for the past couple of weeks I’ve been laying out the following ancillary bits n bobs  so that I can finalise the welded bits.

I’ve been  turning, drilling and tapping any number of gismos… 3/4 forward and 1/2 turn back as I was taught in my youth

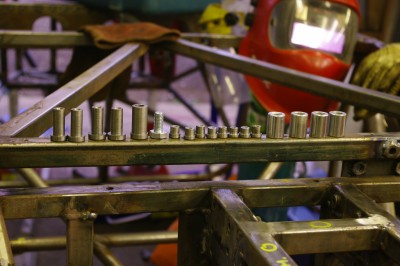
You can see here a small selection of the turned & tapped bushes that I’m currently welding in.


  • Hand brake lever and cable guides.
  • Rear ARB Mounts
  • Left hand engine mounts.
  • Weld in the tacked on rear suspension mounts.
  • Mounts for the front support cage/Crash box.
  • Threaded mounts for side pod mounting.
  • Supports for throttle/clutch cable end adjusters.
  • Fuse box mount.
  • Complete the lower part of the rear  damper mounts.
  • Chain cover retainers.
  • Crotch strap 9/16th eye bolt tubes.
  • Coolant header tank mounts
  • master switch mount block
  • Earth points.
  • Head rest
  • Rain light mounts
  • Steering column mounts/crush tubes.
  • Recovery hard points.
  • Fuel tank and catch mounts
  • Any incomplete welds in the main chassis tubes.

The chassis is now stripped and flipped over as welding in small bushes is most definately easier when you can do it standing up, as opposed to lying on your back with your arms in the air and blood draining from your fingers.

 BTW the little yellow arrows all over the chassis are where I need to complete a weld, insert a bush or just fill a pin hole.  As I do the work, if sand off the arrows, so when all the yellow paint is gone.   Hopefully the work is complete.

Which brings me to powder coating.  I had hoped to get it coated in silver, but it seems powder coat silver is more like grey… Tim and Duncan both suggest white… on the premise that it will show up any cracks easily, and is easy to match with paint should i need to repeair any areas. I just think with the hard life a race car lives it will look nasty and scuffed everywhere, really quickly.  Plus perhaps it will heat discolour in the hot engine bay.   Hmmm

Still we’re not there yet, and for the moment progress is stalled as I’m  out of Argon.


Posted in AB Performance Sabre | Leave a comment

Mini Approaching Completion of the Welding and Mechanical Refurb.

I’m currently trying to serve two masters. I’m desperately trying to get this mini finished so that it can be drivable in the fine, warm dry, summer we’re bound to have for a couple of days some time between June and September.  And I’m also trying to get the Sabre finished, or at least properly started by getting the chassis powder coated soon.   And it does need to be soon, if I’m to stand any chance of getting out for Anglesey in August.

But for the moment I’m focussing on getting the mini ready for painting.   In the last couple of weeks, I’ve got loads done… but it does seem that I’ve been in the garage getting oily every waking moment I’m not at work these days.  

So what have I actually achieved?

All of the welding at the front of the car is now complete.   The wings are all welded in, all the little jobs like spotting in the headlamp support shrouds and the lower front valance joints are done. I’ve even managed to remember the little angle brackets, that support the A panel to wing joints at the wheel arch edge as well.  Beyond this I’ve also seam sealed all of the inside of the front wings, I’ve sealed the wing to windscreen surround gaps and cleaned and dressed the joint margins on the body seams.  plus I’ve touched up any under wingand paint nicks or scratches.   Essentially in front of the engine bay firewall the car shell is complete.  :-)

All that remains on the shell is to.

  • Spot weld the right hand sill join, as I seamed it and tbh I think belt and braces is better.
  • Weld in the rear seatbelt mounts.
  • Repair any thing else that I find… but the only thing I’ve seen is a small rust spot on the passenger door A post.
  • Cleanup any welds or seams that are outstanding, most notably on the back valance.
  • Paint (POR15) the inside panels where the existing paint has been damaged by the structural welding underneath.
  • Dress back and paint the internal welds on the floor pans and passenger side inner sills.

So we are pretty much done,  once the shell is complete… I’ll take it to my friendly MOT garage, and make sure they are happy with the structure and would pass it  before I start getting paint chucked at it.
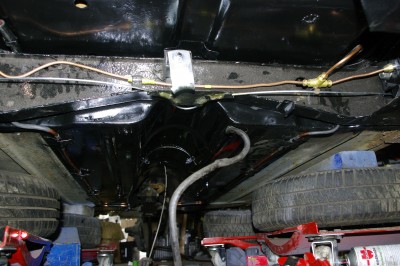
So on with the mechanics,  you may recall that I’d rebuilt the front subframe, with all new fittings.  The only thing that was standing in the way of refitting it, (again with new rubbers, mounts, fittings and fasteners).  Was the fact the that I needed to fit the front to back brake and fuel lines.  These had all either corroded or been nicked with an angle grinder…. which had the potential to be very entertaining, when I did it to the fuel line.

So I’ve spent a few “pleasurable” hours cleaning back and POR15 the floor channels where the lines run.  Of course once this had dried actually fitting the lines entailed dropping out the fully rebuilt rear subframe (again!) in order to get the tubes bent over the subframe as per the original fitment.  The underside is now looking very spiffy, with only a couple of areas remaining to be cleaned and painted…. it remains to be seen how well the PO5 15 performs in this areas.  The lines themselves had to be cushioned from the steel clips, and this was achieved with some shrink wrap that I bought to do the cabling for the Sabre.

So what’s left then…. well three main components… engine + gearbox,  front hubs and drive shafts, and the interior.

I’ve cleaned the engine,  but if the car’s going to go back on the road this year, then she will have to be refitted as is and make do with a new clutch, new fuel pump, new water pump, new hoses and all new gaskets and oil seals.  I’ve even ordered the Mini Spares selector rod gearbox seals.  Then next winter I’ll fit the spangly twin carbs and LCB exhaust I had planned for her.
So that leaves the running gear, as I’ll do the interior after the paint has landed.

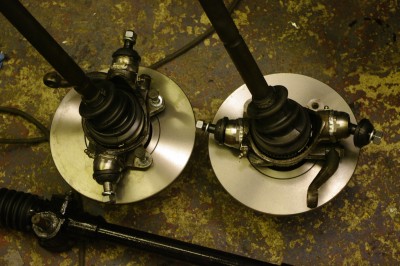
I spent about 18 hours, cleaning the 30 years of accumulated grot off the front hubs and driveshafts.  Then refitted new ball joints, new main bearings, new bearing seals, new CV joint boots, and new brake disks.   The last thing that’s needed will be a calliper rebuild and I’ve got the new seals already for those.  So this spangly picture is off two fully reconditioned front assemblies ready to bolt to the new subframe when it is refitted.  Also in the picture is a partially reconditioned rack.   The rack itself had no play so it’s simply had new boots, new tie rods and protective coat of POR15, and is now ready for refitting.

Incidentally, while doing the somewhat laborious job of shimming the ball joints I was struck by the fact that the last time I did this was some 18 years ago, with my dear old Dad… when he was teaching me how.   I learned all I know about cars from him and I had a spanner in my hand with him from an early age… Kids these sadly days lack those sort of role models, as indeed so do I as he passed away soon after my Daughter was born ( she gets her driving licence in 3 weeks).  Still,  I use the skills he taught me and tools he left me every single day.  And I often hear his voice in my head  “Stop leaning on it so hard, You’re going to shear that bloody bolt off, a sure as god made little apples!” :-)    Except these days I’ve learned to listen to him :-) .   I might be building this car for my wife, but I I’m doing it in his memory.  Here’s to you Dad.

I expect to get the front subframe and running gear back in this week then she can go back on her wheels for the first time in 9 months  for a final (small) round of welding and seam sealing before we prep for paint.

I reckon I’m well north of 650 Man Hours on this project now…. and about £2000 quid in parts and panels.  Certainly the pile of empty Mini Spares/ Mini Sport parts bags and boxes is growing ever bigger.

Infact since i wrote most of this post last night,and indeed this morning  the subframes went back in, the suspension has been remounted.
 

Posted in 1275GT mini | Leave a comment

Exhausting

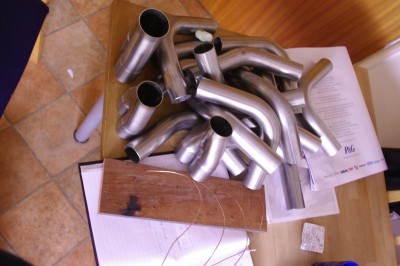
Andy has supplied me with a huge pile of stainless steel mandrel bends.  And three beautifully made collectors.

These parts are destined for my exhaust system, as I don’t have the cash to buy a complete bespoke system from Andy. Plus I quite like to make such things myself if I can.

At the bottom of the picture you can see the wireframe model I made previously.

About 2 hours after I took this photo I basically thew it away, and began a long stint of fitting/refitting and dis-assembly.  Repeat until nearly comatose.

Basically my planned layout didn’t seem to match the radii of the bends, so I couldn’t use it.

Andy has suggested I aim for a total primary length of 400mm, but 60mm of this is taken up with the conical port expanders, and a nother 0mm or so is in the collectors.  This only leaves 265 mm for the actual bends, and with each 90 degree 100mm in length you can see I didn’t have much to play with. Of course you want to get all the headers the same length, but because it is a 4-2-1 system you need to get the collectors in a similar place too, so that the secondaries also end up a similar length.

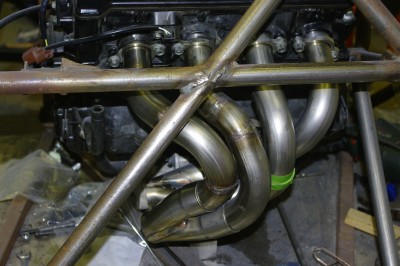
After much work I ended up with this. It is s no where near perfect and I think with say another 100 hour practice I could make it neater. But each header should be within 10mm of the target length.

One or two of the configurations I’m not happy with, particularly the pipe on No 3.  but I expect it will work well enough.  As you I didn’t quite manage to get the collectors level, but we are (I think) close enough.

Welding these is a real challenge, it’s thin wall stuff, and if the joints aren’t perfect you have to add welding rod, and this immediately then falls inside the tube.

I’ve just got No 2 to do now, its currently held on with green tape., and then when I know I’ve got spare material I’ll think about doing no 3 again.

But Generally I’m pretty happy as I can now finish the engine mount on this side.


Posted in AB Performance Sabre, Exhaust pipes | Leave a comment

Forwards to reverse.

Not much time spent on the racer this weekend, as I’ve been trying to crack on with the mini, and I chose to sacrifice a day’s spannering time to help help out Tim in his pre season shakedown test over at Rockingham Motor Speedway. It was great to smell hot tyres and brakes, and hear an RGB car a full chat again :-) ….. gets the automotive urges surging :-)

Still I do have some progress to report… on both the reverse system and the wiring.

This has taken ages, all these little bits of fabrication with few datum points to work from always do.

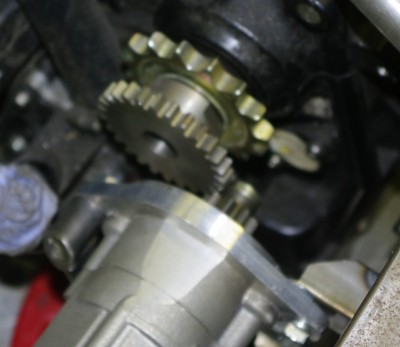
You can see here  (with the actual motor removed) it is basically a triangular structure to absorb the reaction forces as the reverse motor engages. 

Yes I Know its not a full triangle, so I may have to add a reinforcing gusset in the bottom leg.   If you look a bit more carefully you can see a section of thin hex bar, joining a boss half way along the long leg of the motor mount.   This is purposely weedy as I don’t want the reaction forces transferring through this component to the gearbox, as it is only attached to the relatively light weight mounts that are normally used for the chain cover.  The purpose is to apply tension to the reverse mount to stop it displacing sideways under load, rather than act as a “main” mount.   All that’s left on this now, to to weld the chassis mount up and paint it all. I’ll test it when I get a new battery for the racer.

Here’s a picture of it all complete and bolted in place.  In fact I think I’ve made it a tad “tight” to the main reverse cog. and I’ll need to just space it back by a couple of mms.


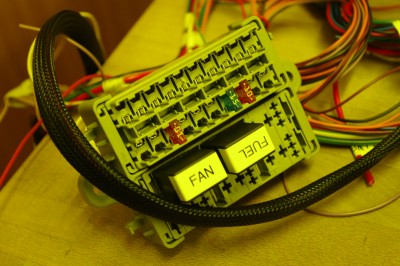
In other new this week I’ve made a start on the wiring loom.  This is based around an MTA modular fuseway system from PoleVolt lts, which allows various modules to be linked together  to form a custom wiring centre.  It also comes with bus bars which make life easier. I’m using the mini relay module, and the 20 way mini fuse module.  one bus bar is driving unswitched circuits (mainly lights and DL1), 1 busbar driving the ignition circuits, and one driving everything else.   It is pretty lightweight and comes with a range of brackets and covers.   Its a bit tricky to put together, but once I realised that you need to crimp all the terminals on the busbars it is relatively straightforward.     So far I’ve basically made the master supply and control loom from the battery location to the main switches.  Incidentally I’m using the expandable  woven sheathing for the cables.   I expected it to be a right pain in the backside to use, but actually it is much easier and a lot less hard work to use than the tape I have previously used.  
Andy has facebooked me, to tell me that he has the exhaust bends I need to make the exhaust are in stock.  So next week is likely to be spend cutting up bits of stainless steel, and trying hard not to cock it up. I’m also expecting a new radiator, and a new fuel pump, so I can crack on with those systems too.


Posted in AB Performance Sabre, Reverse | Leave a comment

First New Paint On the mini.

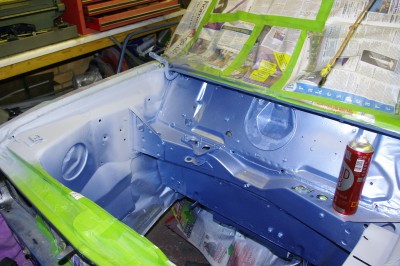
After a morning of clay bashing with Katie in the bright sunshine, the rising temperatures gave me some hope that my plan of chucking the new paint at the mini engine bay would meet with success.   So I masked off the rest of the car, degreased,and tack ragged the engine bay. Then I attacked it with some of that denim blue paint I showed you last time.

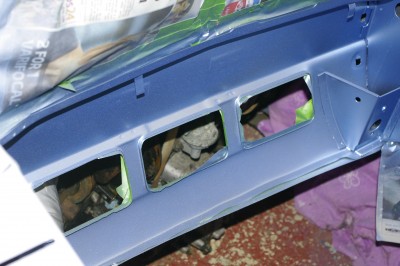
This is what it now looks like.

Now normally after spraying a metallic basecoat, you topcoat it with clear lacquer.  So what the bloomin eck, is that primer doing on top of the nice shiney new blue paint.

Well it seems that some of the POR15 reacted with the base coat to turn it a nasty crinkly texture. 

It’s very odd as the whole of the engine bay is coated in the stuff,  and only a couple of patches reacted.  Of course these were the tops of the wings which are the most the most visible part of the engine bay.  It is all well over two weeks old and fully cured, and I followed the directions to the letter before topcoating it so I’was more than a little miffed.

So I had  to attack it all with air n a powered wire brush and took it all the way back to the original primer.  Then re-coated it with new etch primer .  This solved the problem, for all the major areas. Even so, there are one or two more areas which re crinkled back again like the one above on the top of radiator shroud.   So I’m going to have to attack this again tomorrow, and then re etch prime.   If I then leave it all a few days to go off properly I’ll chuck some more base coat at it next weekend.   Then once that has gone hard I can start refitting the front subframe and running gear (at last). Still here’s a pic of the front half of the engine bay which looks a whole lot better.  This little escapade has certainly convinced me that while I’m happy to spray the Sabre,  for the external surfaces of Kate’s road car a professional job is required.


Posted in 1275GT mini | Leave a comment

Sabre Gear Shift

Progress is being made on the Sabre front… and I’m pleased to report that I have completed another system… the gearshift.

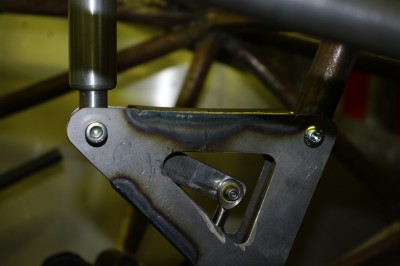
You’ll recall that I had fabricated a mounting bracket for the gear shift lever,   Well the plan was to connect the lever to the engine using a push pull cable as far as the firewall, and then transitioning to an actuation rod in the hot engine bay.    Well the plan worked a treat, it is just that I had to have three goes at it.  I originally attempted to make the entire lever,pivot and actuating arm  in aluminium and frankly spent the whole morning monumentally cocking it up…. twice.   So in the end I reverted to making it out of steel, woth just the large handle made in aluminium.

The central steel pivot in this unit is reinforced with some sintered bronze oilite bushes and it works a treat.

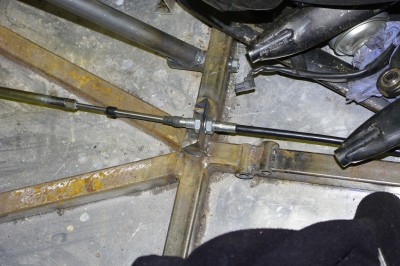
You can see it is connected  via an m5 rod end, which in turn connected to a push pull cable. part number  300-M3223-975. which is metric, 2 inch throw, 975mm long heft cable from cable-tec.co.uk.

The cable runs across the floor of the passenger compartment, to this little bracket I welded into the base of the bulkhead.   you can see it it then transitions to  a fabricated push rod… which connects at the other end directly to the gear shift lever that featured in the last post.

Once it was all together, I gave it a test yank it and it changed up and down between neutral and 1st beautifully, infact it has almost no lost motion so is very direct with lots of tactile feedback.  Now, being used to Honda boxes, where you can go smoothly up and down the box even with the gearbox static.  I naturally assumed I had an issue as I could only N and 1.  So I spent a few minutes trying to change into second by twiddly the output sprocket, removing the plugs and spinning the engine and so on.   Finally  I read the Kwaka manual and discovered it has a positive.neutral action that prevents a change into second unless the engine is spinning. ho hum that seems to be working then.

So the engine is nailed in, gearbox operational, and the diff is in place, although not connected….  I’m now starting to think about oil, water and electrical systems. So progress is moving on, and I’m going to be starting on the electrics now, while I wait for the exhaust bends.  The electrical system is going to be  based around the CarTek Isolator I bought at Autosport, the McGill motorsports master switch, and a new fuseway system from Polevolt, which I haven’t used before.  Duncan and I are starting to become convinced that it is time to pour the custome foam seat.  This is because I need to finalise, pedals, shift arse and switchgear positions…. and we need a proper seat to do all that.

On another matter, you can see the slightly rusty chassis rail in this picture.   The fact that the chassis is unpainted and rusting is really beginning to bug me.   I know It is going to be powder coated, and so I need to complete all the welding, and if possible do a full build before I get it coated….. but I want to work on something smooth, colourful and  clean!  Every time I go in the garage its almost more than I can stand to not attack it with a paintbrush and big pot of POR15.


Posted in AB Performance Sabre, gear shift | Leave a comment

Mini Update

I promised to keep you updated on progress on the mini, and there has indeed been some significant progress.

The new wing was welded on last time, and I currently working towards putting hed  back on her wheels, so that I can get her structurally checked by local MOT tester before I start chucking expensive paint at her.   Of course its only when she starts to change colour with new paint that the last 12 months of work will start to show its value.

So on the critical items towards putting her back on her wheels are the following.

  • Repair, POR 15 and prime the engine bay, ready for body colour top coat
  • Seam seal the appropriate joints in the engine bay.
  • Top coat the engine bay, with final body colour.
  • Complete refurbishment of the front subframe.
  • Refurbish steering rack, and change rack gaiters and steering arm joints.
  • Refurbish front swivel hubs and driveshafts.
  • Refit that lot .
  • Then refit front to back brakelines  and fuel lines and POR15  the remaining underside of the car.
  • Then drop her of the stands.

Then with just a last few bits odds and sods welding and cleanup  she will be ready for the final strip down of things like windscreen and other glass and she’ll be ready for painting. So we’re getting there…. finally.  Of course then there’s the reassembly work and every effort to avoid scratching the new paint.

So what on that list have I achieved?

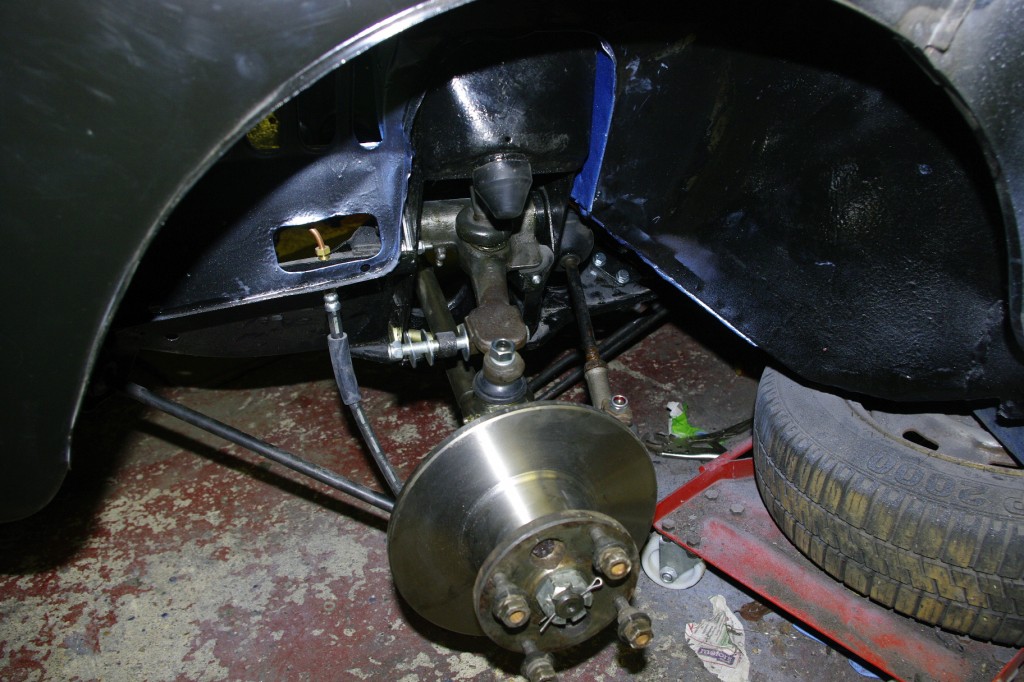
We”ll I’ve spent the last couple of weekends finishing up the front subframe.

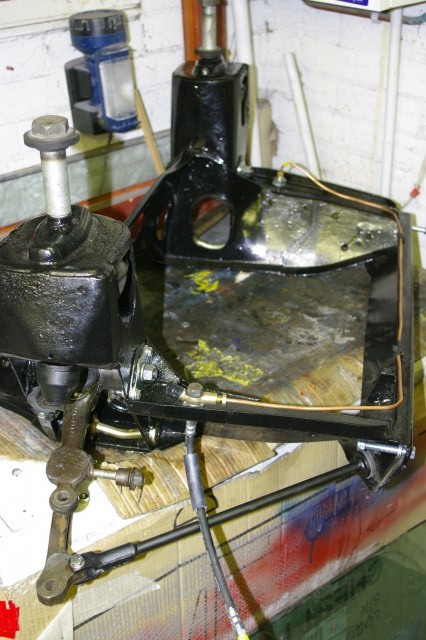
In this one photo there are

  • 2 new flexi brake lines, mounting nuts and lock washers
  • 2 new front tie arms, complete with new hard/soft stability bushes.
  • 2 new lower arm pivot pins, again with new bushes, in the suspension arm
  • 2 new poly progressive bump stops
  • 2 new suspension cones
  • 2 new impact rubbers for upper arms.
  • 2 new upper arm pivot beams, 4 new bearings, all new fixings.
  •  1 new brakes hard line, complete T piece.
  • 2 new damper mount bolts.

This frame is now ready for refitting. and I shall next be moving on to the swivel hubs, steering rack and drive shafts.

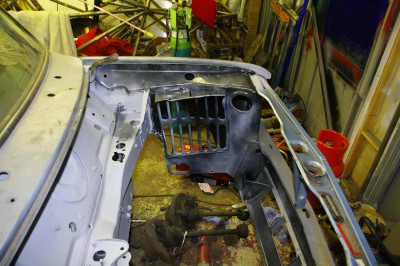
I’ve also finished the first stage of engine bay prep, this has  all been cleaned down with a brass rotarry brush de rusted, por-15d and key primed ready for final prep and top coating…. I’m really looking forward to that moment… its always exciting to start chucking paint around.

On the floor underneath the engine bay are the grotty hub which will get my attention next.

Lastly talking of paint I finally found the right paint for this car,  there is not a single reference to the paint colour anywhere on the vehicle itself or its documentation.  The external paint itself has degraded to almost become dusty and unstable, So I was reduced to comparing the  paint from the unfaded ares behind the seats with internet pictures and photos.   After much research via google, and several forums dedicated to various dodgy 1979 BL cars that would have all gone through the Leyland  paint shop at the same time I finally came up with something that is right.

 It is BLMC 249 Denim Blue….. even the name is dated as modern Denim jeans s actually much closer to a rich indigo blue rather than the light faded blue of 70s and 80s “stonewashed” jeans.   Here it is., it could really look fab.


Posted in 1275GT mini | Leave a comment