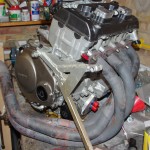
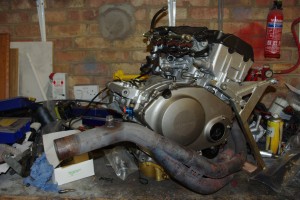
She runs … but didn’t stop :-(

This Saturday saw a number of  activities come to fruition.
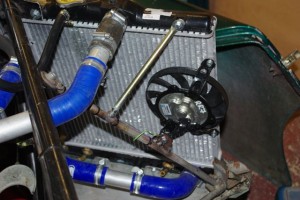
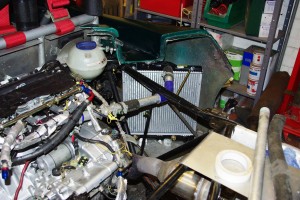
Firstly we finished the cooling system and fitted a new fan that I had bought off ebay.  The new fan is a full half a kilo lighter than the old fan, and it’s easier to mount.  The CBr1000rr has an ECU controlled fan which starts the fan up based on the engine coolant temperature so in theory you do not need a separate thermostatic switch.  However the ECU exhibits some odd behavior.  It starts the fan when the water temp reaches 105 deg c and shuts it down again at 99, which is a bit odd essentially it keeps the coolant temp between 99 and 105.   It also starts the fan under heavy acceleration which I guess is sensible.  however when I’m  on the grid I want the engine warm (say 85 deg c) but not cooking at 100-105.  It’s going to get thrashed  and hot enough pretty soon so lets start with some capacity in the coolant circuit.  To that end I wired in a parallel manual switch for use in assembly/on the grid or in post race cool down plus a dashboard warning light to let me know it is on.  That way I can manually control the coolant temperature as I want, and the ECU will protect me should I forget. Other than that and a few leaks that needed nipping up when we ran the engine the cooling circuit is complete.  It seems fine…. how it stands up under race conditions with the Rads in the side only time will tell.
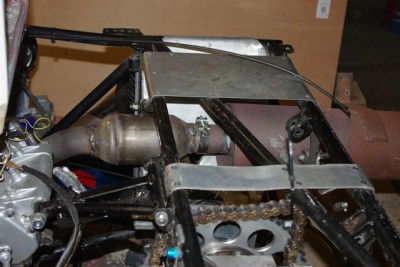
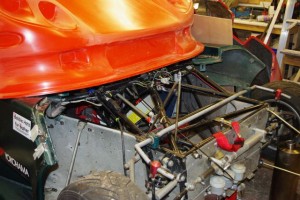
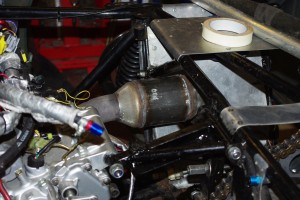
The other thing we finished was the exhaust system.  I was going to change the direction of the can to get the exhaust exiting  out of the side of the car.  I may still do this, but for now I just wanted to get it running, so refitted the exhaust in the “straight out the back” configuration it was in in last season.  To do this I had to shorten some of the link pipes and weld the exit pipe on the Cat. .

The gap between the exhaust can and the cat is to allow the driveshaft to articulate through its full travel.  Incidentally the radiator fan has the happy side effect of also cooling the exhaust system and can.   We don’t just throw this thing together you know!

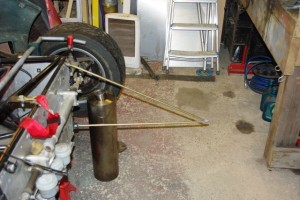
At the front of the car Duncan got on with working on his favorite material (wood- he’s a boat builder/chippy by training) and he’s virtually finished the front floor.
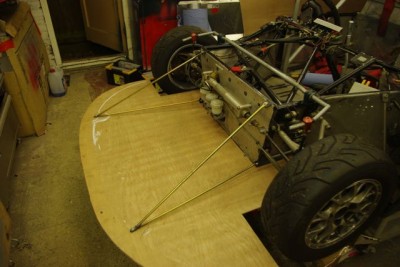
As you can see it is now much easier to get to the master cylinders and much easier to replace.  I will be putting a foam filled crash box up the front though.

So will coolant,fuel and oil (5 litres for a full fill where the oil hoses and filter are empty)  all filled we were ready for a restart of the lump.   A few fuel pump  off cranks until the new oil pressure gauge read about 9 psi and then we went for it.  Uh Oh she doesn’t go!  Perhaps we shoudl plug the ECU in :-) (it had been unplugged a few weeks ago for some welding).  Hmm still no suck,push, bang blow.

Ah… connect the cam sensor.. and Vrooom!  Nothing like the smell of exhaust and hot oil to stimulate the old enthusiasm gland :-)

Interestingly the Cam sensor doesn’t show a FI code when disconnected, but the engine fails to start…. that’s worth remembering in the paddock!.

The new oil pressure and temp guages work fine,  Pressure is 25 with cold oil and elevated idle, but with oil a 50degs it drops to about 15.  At 6000 rpm it hits the regulation 71psi right on the button … FAB :-)

About now we had an odd occurrence, while trying to get the indicator lights for fan switch to work we had some really odd beaviour.

The DL1 stopped working, the fanswitch also controlled the oil pressure warning light and then engine wouldn’t shutdown…even when Duncan was waving the FI key at me.  Weird.

A confluence of events meant that the ECU was receiving power from a short near the fan (5v) as it turned out because the DL1/dash fuse had blown but the “indicator fuse” that lights a light on itself when it blows was still passing 5v. The DL1 wasn’t getting enough power to run properly and when the fan switch was turned on it sinked enough current to stop the oil pressure light from working.  All very odd.

Of most concern was that removing the red FI Key didn’t kill the engine.  The ghost in the machine kept it running in self sustaining mode, not good for scrutineering and not safe.   The Auxiliary terminal on the FI key breaks a circuit when the key is pulled.  I had used this to replace the kill switch in the original honda loom and it had always previously worked fine.  However, the Kill switch circuit basically powers down the engine stop relay, which in turn should power down the ECU, the fuel pumps, the injectors and the stick coils, which are all powered (through) a couple of other relays by the engine stop relay.

Now either it was the short, an odd current loop caused but the not quite blown fuse, a faulty relay or I’d screwed up the wiring elsewhere.  But the engine stop relay remained energized even with the FIA switch out.. and the engine still ran.

I can’t have that again, but there are so many connections in the original circuit that I would have to tear apart half the loom to fix it , so I’ve changed the kill switch to basically break the power line to the stick coils, as close a possible to the coils on the engine loom itself.  That way no other power supply can feed the coils by accident and no petrol engine can run without sparks.   I’m also going to replace all those “tell tale” fuses.  I want a fuse to be on or off. Blown or not Blown…. passing 5v with all its myriad of unpredictable results on a 12v system is just daft.

So fuse replaced, and kill function rewired I ran her again. even with the ECU, fuel pumps and everything else still live… now break just the kill circuit and she dies.  Job done!

So overall a successful weekend, with only a small amount of time faffing around chasing wiring demons…. we’re pretty much onto bodywork now, to which end  I’ve decided that this season’s  colour is going to be Subaru World Rally Blue. :-)   Paint code Subaru 02C provided I can get it in 1 pack acrylic (I don’t fancy painting 2 pack)

Posted in Winter 2008 Rebuild | Tagged , , , , | Leave a comment

The Cooling System is Complete

IMGP0613This weekend saw completion and filling of the completely redesigned cooling system.

The system is now filled and appears water tight. We had one small small issue to resolve. primarily based on own own stupidity and the design of the new Honda Rad.

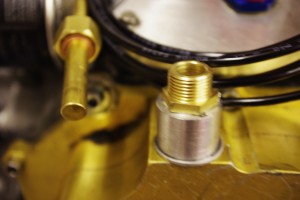
Firstly if you look carefully at the photo above, you’ll see two small brass tubes emerging from the bottom of the rad. I stupidly assumed that these were ancillary coolant connections and so I used one for the system fill point from the header tank, and blanked off the other. with the system complete we poured in the water and were somewhat surprised to see that the system capacity was 0.3ltr. Yes you guessed it the brass connections were for an integral oil cooler and we had actually filled the oil side of the cooler rather than the main cooling system. This caused a fairly hefty rethink and reposition of the hoses, so that we could actually fill the main coolant circuit. However it’s all done now and filled. System capacity is approx 3.5 litres. Previous system capacity had been nearer 5.5 so that is another couple of Kilos saved + the weight of the extra pipework that is hopefully now not needed, also the 3.5 ltr capacity compares pretty favorably with the standard installation capacity of 3.1ltrs.

Still it was quite funny to see the look of puzzlement on our faces as the system failed to fill when we had connected to the oil cooler circuit in the rad.

The electric water pump is now siIMGP0644ted on the cool side of the engine and the return line crosses the engine bay between the exhaust and the block. I’ve wrapped it in cooltek heat insulation to protect both the silcone elbow hoses and prevent heat soak.

The wiring for the pump and fan have both been transported from the front of the car, and repositioned to the rear. The Honda rad doesn’t include a port for a thermostatic switch to trigger the fan, so I’ve reverted to use the ECU controlled fan trigger. I just need to remember that in post race cooling I’ll need to leave the ignition on if the fan is to work. Either that or I might build in a separate switch.

All that’s left on the cooling system now is the “dry” stuff. Fit a new (lighter fan) I sourced from ebay and fit the Ali ducting in the side pod to ensure proper cooling. Duncan and I may yet decide that a fan is superfluous. He says “No, what about hot restarts after a red flag when you’re held on the grid”… I’m undecided.

Other stuff that got done this weekend included welding in the new catalytic converter, and work on the new front floor area. Here we started building the support stays that both hold up the floor and transfer the aero load from the front bodywork to the main chassis. These look flimsy, but when connected to the floor produce a very rigid structure.

IMGP0648

This should be enhanced by the fact that the new front has a moulded in splitter. so the floor is actually mounted inside a lip on the moulding and we intend to dsuz fastener the two parts together. An idea I nicked from Steve Robinson :-) at Cadwell last year. When in Wickes buying plywood for the floor It occurred to me that as the body and floor will now be imparting rigidity to each other I no longer need the floor to be self supporting and can therefore use thinner 6mm ply rather than the 9mm I had previously used. Hefting both a 9mm and 6mm 8 x4 sheet confirmed that this was “a good idea”. Actually I bought a sheet of both, and will make a spare out of the 9mm stuff. If I bang it gently into the barriers like I did at Cadwell this year… the two components may well be damaged and I may need my spare to revert to being self supporting. An upside of moving the rad and all it’s housing to the back is that the spare is now completely flat and easily supported in the belly lockers of the Winnebago. With this in mind we’ll also make a spare set of bracketry that is also nice and flat and therefore easily carried in the ‘bago.

At the front a thorny issue remains outstanding…. how to fit the mandated 60mm front tow eye? There is no meaningful structure within 10 inches of the periphery of the front bodywork, and with no hole in the front body I’m unwilling to use the strop type arrangement I had previously. (it will just tear through the body if used in anger). It seems I have no alternative but to add some additional steel bracing to support an eye emerging halfway up the nose. Hmm

Weight loss…. As you can tell I’m rather obsessed with pulling weight out of the car…. but in honesty the easiest way of doing this is to pull some out of the contents of the drivers seat. (me!) Infact there is quite a large opportunity to do this around my middle. So the new year willpower test starts today. with only 5 weeks before the first testing outing there is still lots to do

Posted in Winter 2008 Rebuild | Tagged , , , | Leave a comment

Loads of Progress

IMGP0606Today we did that odd thing of moving closer to finishing the car by taking it even further apart.

First order of the day was to remove the front floor and radiator assembly. This was necessary for a couple of reasons, firstly the existing floor is broken, and needs to be replaced, but also I needed to remove the existing radiators and the mounting frame so that I can fit the new front body work.

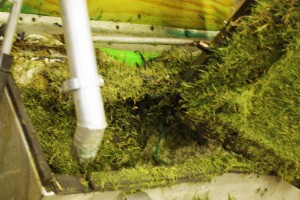
As we took the radiator out it became apparent how very lucky we had been to finish the Birkett, my little grass cutting escapade had, it seems been very very effective. The whole radiator was covered in thick layer of grass cuttings and the airbox was absolutely stuffed full of grass. No wonder I was going around Silverstone smelling of mown lawn! It was grass everywhere, how the thing didn’t overheat with so little airflow I don’t know!

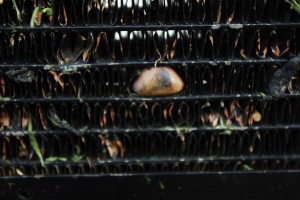
IMGP0607More concerning was that when we cleaned the grass out of the old radiator, it became obvious that we were even luckier. The grass was mixed with the usual tyre debris, but also there where some substantial stones and other hard sharp things mixed with it. Including this nice little pebble that is so firmly embedded that it had distorted the radiator cores. That pretty much settled the debate about trying to move the radiators to the sidepods. They are just too vulnerable up at the front.

More of that later. While we were in body prep mode we went over the new body moulding to remover the mould flash lines and key it ready for painting. This takes much much longer to do, than to describe and is one of the those jobs where one slip or accidental gouge can leave you with a lot of recovery work. Anyway after about 3 hours of scraping and sanding Duncan and I were nearly there. The flash lines are now gone and we are at the stage were we need to do a little defect filling before we can continue. So with the front floor off (gosh the car seems so much shorter when the front is removed) and the body prepped as far as we could go today (I’m out of sandpaper) we turned our efforts to the engine bay.

IMGP0611One of the the things that the regs mandate that we must have for 2009 is a catalytic converter in the exhaust. Cats are only really effective when running in lean cruise mode and in a race environment can be expected to have a very short usable life. Still MSA rules are MSA rules so we had to fit 1.5 KG of additional ballast. To do this we shortened the existing exhaust tube by about 6 inches and biiffed the cat onto the pipe. We’ve not welded it into place yet as I need to work out where the next stage is going. I’d quite like to add an additional silencer to help me pass the noise tests. but we haven’t quite worked out the routing yet.

So on to the re designed cooling system. I’d already sourced a Honda Vti rad which looked like it should fit in the side pod.

I chose the Honda unit as it cheap and freely available in standard form, but also because there is a bloke on ebay selling a thicker all aluminium “motorsport” version that I can upgrade to if I needs be.

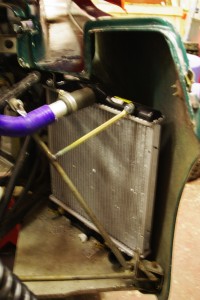
IMGP0615IT is actually very slightly over tall, but I think we can get away with it. It also came with outlets that match my current pipe work and very handily placed mounting points and hose exits. As such it didn’t take us long to get to this stage. The rad is mounted up on the side tray and supported on the appropriate brackets. We’ve even manage to get the top hose installed, and have a plan for the header tank. The current problem is routing for the bottom hose. By now Duncan and I had been at it all day and were tired and cold so we called it a day. We’ve a few bright ideas but right now we’re losing our objectivity (Each plan seemed to have an insurmountable fault) as well as the feeling in our fingers. Once the bottom hose is routed across the engine bay,it should be a simple matter of moving some wiring to drive the relocated water pump, cutting the inlet in the right hand side pod and making an Ali shroud for the rad.

Actually while were were making the changes we chatted about how much coolant capacity we were removing from the system. The pipe runs are probably 60% shorter than the old ones and the radiator is only 2/3rds the size. I guess we’ll be using a couple of litres less water than the existing setup. This means that the system has a lower overall thermal capacity, and so will heat up quicker. Hopefully this will not mean that it boil over quicker too. It should certainly be lighter.

The questions is “Am I trading weight for reliability?”. I’ve been lucky to get way with three lots of front end damage this year… which under other circumstances would have damaged the radiator and cost me the race finish, moving the rad to the side of the car should prevent this occurrence (the oil cooler I moved there last year hasn’t a mark on it … touch wood) However if the new system is not thermally efficient, over heating will also cost me races. Also moving the weight to the rear will change the handling balance ,will I now face horrible understeer? Questions… Questions. Hmmm The big boys would have a room of aero\thermo dynamicists figuring this out before trying it. Me I’ll suck it and see! :-)

Good job I’m testing in February, hopefully I can answer some of these questions then. It is beginning to look awfully close now though

Posted in Winter 2008 Rebuild | Tagged , | Leave a comment

The Engine is In

Coo I’ve never before been on schedule before Christmas.Engine In Place

A few hours of spannering by Myself and Duncan on Saturday saw the engine fitted, the oil and coolant circuits completed, and the majority of the electrics reconnected.

The new gauges were also fitted and finalized, and we also managed to change half the front suspension bushes

Currently, the following need to be completed before we can restart the engine.

  • Fluids fill.
  • Refit Airbox (although this will be delayed pending its repsray)
  • Fit throttle cable
  • Fit new cam sensor…. the old one had been smashed
  • Fit new driving sprocket and clutch slave cylinder.
  • Refit reverse.

Once the engine is in I can start looking at stuff that is less on the critical path, such as rubbing down and re spraying the bodywork. And fitting the new nose moulding.

This is leading me to think about moving the radiators. The front is very vulnerable and pretty much any frontal impact or damage will break the cooling system (got knows how it survived the smash with Stuart at Silverstone this year) . As I’m faffing around sorting out bodywork it would seem sensible to move the radiator to the drivers side pod and save a bit of weight before I re spray the beast.

Plus I’d quite like to complete the process before the test at Snetterton in February. That way if the car overheats I can easily revert to front mounted radiators before the season starts in March. The BDN, Gordon’s Griffins T5 Mission, and the ADR all have side mounted rads so it should be possible to get it working.

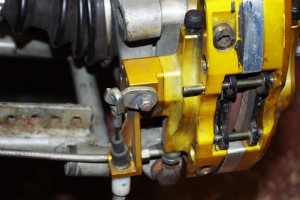
IMGP0604 The other thing we pondered was extending the operating levers on the rear handbrake calipers. This seems to be an easy way of gaining enough mechanical advantage to make them work more effectively. I lived in fear of failing post race eligibility scrutineering all last season, where we’re tested as part of our MOT compliance and a poorly operating handbrake will earn a DSQ.

Lastly the 750MC annual yearbook came out this week, and I’m mentioned in dispatches for the fight Neil and I had at Brands and my highest ever finish at Mallory (6th), having half the grid buried in various bits of scenery certainly helped, but a flying start and some hard driving contributed too. Always nice to be recognised :-) .

Interestingly I’m not suffering any enthusiasm lapse this year. normally the cold winters nights fettling leave me wondering why I bother. But last years success has left me keen as mustard for the restart. :-) .

Posted in Winter 2008 Rebuild | Leave a comment

New Instruments

New InstrumentsSo with the engine ready to go back in I’ve just got a couple of little things to do before I can start the fitting process. No 1 is to fit a couple of new instruments.

Last year I ran Tim’s Palm Pilot based Dashboard

It worked a treat, and gave me oil temp and pressure reliably, when the Palm itself was stable. However the Palm OS can be a little unstable and going round Brands prodding the reset dialog or declining the option to run a Hotsync cycle is probably best avoided, Also the temp and pressure is feed by the DL1 and I need to release those inputs.

So I’m going for some old fashioned capillary tube gauges for Oil temp and pressure.

I think I’ve proven the stability of the CBR1000RR engine so I’d rather use the inputs to log the suspension activity.

Hence I spent a little time making the new mini dash above.

In fact I spent quite a lot of time making two versions …. the first effort was coming along nicely until I picked the wrong hole saw from the box and cut a clearance hole rather than a mounting hole for the gauges, which on trial fitting promptly dropped right through. Hmmph.

Actually having completed the task I’m a little concerned that the nylon pressure tubes may be damaged by the heat in the engine bay so I’m going to wrap them in some heat reflective tubes. Once the pressure tubes are run I can then refit the engine, currently w

e are on track for this weekend.

After a few sessions running I may adopt the old trick of rotating the gauges so the the normal “nominal” operating position is aligned with 12 Oclock. That apparently makes it easier to identify that all systems are

normal at a glance as all the needles point straight up.

Last thing tonight was to measure the exhaust dimensions so that Tim can get a new one made up for his new CBR1000RR installation.

Posted in Winter 2008 Rebuild | Leave a comment

A Cold Day In the Garage but the Engine is Ready

2009 EngineReady for installation

Today, it was flipping cold in the garage, however not withstanding the shivers Duncan and I did manage to get a load of “little stuff” done, all of which is on the critical path to refitting the engine.

We finished fitting the new engine bay floor, fixed this time with Dzus fasteners, so 10 clicks and off she comes. It should make life easier for oil changes and mechanical access.

I also finished a few jobs on the engine, refitting the exhaust headers, cleaned the block and capped off the Air breather valves on the top of the block.

IMGP0577

I also took the clutch apart and checked the thickness of the steels and frictions. Many of them were a full .4mm above the service limit and all were well within tolerance. So I didn’t bother changing them. I had been concerned about the life left in it.. but it seems fine.

The only thing then left to do on the engine is fit the oil pressure gauge and warning switch sensor. This is fitted into the main oil gallery on the block, and then brought out o a T Piece at the rear of the engine away from the exhaust headers.

We also spent a good couple of hours completely stripping the rear suspension down to change the bushes. These are usually good for a season or two but we had detected a bit of play in them at the Birkett, so decided to change them all. They are only simply little top hat units so it doesn’t take long. but you do have to have all the suspension off to do it.

So the engines ready to go back in, and the drive train is ready to be re assembled/

Ideally I’d like the mechanical stuff done by the new year so that we can concentrate on sorting out bodywork before our unofficial RGB test day at Snetterton on February 14th.

Posted in Engine, Winter 2008 Rebuild | Leave a comment

2009 Engine Preparation

Engine ready for 2009

Well the engine has been out of the car for a few weeks, while I weld some dzus fasteners onto the bottom tubes of the engine bay. This is mainly to allow me to remove the floor more easily.

Currently I have to undo about 20 self tapping screws and it really kicks in the RSI in my wrists.

While doing the welding I did have a mishap with a stray welding spark, a drip tray of … lets call it “accelerant” and things got a little hairy there for a while with large flames burning merrily under the car’s fuel tank. However, we got it sorted out and it only cost me some eye brows and a few heat curled eye lashes.

Oil Temp Sender

So with regards to prepping the engine, I’ve changed the clutch and oil filter, refitted and sealed the sump and removed the water pump. Paddock chatter is that running an electric pump, releases some horse power. I’m not sure I see this is the case as the electric pump is driven from the engine’s alternator which also saps power, and that the energy is being transferred from kinetic energy to electric energy and back again so it is by definition less efficient than the purely kinetic pump. However I currently have both types of pump so losing one of them is surely a good thing. Plus I had no choice. I broke the pump drive taking it out. “Pink”…. went the sheared bolt.. “Oh it’s a left hand thread!” said I to Duncan…hmmm.

One of the things that I want to do this winter is put in a couple of mechanical gauges so that I can release the data logging channels to watch the suspension movements. So I’ve ordered a couple of Racetech mechanical gauges. Unfortunately the Oil temp sender “bulb” is quite large, so I had to make a little standoff on the lathe to get it to fit instead of the sump plug. I needed to space it out so that it didn’t protrude far enough into the sump to Jam the swinging pickup. This took a while plus I learned thread cutting on the lathe along the way.

Cool. Just waiting for some daylight this weekend and the engine can go back in

Posted in Engine, Winter 2008 Rebuild | Leave a comment

Winter Plans

It seems class B is going to get busy next year.  Tim, Judy, Rob Grant, Dan Bromilow and  several others are all swapping to class B.   This means that life is going to get much more competitive and I don’t really expect to finish as close to the front as I have done this year.

This year has been fantastic… we’ll see how next year goes  but Idon’t expect to win any pots.. Tim is usually at least half a second ahead of me with a class C engine, that could well be extended with the extra power of a class B
As for winter plans,  
  • I’m going to try and take some more weight out of the car and me.
  • Fit some analog instruments, so that I can release some channels from the logger
  • Sort out the bodywork,I’m really fed up with my car being the most skanky on teh grid, so she is going to get a new front end and a full respray.   
  • All the suspension bushes need changing
  • The engine will come out and go to Andy at AB Performance for a refresh
  • New regs mean that I have to modify the exhaust to fit a catalytic converter.
  • After that we’ll see how much time I have for other modifications
Posted in Winter Plans | Leave a comment