Nice to be behind the Wheel Again

Nice to be behind the wheel again!

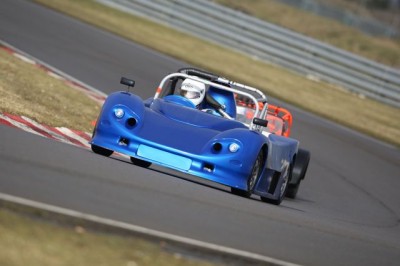
After the snow and ice and general tribulations over getting the car ready…. or at least all one uniform colour and ready, I can report that we had a very successful day. :-) and that I had a great time.

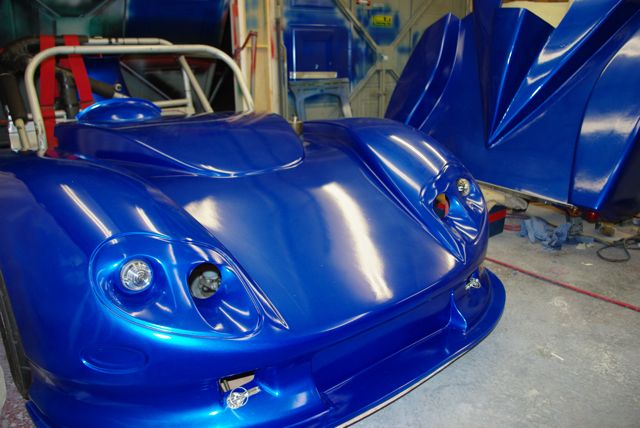
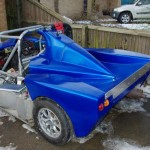
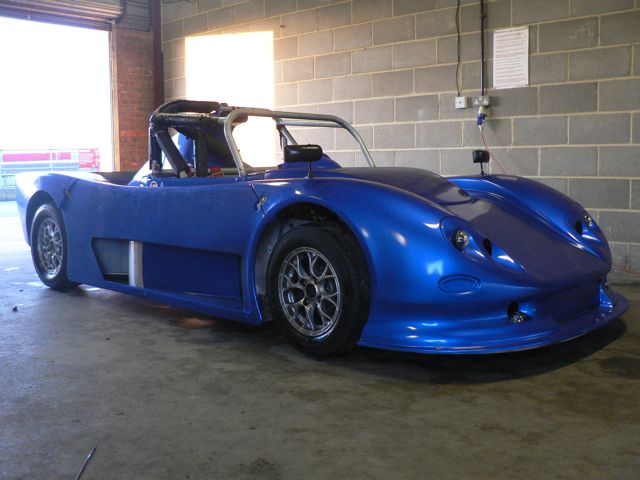
The only changes we had made to the car this year were to turn it blue, and move the coolant radiators to the side pods.

Moving the coolant to the sidepods had two concerns, firstly I was worried that the reduced mass at the front would give me nasty understeer, and secondly I was a bit concerned that it might impair the cooling efficiency.

On the first I needn’t have worried, the integral splitter in the new front bodywork is probably a bit more efficient than the old one, and the car’s handling is largely unchanged from last year.

On the second point, the cooling efficiency is impaired, and in the morning on a very relatively cold day, I was seeing water temps in the 100+ territory, at one stage my coolant temp warning light, which illuminates at 115 degrees, came on. I also had some odd behavior when accelerating as the temp would jump from 91-105 in about 3 seconds. This later proved to be airlocks in the system, which it self- resolved as it cooled down after lunch …. we added a full 3/4 ltr of water.. That is some airlock.

Andy Bates suggested blocking off the exit from the front wheels, as this may be disrupting the airflow down the sides and into the sidepods, we did this using a handy cardboard box, and that did get the coolant temps in the 80s – 90 range. However the same trick didn’t stop the oil from getting to 130 degrees after ragging the arse of it for 15 laps. So there is still some work to be done on cooling and aero. I have to admit I need to build my base knowledge on aero a bit as at the moment it is all terribly unintuitive and I need to educate myself to think about boundary layers, separation turbulence and vortices.

Considering air ambient was in the region for 5-10 degrees, come June at Brands she is really going to struggle, so there is some more work to be done on the cooling. I suspect I’m going to end up remodeling the side pods to have a proper Naca ducts in the sides.

Once we cleared the airlocks, and blanked the sidepods the water temps were controlled and I was having a ball :-) .

I just about worked up up to trail braking from under the bridge in the Esses, but I’m not quite brave enough yet. Elsewhere I felt Richies was good, Sear was variable ( i never get it right), The Bomb hole and Corum were very good. In fact I felt I was right on it in Corum by the end of the day. and the Chicane was a bit variable.
The morning was cold and frosty and late rain the previous evening followed by frost had left the paddock sheet ice. I ended up sprawled on my arse just walking between the garage and the motorhome.

The track was extremely slippery, and after one injudicious application of throttle I managed to lose the back end and did a full 720deg double spin up the main straight. I also had a half spin at Sear, due to locking a rear brake, a tweak to the balance soon solved that. other than that I was a good boy all day.

The track dried and rubbered in, and really became extremely grippy by the afternoon, and it turned into one of those great days, when the surface is dry and grippy, the track is emptyish and the air is cold, so the engines are just purring :-) . Perfect driving conditions

Retrospective analysis of my data logging (you’re not allowed timing on a trackday) showed that I would likely be on row two of class B and top 10 on the main RGB grid.

Tim however seemed to be a bit quicker than me everywhere, and now that he has a class B engine no doubt will be perennially 2 seconds ahead of me again. And I’d just closed the gap to under a second . Sheesh! :-)

Overall the afternoon was fantastic. The RGB cars were pretty much the fastest things out there bar one or two well driven Caterhams (Rob’s included) and a Radical Clubsport. So we spent the whole day gobbling up pretty much everything else, including a couple of big Porkers. I’m always very careful to follow the trackday rules… as I still remember being a novice.. tis fairly intimidating to have all this race machinery flashing by, but even so its hard on the novice in an open pit lane session.

Top Fun, more so because towards the end of the afternoon the track cleared a bit (apart from the odd gaggle of Bookatrack Caterhams running in convoy together) and you could get three or four laps of seemingly totally empty track. Paradise :-)

In one particularly memorable session, Tim, Colin and I were running in very close proximity at pretty much race pace with no one else around, We were obeying all the rules, but we each, apparently independently thought “We’ve got to stop this or we’ll get a good telling off from the Bookatrack folks” :-) It was a nice pre season moment though.

We also weighed the car and if Steve’s scales are moderately accurate, she is a further 10KG lighter coming in at about 490Kg without fuel. Cool

Top fun, and a car in 1 piece ready for Snett in a months time.

:-)

Oh and everybody commented on how nice the colour was and how shiny she is :-)

So overall I’m pretty pleased and I’ve some stuff to sort out before race day, not least the cooling… but at least I haven’t forgotten how to drive her over the winter.

And I think Josh needs to be looking in his mirrors for Tim approaching fast :-)

Posted in Snetterton, Testing | Tagged , , , | Leave a comment

The Big Tidy + Extra Cooling

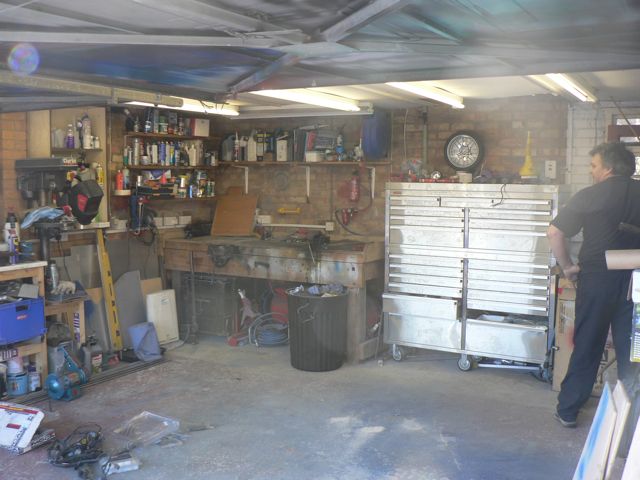
This saturday Dunc and I spent half the day clearing the garage of 1000 variable types of sh*… erm rubbish. Duncan felt that the occasion of my work bench being clear occurred so infrequently that it deserved recording for posterity. I do sometimes worry that my local dump will prevent me from getting rid of my rubbish assuming that I’m some sort of trader.

Anyway after the big tidy, we set about getting the car ready for the Snetterton meeting in a couple of weeks.

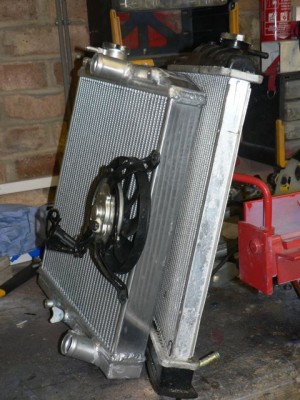
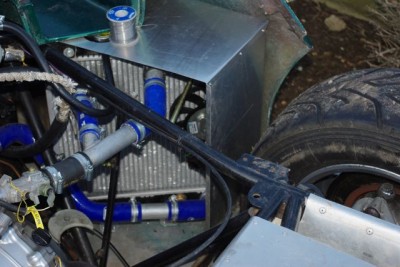
Number one on the agenda was cooling system. I’d bought this all aluminium radiator off ebay for the bargain price of 80 quid. You can see from the photo that the matrix is fully twice as thick as the original(although sadly it is not a double pass version) so it should help in the cooling stakes. After spending some time fitting the beast Duncan and I filled her with water and ran her up. Woomp instant overheat, Well not quite instant… but you get my drift. Airlocks Galore!

I know Tim had a pretty hard time getting the air out of his CBR, so I expected this. what i didn’t expect was that it was going to take two days of random fiddling, and a move of the expansion tank to clear the airlocks. Getting the expansion tank a full 18inches above the head before the airlocks cleared did seem a bit excessive.

I do have a plan using a different Thermostat housing to help though, and I’ll revisit the air bleeds around the system to try and bleed any inverted loops back to the header tank.

However once sorted out. The new rad plainly made a difference. i ran the engine up and the water temp climbed slowly to 96 deg C. I then switched in the fan, and the temp just dropped and dropped. Eventually it established a base temp idle at 72 degrees. And I could have left there all day and it wouldn’t have moved. Cool, considering the fan only covers about 20 percent of the matrix then I’m hopeful this will fix the water cooling problem. For the oil cooling Dave Turner suggested that I might need some turning vanes inside the side duct to direct the airflow up to cover all parts of the oil radiator. I’m told by Think Automotive, that oil is “funny stuff”, if a part of the cooler is shrouded from the airflow, then the oil here us hotter, and therefore thinner. What then happens is that the majority of the oil moves through the hot area and not through the cooler area that is in the airflow, but full of viscous,cooler, slower moving oil. Unsurprisingly the majority of oil is then not cooled by the cooler and the oil temps stay high. Nothing funny about that Sounds like physics to me. Anyway If I can’t fix this problem I’ll just stick another water rad in that side and move to a Laminova cooler.

Incidentally I was at Powertec today, in preparation for getting the car rolling roaded. Powertec are a spin off from, and share premises with Radical, and so in their yard was a fair stack of bent Radical bodywork… So I paid special attention to the air ducts. Radical use side mounted radiators too, with exits from the front wheel arches feeding the rear intakes. Just like mine. Except

1.The ducts are much deeper than mine, and never approach the main surface of the side pod between the exit from the front wheels and the entry to the radiator duct. They are always at least four inches deep. Therefore (I surmise) the cooling airflow doesn’t emerge beyond the main silhouette. Essentially the duct is closed, although it appears open.

2. Inside the front section behind the wheel is an aerodynamic vane, which separates the flow from the high pressure area behind the wheels, into two main flows. The inner flow is plainly intended to become laminar, and to move along the inner face of the duct, the outer turbulent flowis injected fairly rapidly into the exterior airflow.

3.The entry to the rear radiators is probably 30cm further forward from where mine is.

So I’m guessing the inner flow moves along the open duct, adhering to the surface profile, whereas the outflow generates turbulence beyond the face of the bodywork, which effectively seals the inner flow in place so that it move directly into the radiators.

Worth knocking up a moulding in the long term to test this idea.

In the short term I might just make some simple ali turning vanes and airscoops to see if this helps. keep the temps down.

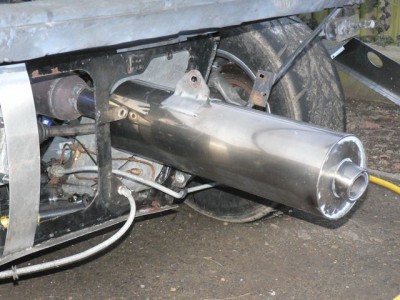
Andy Bates over at AB Performance lent me a stock titanium exhaust Can from a superbike. He mentioned that another of his customers had found it quieter than a “Race” can from an aftermarket fabricator. I’m sure that must be the case as Mr Honda/Yamaha/Suziki has a much bigger budget to get these things right than anyone in the aftermarket. I’m also pretty sure they wouldn’t be giving power away in the ultra competitive BHP driven superbike market if they could help it… so it is worth testing.

So I made up a little adapter and a slip fitting that looks like this. And we ran up the engine for a back to back noise test. Following strict MSA test guidelines (well everything except the need to be in the middle of a playing field) so 7,500 Rpm, 0.5 Meters away and 45 deg from the center line of the exit, The stock can delivered 100dBa whereas my race can came it at 106. The stock can would mean I could pretty much get on every circuit in the country without worrying, whereas my race can needs to be repacked after every race. The stock can doesn’t need repacking as it’s internals are all steel.

So while the car is at Power Tec they are going to do a back – back test and If the stock can is not losing me power, or even if it is only marginal loss, I think I’ll take that for piece of mind. Last year I lost 2 test sessions and nearly one entire race weekend to failed noise tests. Besides it is very bling, even with a light dusting of Subaru World Rally Blue overspray :-) Plus guess what… it’s lighter :-)

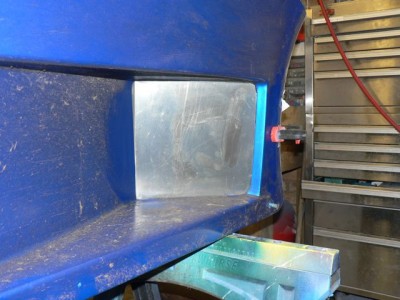
The next thing we did, well actually it was the first, but i’ve only just remembered was Duncan swapped the cardboard intake shrouds for nice Ali plates which we bonded in place.

Lastly I finally took my life in my hands and drilled some large holes in the side of the Winnebago. These were to fit the new GH Awning onto the side. The Patio Awning by the main door is just slightly too small, and it doesn’t keep the car dry overnight, plus it rattles like nothing on earth and keeps me awake. So about 6 months ago I bought a second hand (although never fitted) awning from ebay, and this weekend I finally screwed up my courage and fitted the mounting plates. At 5m by 3m its pretty huge and heavy, therefore, so far I’ve only got the mounting plates fitted. Next weekend with the help of a few ladders and burly chums we’ll get the awning itself fitted. Assuming it doesn’t pull the sides off the bago, which seem to be made of 4mm ply and polystyrene.

Long Term I’ll get some sides for it, and then we can work on the car in the dry. Which is handy for places like Snett, Cadwell and Anglesey

Posted in Winter 2008 Rebuild | Tagged , , , , , | Leave a comment

Avoiding the Cowpats!

If I may quote Edmund Blackadder “The path of my life is strewn with cow pats from the Devils’s own satanic herd!”. Well the path of this respray seems to have been long and arduous and indeed strewn waist deep with steaming piles of demonic manure!

However today, for once I avoided sinking knee deep in the nasty stuff, and managed to tip toe round the worst of it.

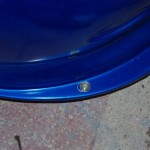
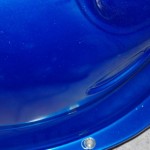
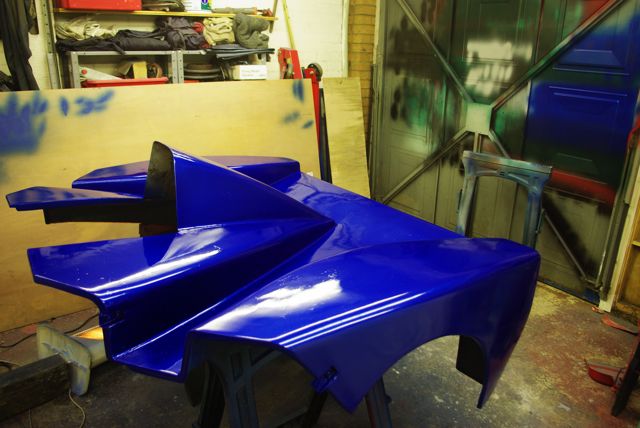
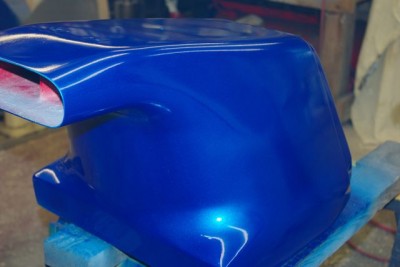
Enough of the dungy metaphor, lets just say that today was pretty successful, as you can see from the index picture above I managed at long last to get the last sidepod primed, flatted and sprayed blue. It’s got one or two little sags in the clear coat, but nothing to be too worried about, given the state of the underlying surface. Anyway it’s nothing a suitable sticker won’t cover.

At various times while coats of paint were drying I got on with a bunch of other little jobs from the to-do list, and this included fitting the right hand sidepod I painted yesterday.

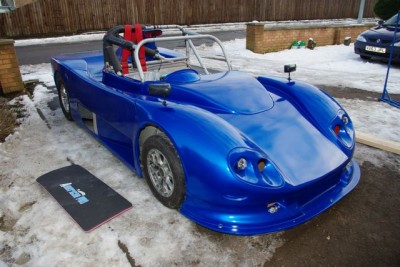
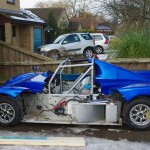
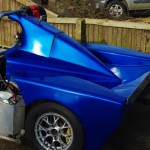
So the car now looks like this! (at least from one side)

The angle is a bit of a cheat to make the most of the light and hide the missing left hand pod,from the other it looks like this. which I always think looks like one of those cutaway drawings that show things inner workings.

I got the rear frame fitted, the electrics connected, the whole car tidied a bit, the rear floor screwed in place, the front floor screws trimmed and after the photos were taken nearside body clips mounted to the finished side pod.

Basically I think one or two good evening’s work will see her ready for taking to Snett, providing I can corner weight it while I’m there in one of the garages. I now need to repack the exhaust, make a bit of front wiring loom, and mount the shift lights/palm display up in the binnacle and I’m pretty much done. Phew!

There’s still a bunch of stuff to be done before the first race like fitting headlights and race numbers and front tow eye, for a start but If I can bring her home in one piece from Snett I will, I hope no longer have the skankiest car in the paddock!

So if you see me at Snett please don’t run into me ;-) and I’ll try not to bend her (touch wood).

I’ve got to admit, that she looks pretty good if you’re not close enough to see the patina!

Posted in Winter 2008 Rebuild | Tagged | Leave a comment

Rapidly Running out of Time :-(

Well we are now only 6 days or so away from the first outing at Snetterton and the liberal “flump” of snow delivered to Eastern England has really screwed my timetable up. At some times this week I couldn’t even get out of the house to collect some new more high build primer, let alone do anything else.

It’s been far to cold to do anything remotely painty for most of this week, so my side pods still looked like they had been attacked by an slash murderer. One night in the week I did get the right hand side pod, flatted back, repaired, and re primed. It was only when I had finished the final rinse before the colour coat was applied did I notice the small bit of glinty silver sticker right in the middle of the side. AAArgh!…. damn, damn damn! Is this painting fated never to be finished! so I had to start again…. wereupon it cracked…. Its enough to make you weep!

Anyway today the bleary wintery sunshine raised the temperatures just enough to get that side pod painted, and you can see it in the index photo above. Considering it’s a very cracked and broken surface it doesn’t look too bad, and this time I managed to spray the clear coat without any runs which at least is one plus. I also got most of the other side pod primed but this had again cracked in a couple of places. This time only one or two places cracked so I should be be to repair it tomorrow, sunshine willing, but I’m really up tight up against a deadline now!

Ironically, I’ve just completed an article for the 750 Motor Club magazine that speaks to the importance of preparation. I’m in danger of going to the circuit next weekend in the least prepared state I have been. hmmph.

Duncan manfully cracked on with the front bodywork, while working outside on my snow covered drive. Such dedication to the cause!

This is now finished, the front floor is linked to the bodywork using these natty little 1/4 turn fasteners which are positioned around the nose. All I need to do now is fit the shiftlights (double sided tape) and bolt on the strike plates for the over centre latches.

While he was working at the front of the car, and in between fitful bouts of swearing at the bodywork I got a few things done at the back of the car.

These included.

  • Running the engine, and checking it all out
  • Fixing a slightly weepy top hose
  • Bleeding the brakes and clutch
  • Transferring the wing mirrors from the old front bodywork to the new. These will be painted to match\contrast with the body, but probably not before the test day.

So bar a general tidy up & clean and one or two little jobs like re pack the exhaust the car is now mechanically sound and ready for the test day. It’s just the damn body work and its associated jobs that are yet to be resolved.

The MUST jobs for the test day are now listed below. I’ll try and get most if not all of these done tomorrow. I really don’t want to be carrying any of these into next week as I’ve a few full days at work which will mean lack of garage time in the evening.

  • Exhaust:
    • Recheck and repack
  • Engine:
    • Change Cam sensor
  • Engine bay General:
    • lube chain @must
    • Screw up rear part of Rear floor
  • Chassis:
    • Corner weight it – get scales
    • Reset RR Spring setting
    • Check wheel and hub nuts
    • Check tyre pressures
    • order dsuz fastener fitting rings
    • give it a general clean and tidy
  • Electrics and ancillaries:
    • remount shift lights on new bodywork
    • Move Palm
    • check video recorder operation
    • make new front loom
  • Bodywork:
    • rub down side pods.
    • Order new Dzus fasterners and retaining circlips for front floor
    • Paint sidepods and refit
    • grind off screw projections on front floor
    • Fit rear frame
    • Fit New rear clips

No matter what the car must be finished by Wednesday at the latest, as I’ll need to collect the trailer and Winnebago on Thursday and Friday nights, and travel to Snett on Friday.

There’s just so much left to do, I really need for Sunday to be warm dry and very,very productive.

The other thing that arrived this week are some natty little headlights which I got from ebay.

These are from Streetfighter spares, and are actually joined together in a double housing, but they should be easily separated for fitting to the car. Now that will definitely not happen before the Snetterton Test

Posted in Winter 2008 Rebuild | Tagged | Leave a comment

Some Other Stuff & Some Moore Paint

Duncan and I cracked on today in a bid to get the car ready for the test at Snett which is now just 13d 13h and 13 minutes away.

We got a fair few sundry items ticked off the to-do list. These included

  • Tension chain
  • Empty exhaust ready for repacking
  • Duncan made and fitted both the main front floor and a spare.
  • Fit front indicators and front body clips to nose section
  • Wet and dry off some overspray from a repair on the nose where I nicked the paint
  • Polish some of the front wing were the overspray was
  • Fit Front Binnacle
  • Fill, paint prep and prime both side pods.
  • Weld in front mounts on the support frame for the clip mounts
  • Fit rear (non gurney) flap
  • Fit rear lights.
  • Tidy up an issue on the rear suspension where the RR wheel was fouling slightly on the upright

Sounds pretty successful huh? Well we had a few trials and tribulations along the way.

Firstly I’ve used clear glass front indicators as I think they look nicer than the yellow ones. the plan is to use yellow coloured indicator bulbs. Unfortunately these indicator lenses are actually reversing lights and oddly much shallower than the normal indicators that you can just see in the rear bodywork in the main pic above. I think I can fix this with some LED indictors although I may need a ballast resister or two.

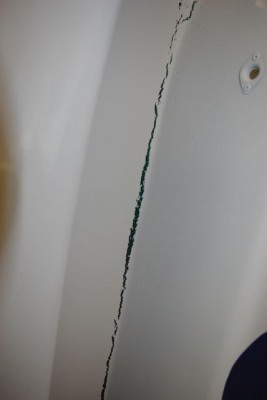
By far the main problem we had was that the cellulose primer “cracked” and split on the side pods. We think this was caused by a lack of mechanical key (although I was very thorough going over the whole side pod with 600 grit wet and dry, perhaps I should stick to 400) and the cold conditions causing differential drying as the solvent evaporated These even occured when we dusted the primer on. The result was that the whole surface was split by cracks such as these. In the end after a session of re spraying it and watching it crack again before our very eyes, we decided to cut our losses, and let it harden. Tomorrow I’ll flat it back around each of the cracks and respray. Given the time pressure I’m under I don’t need another paint prep and prime cycle… but I plainly I can’t leave it like this :-( .

Other than that it was a moderately successful day we got most of what we needed to done…. just not as much as I wanted too :-)

Anyway to cheer myself up heres some pictures of my painting that did work :-) .

Posted in Winter 2008 Rebuild | Tagged | Leave a comment

On The Subject of Paint

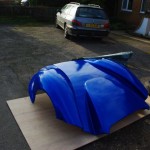
As you can see from the index picture below, I’ve cracked on and got the rear bodywork done.   In fairness it looks a whole lot better than it did before I started  but to be honest  I right royally  screwed up spraying the lacquer coat.  1 coat  lacquer is a bit tricky  to get right and lets just say this time I didn’t get it right. in fact I got it wrong.. very wrong indeed.

Basically I applied it much too heavily. I got over confident and didn’t dust it on first.  As a result I’ve got quite a few runs and sags…. Nothing that wont rub away with a little (lot) 1200 grit wet n dry, once its gone properly hard.  But I take pride in trying to get things right.  and here I got it very wrong, undoing in the process a good deal of the work of the last few evenings :-(

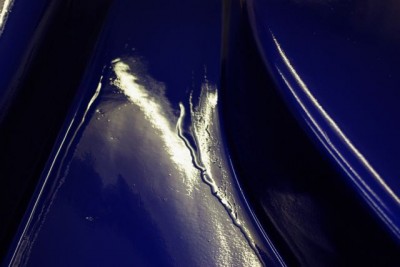
Here you can see the worst of it, the lacquer has run off the vertical surface to the right and pooled on the rear body work… worse of all the heavy concentration of solvent attacks the paint and primer below and you can just see the paint cracking.   The moulding is complex with lots of right angle surfaces so it is very difficult to spray, and this face was in shadow so I had difficulty judging how much lacquer I’d put on…. answer: too damn much.  ARSE!

Duncan will insist “Hey its a race car”  (oddly usually in a Jewish accent) and I’m sure it passes the race car test … looking good at 70mph 70 feet away… But I know I screwed it up.  ARSE!

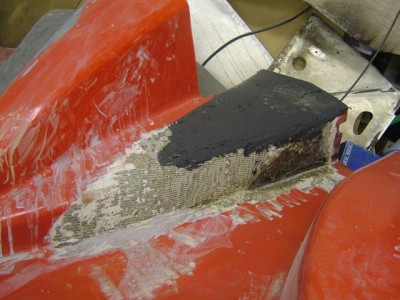
But given that this bodywork once looked like this  after the fire at Cadwell Park in 2004 I guess  I can live with a bit of poor paint lacquer

Still against this background it was very nice to read  the complementary  comments from you anonymous folks on the front bodywork that I did last weekend… thanks for that, just what I needed

A couple of people have emailed me recently to ask what sort of fancy system I use for painting, well the answer is actually “I don’t.”

It’s simply a compressor, a Sealy spray gun, and paint.

I’ve got a decent size compressor (best tool I ever bought) and a 70 quid  gravity fed HVLP spray gun from my local motor paint factor. The compressor is a fantastic bit of kit  (its one of these http://www.machinemart.co.uk/shop/product/details/quiet-run-air-compressor/path/ultra-quiet-air-compressors) and I paid £350  for it in a managers sale) its brilliant, runs quieter than a fridge (so much so I tend to forget and leave it on) and runs my vast array of air tools.

Worth every penny,  in fact would have been worth every penny if I had paid full price.

But you could do just as good a job with an £80 quid unit from Aldi… it will just be a whole lot noisier and would need a water separator

I used standard upol body filler and rubbed it down to a decent finish using 150 then 300 grit wet n dry, then I use upol TopStop to fill the pores in the thicker filler.  Up close you can see some of the heavier scratches from the 150 that I missed when going over it with the finer stuff.  Next time I’ll  finish with 600.

Then I  wipe down with panel wipe and clear the dust with tack rags (again both available from your local paint supplier)

Then I sprayed a couple of layers of standard cellulose based high build filler primer…. I’m learning that you can spray this really thick and provided it hardens properly it will cover a fair few sins. I flatted this off with 600 grit used wet, wipe down and de dust again

Then a few layers of polyester base coat… this you don’t flat off ( or even touch it) so avoiding runs and sags is paramount… hence start with a dust coat to give the surface some grip, and then a couple of heavier coats to get a nice finish and even coverage.  If it does run… flat it back and respray the colour again

Then 1 pack clear coat lacquer on top.

The key here is that none of this system uses “2K” or two pack paint.  That stuff uses a iso-cyanate (read superglue+cyanide) based catalyst and I don’t fancy poisoning myself or the neighbors.  You really need an air fed mask positive pressure mask and full body coveralls to spray that stuff, its pretty nasty (its even absorbed through your tear ducts and skin) .  As spraying is fairly heavy on air use  the air fed mask would need a separate oil free compressor, a separate air line and it needs to be outside the spraying area so that it doesn’t feed you compressed poison from the fume laden atmosphere.   Too much faff, too much by half.

Although some pros say you can spray two pack occasionally with just a good quality vapor mask  I’m not taking the risk. And I’m particularly conscious of my neighbors.  If you’re spraying in a barn in the middle of Salisbury Plain I guess you could be less precious, but I’m taking no chances.

So using only 1 pack materials, means I can spray in my garage using just a decent 3m vapour mask , and wearing noting more restrictive than my normal oily jeans.

I tend to paint the panels separately as my car only just fits in my garage, and I need working room around them.

So nothing special, but there is probably 5-10 hours worth of prep before you get to good bit of chucking colour around.


Posted in Winter 2008 Rebuild | Tagged | Leave a comment

Painting the Front Bodywork

Today Duncan and I did, lots of fill, sand, stopper, flat back, topcoat 1, topcoat 2, and gloss coat.  We have no fingerprints left  the air is filled with the heady scent of paint.

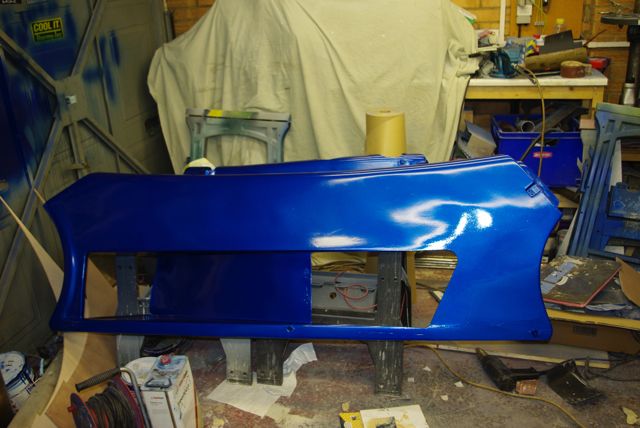
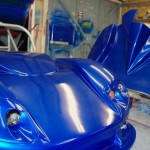
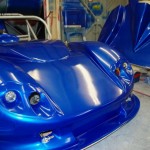
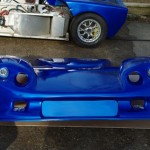
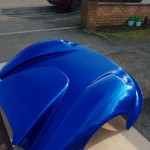
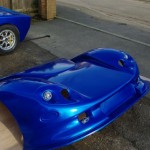
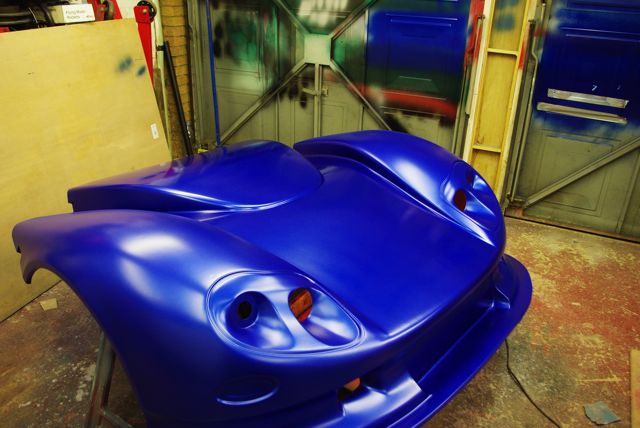
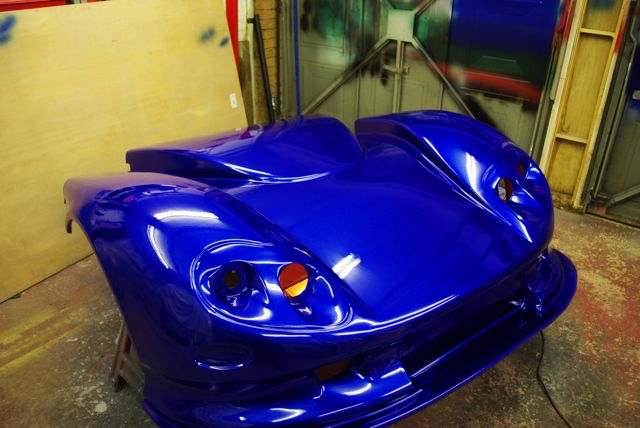
But we have created this!  Now be aware that the colour is slightly darker than reality  as my camera’s relation to the blue/white balance is a bit off.  But the shine is all real… and all our own work.

The picture above was taken before the lacquer was applied, and below is the “after” shot

Unfortunately the rest of the car will look nowhere near as good as the panels are all star cracked and broken.. but at least the front looks nice :-)   I am most distinctly well chuffed.

Posted in Winter 2008 Rebuild | Tagged | Leave a comment

Time to Start Chucking Paint Around

This entry is in reverse order, as I wanted to use this rather spiffing pic of the newly painted airbox.

As I said before I’m trying to get the car to be all one colour this season, (I take a bit of good humored stick for turning up to race looking like an old for Cortina with each panel a different colour). So anyway this years nominated colour is Subaru World Rally Blue (paint code 02C, P60322). The first thing to do was the airbox, as I had previously stripped the old paint off it, and I spent a good deal of time on Saturday and Sunday, filling and flatting it to get read for painting. It then went through a cycle of high build cellulose primer, then 2 x 1 pack acrylic top coat and 1 x clear lacquer. As you can see above it is by far the best bit of painting I’v ever done. And I’m quite chuffed with it. Also it was imperative that I get it finished this weekend. February the 14th is getting very close now, so I wanted the airbox refitted to the car… and to do that I had to get it painted.

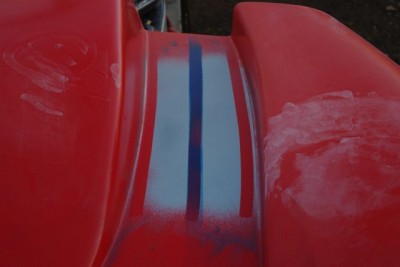
On the subject of paint, the plan it to livery the car with a couple of painted silver stripes on the blue base coat., as per this test section…. however time will tell

If I have time to do this before the season is upon us. The silver and blue together really makes each colour sing, although you can’t tell in this pic.

I can refit the airbox this week, and then the engine bay work is complete bar a few odds and sods. Complete? Yes indeed a new chain wheel turned up yesterday from B&C Express who make them to my specification for very reasonable prices. I could then set about refitting the drive line, so a new sprocket, newish chain, new front sprocket, reverse gear, Clutch slave cylinder, new engine bay wiring and so forth all went together to complete the last major incomplete system… the drive line.

While I was taking apart the diff, Duncan was doing another one of those jobs which he is much better at than I am… Aluminium fabrication. He spent two or three hour banging away on various bits of Ali to produce the inlet tract and protective shroud for the new radiator. A fine piece of work. Once I’d completed the engine bay I cut the appropriate hole in the right hand side pod… and voila a new air intake system to feed cold air from the high pressure area just in front f the rear wheels to the new radiator.

In order to clear the garage for spraying the airbox I fitted the rear floor, put on the wheels and dropped the car off the axle stands. This is always a moment that indicates the winter work is coming to an end. And each year (having got used to the car being high in the air I’m amazed how low it is when on the ground, then when I get to the paddock I realize that it is much bigger than many of the others.

However it was nice to rollout it out of the garage on it’s on wheels and sweep up the 1000 of rivet mandrels and cable ties that had found their way underneath.

Major jobs still to do are corner weighting and chassis alignment, Spray the other four panels on the car, fit new headlights, fit new body catches and Dzus fasteners all round.

Finalise and fix front floor… so still a considerable amount of time pressure before Feb 14th.

Then before the race season starts, reverse, handbrake, head lights, rain light etc etc

But by next weekend she’ll be drive able which is a huge plus :-)

Posted in Winter 2008 Rebuild | Tagged , , | Leave a comment