Resin, Resin Everywhere!

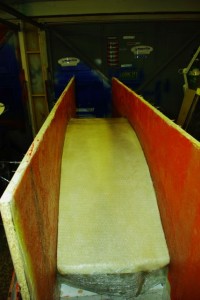
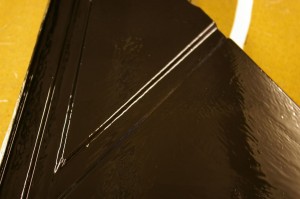
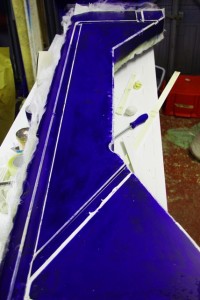
IMGP1370Not much to say today except I got a couple of layers of gelcoat and CSM laid up on the buck for the  side pod ducts, as you can see the under-layer of gel is orange, and (as you can’t see ) the top layer is canary yellow.  the white section in the middle is a layer of coremat coated with some CSM. Today I also learned that laying up a moulding on a vertical surface is also a challenge, as at one stage the entire sheet of wetted out matting on one side began to peel away, and before I could stop it, pretty much the whole side had collapsed into the central tunnel. Handling wet CSM is not unlike trying to do origami with damp toilet tissue… a bit tricky.

But with 2 layers on the sides and 3 layers + 1 of coremat on the central tunnel I’m about half way through this layup. Dear FSM I hope it releases!

Not withstanding my little reference to “The Ancient Mariner” I’m beginning to see why having moulds made for a complete car is such an expensive and time consuming process (my friend Tony had been quoted 10,000 GBP for his Wolfe).  This single mould is currently eating vast quantities of CSM, gelcoat and resin and constant stippling has made my RSI kick in.  This is nothing like the normal pot of  3 or 400 CCs of resin that we amateurs normally use.  Each layer of matting takes a litre of resin, and about 2.5 m x 1m of CSM. Then there are disposable gloves, mixing pots,  brushes, acetone, gel coat, pigment, & coremat etc.  No wonder my daughter’s stock greeting is now “You smell!” (of styrene I might add), plus goodly Mrs M is also being terribly tolerant of me traipsing GRP fibres around.  Thanks Katie

Overall it’s still a pretty cheap, if very labour intensive)  process.  Yes Ok pattern & mould making is slow, labour intensive and smelly. But i did calculate that the second sidepod floor I made in the mould at the weekend cost me about £5, and saved a Kilo in weight. To make the comparable part in Aluminium is >25 quid, and of course not repeatable to the same degree.

I am glad that after this one I only have 1 front and 1 side floor left to go… very glad.

Of course I do have the problem of working out where to store the moulds from now on . hmm

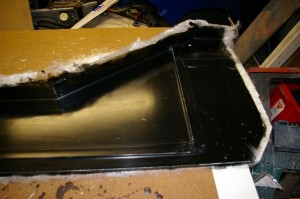
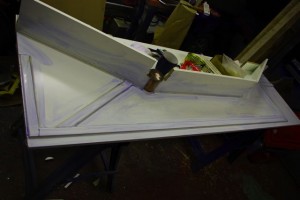
And on that subject, while musing how to protect the important face surface of the side floor mould while it was in storage I had slow brain wave, well more of a ripple really…. refit the unwanted black moulding as a surface protector.   It does after all fit!….. Well Duh! Adrian  it only took you a week to come up with that idea.

Right I must get on and order some more glass tissue, CSM, resin.. and mixing cups.. oh and brushes…..

And acetone……erm and….

Posted in Winter 2009 Rebuild | Tagged , | Leave a comment

Yet More Mouldings

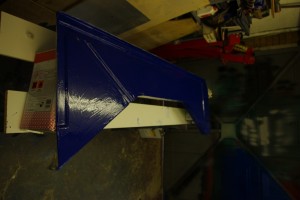
IMGP1365Many hours today again spent breathing styrene… which I have to say I rather like. :-)

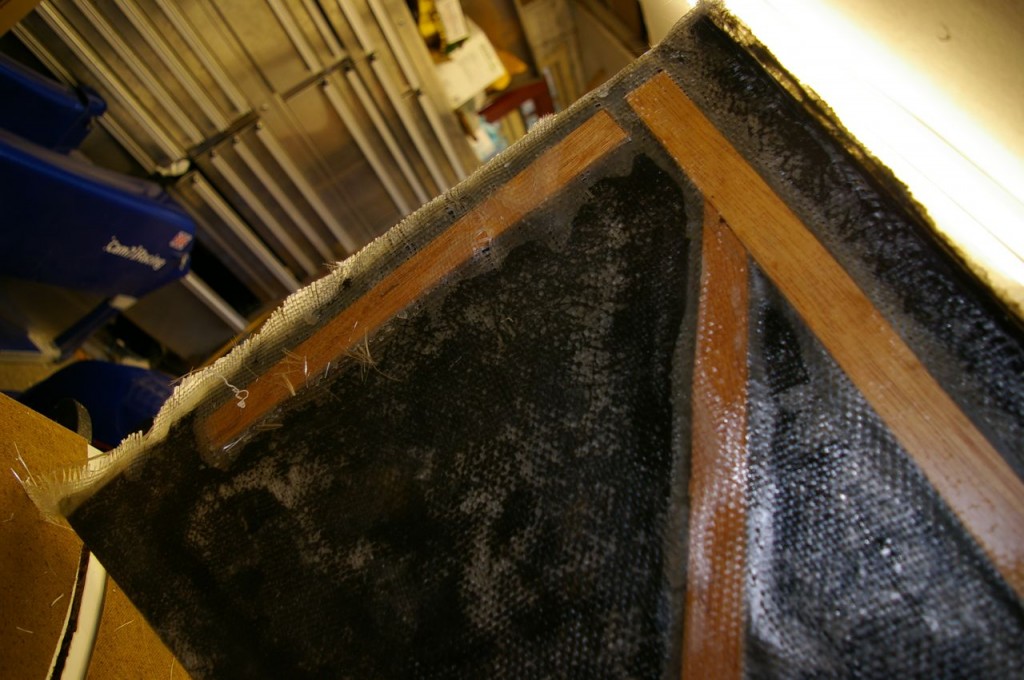
Firstly we made another floor in the right hand side mould. This time, instead of using ply as the longitudinal stiffeners we hadded two extra layers of CSM, and some 3mm coremat, before finishing off with Roven Wovings.

So there followed the usual routine of  wash down the mould, rewax, and re wipe the “sticky” bits with PVA release agent.

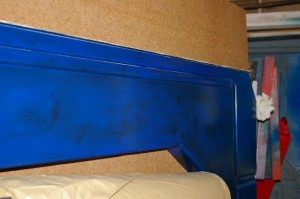
Before laying down the CSM we also laid down some extra 1″ strips of tissue into the strengthening channels to try and avoid the problems we had with the first moulding of air bubbles in the strengthening channels.  We also did this one in blue rather than black, and I’m pleased to say that our extra bit of experience showed and the whole thing went down much better.  Just before writing this blog entry I’ve just been into the garage and released the moulding and am happy to report that  a) It has  popped off the mould nicely, and b) there are no weakspots or gel coat bubbles. :-)

Out of interest I also weighed the old aluminium floor and the new GRP one,  I knew the new one was a bit light but it weighs just  1 Kilo.  The aluminium one weighed in at 2Kg,  its always nice to save some weight.  :-)

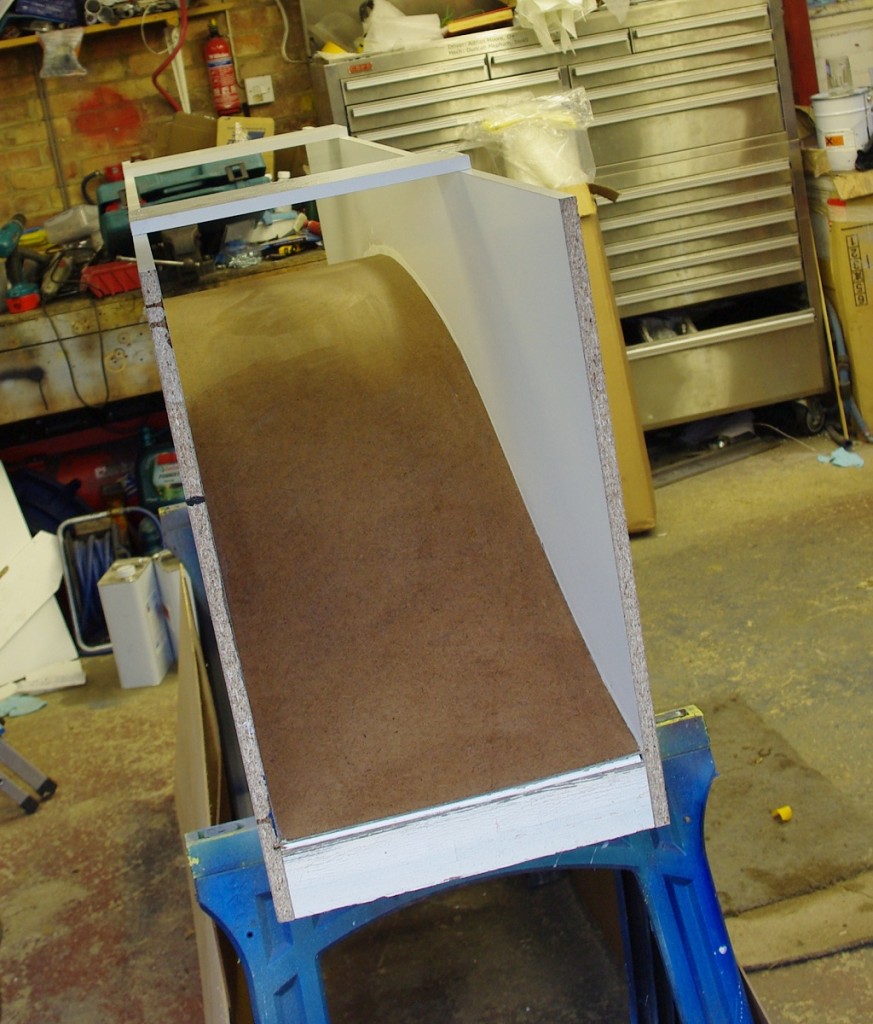
IMGP1366IMGP1368With the car out on the drive the other side of the garage was devoted to Duncan working with his favourite material… a bit of tree wood.  He was busy making a buck  for the new side pod air channels.   We’ve designed this (on the back of the proverbial fag packet) to be bi-directional.  We should be able  to use  a single mould  to lay up either side pod channel.

To  make this buck we’ve come up a nice curvy shape that follows the side of the car, it’s a bit like the plan form of a formula ford.  This we transferred to a hardboard template, and that in turn we used to route out identical channels in two sheets of Contiboard.  While I was making the right hand side floor Duncan then joined the 2 sheets of  Contiboard with some substantial blocks, and a another sheet of hard board.  This results in a  U shaped channel that matches the shape of the channels in the car.

The hardboard was then stabilised in place by stuffing the gaps in front and behind with plasticine. We then waxed the hardboard a couple of times and finished the edges with curved fillets of plasticine.  This gives me a nice u shapes structure, with smooth corners  and 3D curves which will all add rigidity. This picture shoes the general structure. But overall the buck is huge, and should plainly flow a lot of air. I should point out that Duncan has cannily includes are small 1-2 degree draught angle to help component release.

I’ve also been thinking about supporting the new floors,   even though they are pretty stiff, they still going to need supporting in the correct location on the car.  For the moment my thinking is based around tension wires.

Posted in Winter 2009 Rebuild | Tagged , , , | Leave a comment

New Floor Mk1

IMGP0543So having made a mould, it was time to make a floor.  The plan was gelcoat,tissue, 1 layer of chopped strand mat, reinforcing strips of 6mm ply, and then a final layer of woven rovings. All laid up with polyester resin.   For the edge of the floor which will be unsupported the plan is also to support this with a 100mm stretch of Kevlar laid up in epoxy resin, to add rigidity.

To be honest the layup precess went less than spectacularly well, the problems identified previously with not allowing enough spare space at the mould margins for the fibre to lay down properly, or trying to do too many direction changes too close to the edge, meant that it was a bit difficult at times.  Still we live and learn.

However the biggest problem came with getting the ply reinforcing to sit down properly in the moulded channels, and then get the woven rovings to glom down onto them.

IMGP0548Above it is pictured with just the the gel coat on it, this was then followed by the CSM. And in true Blue Peter fashion  here’s the finished version.  Which overall I’m quite pleased with.

As a first effort its not too bad.  The gel is a bit thin in places on the up stand, and around the plywood braces there are some areas were the resin hasn’t penetrated and filled the voids properly, because the gel coat is plainly very flexible and unsupported.  Once the gel hardens properly in these areas to form bubbles they will just break away.

On the plus side.  The surface finish is ok for a floor, and it released from the mould nicely, so I can go ahead and have another go :-) .

IMGP0549This was the first time I used Woven Rovings in anger and they were a little difficult to get to lie down.  This shot of the underside shows the problem with the ply, it has lifted the rovings and these areas plainly need to be cut back and repaired, with another layer, you can also see the obvious airgaps around the ply. As I was laying it up I could see the problem, but by then I was a bit committed  So for Mk2 I’ll either chamfer the edges to get the ply to sit down better, use thinner ply, or add some specific addition reinforcing strips in the grooves to add the required stiffness , and abandon the ply altogether.  Still at least the mould released properly so another attempt is an easy thing to do.

Posted in Winter 2009 Rebuild | Tagged , | Leave a comment

New Side Pod Floors

It was apparent, well blatantly obvious really given the overheating problems  that ruined my 2009 season, that managing the airflow into and out of the radiators is of crucial importance.  When we originally moved to radiators to the sides pods back in last December we simply cut holes in the existing body work, and put some sub surface ducts in crafted from aluminium.   The problem with these is that the ramp angle is much too steep, and we think the airflow is stalling/ braking away long before it reaches the rads.

So for this year we have decided to take the quite large step of rebuilding the lower half of the sidepods, and the front floor section to make some deep side pod channels, that flow the air much more gently into the radiators.  The idea is to remove some of the damaged lower section and replace the sidepod floors which are currently made of skanky aluminium.  The result will be some very deep ducts, which if necessary can also be interchanged with proper NACA ducts if required.  If I can get it to work right I may also be able to generate some additional front downforce too.

One problem with  making new floors from GRP is that they are a little vulnerable to side impacts, so it pays to make a spare or two.  And If I need to make a spare, then I’m going to need a mould.   No Worries  making GRP parts + moulds is just another skill to learn.

IMGP1362.JPG

So if you’re making a mould you need to start with  making a buck (mine can be seen to the right), which is an exact copy of the part required.   This is a 3 stage process, make the buck,  make a mould of the bulk, make a part in the mould.  Its only remotely worth it if you are planning to make multiple identical parts.    I want to beable to make new floors in case these new onse get damaged so the need for a mould is partly justified.  I also want to use this relatively simple part as a test piece to learn the process, as I have long term plans to change other, less simple bodywork components.

In fact you need to make the buck bigger than the part, to allow both the mould and the part to be trimmed back to their respective final shapes,.

However it would be far quicker and cheaper to make the floor in Aliminium if only a 1 onff was needed.

IMGP1364.JPGSo as  this is a floor we started with a flat sheet of contiboard,  this is plastic faced, so should release nicely.  To this we added some Contiboard upstands, an old pot of cutting fluid and some uPVC roof mouldings to give some 3D channels to what is essentially a flat GRP sheet and therefore would have

been really wobbly .  All the joints were  nicely filleted with plasticine to give smooth corners.

On top of this I brushed on a layer of PVA release agent, well two in fact.

The actual mould laminate is made of 5 layers of chopped strand mat, 2 layers of gel coat, and 1 layer of tissue, laid up in the the sequence Gel, Gel, Tissue and then CSM. Then left alone to cure for a week. I used two layers of Gel coat,  one blue and the next black.  This was in case I needed to repair the mould by sanding away imperfections…. once I hit solid black gel I’m nearly through to the matt.

After 5 days the mould was released from the buck, and it came away nicely, you can still see the fluffy GRP edges, where the fabric overlays the edge of the mould.  Do not be fooled these are a forest of sharp glass shards which are now both rigid and fragile and love nothing more than to embed themselves several mm deep in your flesh and then break off. Ouch!

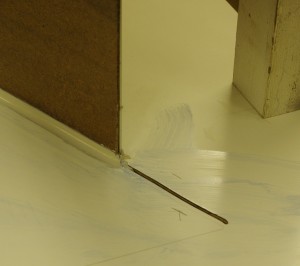
The white lines are the plasticine fillets, where they have pulled away from the buck.  These clean off easily with warm water and or panel wipe.

IMGP0542.JPG

This mould has probabaly cost about 50 quid in materials and about 10 hours in man time so far.  You can see that this is not something to undertake lightly.

Anyway after a few more hours of trimming and polishing with 4 coats of release wax the mould now looks like this, and after one more coat of wax is ready for the first part to be laid up.

Closer inspection as part of the polishing, has revealed a few flaws in the surface.  Mostly these are brush marks, which were left in the plasticine fillets when I brushed on the PVA release agent.    These I’ve rubbed down and polishes as best I can, and next time I’ll spray the PVA.

I’ve also deliberately left some release wax in the sharpest of corners, to aid release.  With all that wax on it is damn slippery now

So hopefully by next weekend I’ll have laid up a new floor, and maybe just maybe it will have released from the mould.

Posted in Winter 2009 Rebuild | Tagged , | 1 Comment

Sylva J15

IMGP0958

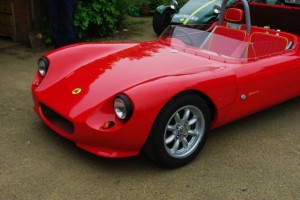
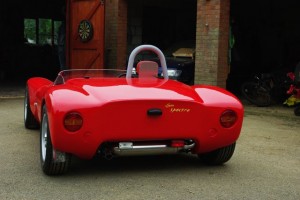
Now I love my Genesis, I love the shape, the performance and the uniqueness of it. But I have to admit my eye has also been drawn to the new Sylva Spectre J15. It is a mid engined full bodied car, redolent of the 60s racers of old, with more than a touch of classic Ferrari/Lambo about it’s styling. Based on the R!ot chassis, and created by the renowned Jeremy Phillips. Tim and I spent a very pleasant day today looking at the first prototype at Jeremy’s workshop. There are two main points.

1)The car is every bit as lovely in the flesh as in the pictures I’ve seen, and should be fine for racing.

2)Jeremy and his Wife are really very,very nice folks.

3)Both me and Tim can fit in it, although Tim would need to adjust the pedals for his Extendo-Legs ™

IMGP0947For the first time I’ve seen another car where I thought “I’d sell the Genesis for one of those”. So if you want a nicely dialed in Class A or B RGB car drop me a line :-) .

Don’t you think it would look fabulous in Subaru Blue? Plus being 10- 20% smaller than the Genesis in every direction I think even a biffer like me could get on the weight limit for mid engined cars.) Plus I could get away with a smaller trailer.

My head says “You’ve a working race car that you’ve finally got dialed in”…. My heart says…”Oooh Me want one”

Posted in Kit Car Stuff | Tagged | Leave a comment

A Great Race Until Heat Related DNF :-(

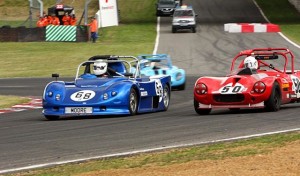
IMG_1254So after the fun at Anglesey the next RGB outing, was at Brands Hatch, As our sister series BIkesports is struggling for numbers at the moment, we’d been invited to join their races to so I was expecting 2 x Bike sports + RGB and 2x practice for 5 outings in one day. It was going to be hectic, so we tried to ensure that the car was perfectly ready so we had no tweaking to do between sessions. Bike sports allows slicks and wings, but it is a testament to the skill of the RGB boys that we can mix it with all but the most powerful of these chaps. The leader lapped the entire field, but elsewhere RGB and Bikesports often competed equally. However I’m mindful that this is not an all comers race, but their championship round so I’m careful not to impede them if they are obviously faster or trying to get to the next BS in front.

The only things we’d done to car since Anglesey was change the oil, and put a restrictor into the water system to try and increase the cooling efficiency of the laminova cooler by forcing more water through the cooler’s oil cooling channels rather than the large central bore, This has the effect of improving oil cooling at the expense of main coolant flow rate., In testing on the drive it had struggled to hold temperature at idle, but it seemed ok once we had some airflow, and we were hopeful of getting some more heat out of the oil. But at Brands I had nothing but temperature problems.

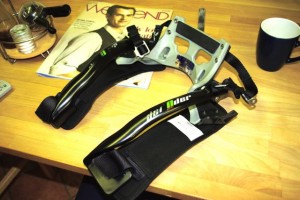
IMGP0943The other thing that was new for this weekend was I had bought as Defnder HANS device, indeed several of the field had bought one since the fairly hefty shunt at our last outing, At Anglesey Rob Grant came back to the paddock (once extracted from the tyrewall) singing the praise of his so most of the field mind was focussed on them for the last few weeks.

I’d bought a Defnder from Nicky Grist Motorsport (whom I heartily recommend).

The Defender is a 2nd Generation Head and Neck restraint system (HANS is the trade name of the original product by a competitor) and I particularly wanted it as it also has secondary tethers that help protect you in a side impact. You can see that the steel component on the right, is attached by both a rear and side tether.

Unfortunately it only arrivee 2 hours before we left for Brands so I had to adjust it, and fit it once we were there.

It’s adjustable in many ways and has much simpler tether mounts that the hans, so I was very pleased it had arrived in time for this weekend, and was looking forward to trying it out.

However that was the least of my worries, as the main problem of the day was an overheating engine, which Marred the entire day :-(

IMGP0944

First thing in the morning, after bike sports qualifying, the oil temp was 120+ degrees. l managed a 53.77 which is a full 0.7 inside my previous best time so I was pretty happy, and I was second of the RGB contingent as well. So I was very happy with that result and my driving. In fact I was chuffed with my driving all day, the problems were with my Kit and my Car.

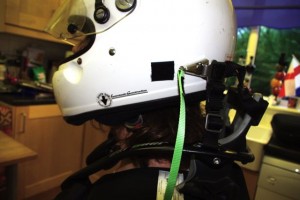
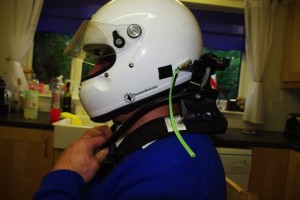
I was struggling with the new Defnder Hans Device, It has side bars for lateral protection, but because I’m a big lad these sit too high ( I think its because of my large shoulder muscles and flabby man boobs) and force my helmet to an odd angle particularly when looking right as for some reason my right shoulder sits higher than my left. IT is somewhat uncomfortable, as you’re forced to cock your head a bit and push against it… very fatiguing.

My neck is still sore today, so that can’t be good.

IMGP0946

In fact I plonked it and my GP5K helmet on my 18 year old son today, and you can clearly see the problem.

Chris is about 2″ taller than me and made of spaghetti without an extra spare ounce of lard or indeed any shoulder muscles, that extra 2 inches seems to all be in his neck vertebrae, Here you can see, that even with the tether adjusted for me the device has good clearance between the shoulder bars (with the Defnder logo) and the bottom of the helmet. As a result he can turn his head without issue.

By contrast in my picture (Blue shirt) the helmet is virtually sitting on the Defender.

Chris can clearly move his head without hitting it, I unfortunately cannot. Such a shame as I like it a lot.

Anyway, back to the racing, the car was showing signs of over heating. coolant at 55-90 degrees but oil at 130. So we persevered on to RGB qualifying. Here again I did a 53.56 so a further .2 again off my PB, but The car was showing 155 oil temp and I really wasn’t happy with that.

So before the bike sports race we whipped out the restrictor and re bled the cooling system. which is always problematic on a CBR100rr. eventually we got it sorted just as we were called to assembly.

I was only on row five, and it’s quite fun being up the front of the grid :-) . Except that bit of the grid at Brands slopes, and with my none existent handbrake I was concerned about rolling forward at the start, as a result I got a poor one, and ended up in a gaggle of RGB cars with Me , Austin and Bob Mortimer.

There then followed 8 laps of great racing between me Austin, and Bob, most memorable was Austin getting me up the inside at Druids, me switching back on him, then taking him on the inside at Graeme Hill, but when the oil temp touched 170, and the pressure hinted at dropping off I called it a day, and let Austin and Bob through, as I retired.

Worst still the restrictor and ultra hot Laminova oil>water heat exchanger now worked against me, and back in the garage she boiled over instantly the airflow stopped moving across the radiators.

So I reversed previous procedure, refitted the restricter, refilled and re bleed coolant system. and tried again in the RGB race . This meant that I couldn’t help Tim as much as I would have liked. He was busily changing an engine, but his willing band of happy Elves from the rest of the RGB paddock seemed to be doing a good job.

A few minutes later , while waiting in assembly it was really glorious to see Tim arrive, to much clapping and horn tooting from the rest of the paddock, but I wasn’t actually hopeful that I’d finish the race due to the overheating.

Anyway we got going, (again a bad start due to holding on the brakes against the slope), and I made up a couple of places that I’d lost on the grid, getting Bob M, Paul Rickers and Austin to be 2nd (I think) in Class B. But oil temps rapidly went skywards again, so I backed off and started short shifting to see how long it would take to cool down, the answer is ages. The oil was now heating the water and there’s lots of thermal mass in the system, so it never really got below 150. My times dropped from 54s to 57 & 58 & 59ss and I tumbled down the field.

Tim got me in a great move where we drove half the top end of the circuit side by side with a whisker between us. He knew I wouldn’t squeeze him off and I knew he wouldn’t turn in on me. So we were locked side by side from the end of the Cooper straight all the way through Macleans, Surtees and Clearways. Great racing…. but of course I couldn’t hold him. It was a really fantastic display of skillful driving in the face of engine swap adversity.

So I just used the time as a bit of test, speeding up where I could because the temps had dropped. I almost faced being caught by Judy on the Line, bit I managed to hold her off by half a cars length, to avoid being last.

I skipped the last bike sports race… no point.

So the pluses are.

2x new PBs and my times are competitive with Tim except for the one or two he banged in in the 52s, and I was generally happy with my driving. Again I went a second quicker, and yet again so did Tim and the other front runners, but I’m properly in the game now :-)

My expensive new safety gear seems to have given me neck/backache and is uncomfortable, so that it may get offered for sale :-( , which is such a shame

And what the hell an I going to do about keeping this beast cool? I really have no idea,

It did occur to me today that the laminova may have been air locked, but when we were handling it it did seem to be uniformly hot.

So driving home was all a bit despondent really, and I’m somewhat at a loss today :-( after 2 xPBs, but one DNS, one DNF, and one limped home hurt.

Fair play to Tim though… he drove a fantastic RGB race, fully deserved driver of the day award , and his 2nd place pot, as Andy Bates commented “Who switched the Hoverd on?”

The really good news is that in the Bikesports race Bob Mortimer’s camera worked well and he got some great footage of the battle with Me, Him and Austin. So at least you can share that (I’m the shiny blue car that starts in the mirrors and ends up in front until I retire after swapping places with Austin (in yellow) a few times

Posted in Brands Hatch, Racing | Tagged , , , , , | 2 Comments

Competitive at Anglesey and a good weekend at last

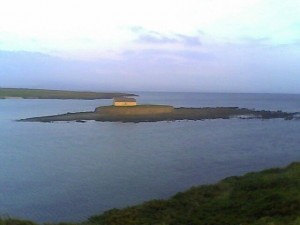
Chapel on IslandAnglesey Circuit or Trac Mon is one of my favorite circuits. The track is flowing and technical, fast and twisty with both elevation and camber changes and it has two or three great overtaking spots. What’s not to like? The only problem is that it is as the ends of the earth relative to me in Peterborough. Although I guess unless you live in Conway its at the ends of the earth from everywhere. After our first visit here last year it has become a firm favorite, so Duncan and I had arranged for 3 days off work to make it a 5 day weekend including traveling, testing and racing.

After a 5 hour drive in 30ft Winnebago and trailer we arrived on Thursday night to find the paddock absolutely heaving with cars. It looking like it normally does on a race day, the allocated section for RGB cars was already full. Tim arrived a bit later and then came Coli

n, so we went off and annexed a bit of the paddock elsewhere.

Unfortunately the weather forecast was poor, and it seemed that we would get rained on for most of the three days.

Friday testing was fun and very instructive, but the weekend was almost ruined at the start.

On Thursday morning before we left I had fitted new brake pads to my rear calipers, this in conjunction with the new pedal box, and new RS14 pads, and new fluid meant that I had an entirely new braking system to get used to and to get the balance setup on.

But this wasn’t the problem.. Oh No. It seems the hi-spec handbrake caliper had developed a leak as a result of pushing the pistons back into the body to fit the new pads. No ordinary leak from the piston seal either. No, it was leaking through the handbrake mechanism in the back of the caliper a part that Hi spec have specifically said I shouldn’t remove to repair as its all a bit complex in there! Fortunately I’m not completely screwed. I remember that I’ve still got my spare, right rear, non handbrake caliper in the bus. I had actually considered removing it when doing the packing but left it in the locker “just in case” It’s bolt and pad compatible with the handbrake caliper and so we effected a swap in 15 minutes or so. It has sat on the shelf for two years, but mercifully it was fine. This, I think was the motor sport gods saying “Th

ank you”. I only had it on board as it had been fetched from home mid weekend by Dave Hackett to help out Bob Mortimer at Cadwell when his Hispec calipers had failed. That little bit of helping out, came back to save me from a completely failed weekend. As they say “It goes around and comes around”.
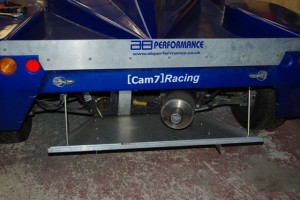
IMGP0941Since our last outing at Cadwell, we had added a simple rear undertray/diffuser to try and generate some additional rear downforce. Derek Jones ,the RGB Champion has been gently banging on about this for two seasons to help cure one of the car’s perennial issues… power on oversteer at the corner exit.

So I was looking forward to trying it out and seeing if the car worked better.

In session 1 I went out on my wet tires. I wanted to give them a gentle scrubbing as I had used them instead of the dry tyres at Cadwell a few weeks ago and I wanted to level their surface again by rubbing off all the rubber crap that they had picked up. Once I had dialled the circuit in a bit, and got properly underway I started to evaluate the undertray’s effect…. Needless to say Derek was Right!

The first testing session was pretty entertaining, the diffuser was plainly having an effect but surprisingly the car was more unstable not less. I had significantly increased under steer pretty much every where, but the back end was still unstable under corner exit, power on conditions. Duncan, from his position on the pitwall could clearly see that the car was running in a tail down attitude. The car normally runs pretty level, and even under heavy acceleration doesn’t normally exhibit “squatting” at the rear. Duncan thought I looked like I was going down a runway trying to reach take off speed. So plainly the diffuser was creating much more rear downforce and this was having the effect of lifting the front of the car and creating understeer.

Despite this I managed a 1:17.3 which is pretty much equal to my best time time in the race last year of 1:17.34, and that on wet tyres too. So I’ve not gone backwards too far in the intervening 12 months. :-) . In fact last year it took me 3 days to work up to that sort of speed.

So we now changed a few things on the car to reestablish the handling balance, previously I’ve always worked on a policy of leave the car alone if it is settled and easy to drive and work on improving my own use of its capabilities instead. But now I was as fast as last year in a car with some distinct issues, but I knew the car could be even better. So it was time to change my policy and actively change the car to find the extra time.

Between the sessions we put on my dry tyres, added and extra 10mm of rear rake by winding up the rear spring seats, added some additional rear camber in case the issue was the rear tyres folding over and went out again.

In session 2 the car was better with the understeer much reduced, although I still had problems with rear end grip.

Unlike the first session where the 1:17 lap was the only one below 1:19, I was now banging in lap after lap in the 1:17s and even dipped down to 1:16.99. However it still wasn’t right. It was plain that the diffuser was having a strong effect, I

was still having understeer at turn in and oversteer at exit issues.

Unwilling to increase the rake further (it would possibly screw the ride height and make the front drag on the ground), we added 1 additional click to the rear dampers, to stiffen them and help fight the squatting. We also removed most of the additional camber (as the tyre wear patterns showed clearly that it wasn’t working the contact patch evenly) .
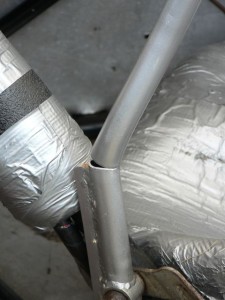
P1050261Session 3 was a hoot, the car was now much more planted, and I quickly dropped to a 1:16:62. Unfortunately the session was curtailed after just 5 laps. I was having a ball and just coming along the back straight to overtake Bob M when I broke my gear stick in half! I had to finish half a lap changing down by gripping the stumpy end.

I’d done this last year at Anglesey too, and it seems I still don’t have much finesse behind the wheel. In the words of Andy Bates, who once again repaired the lever using his trusty brazing kit. “You’re a bloody animal, If you break it again I’m going to make you one from an RSJ”. Oops :-)

So with the gear shift repaired we set out for the last session after adding one more click to the rear dampers.

We shared the last session with the Locosts and Caterhams. These are small light and nimble cars, but compared to an RGB car they are pretty slow. The RGB boys spent the entire session mugging them in the corners. At one stage I shoved it up the inside of four of them on the way up to rocket one. They are all skilful drivers, saw me coming and gave me room, but even so it must be hard to work on your own lines when you can never get to an Apex because an RGB car is in the way.

Now normally I have a policy of taking the last session easy, but I wasn’t yet fully up to speed and I was sure that there was more to come, so I leaned harder on the car. Again I was consistently in the low 1:17s and high 1:16s and then I banged in a 1:16.2. The car was maybe a little better again. The understeer was mostly cured… except when pushing very hard, and the rear end grip was better although far from perfect.

Best of all I was 1.1 seconds inside my previous personal best (and that itself had been a massive step up last year). And I could pronounce myself “Most Well Chuffed”. Tim, of course went quicker, as did the fast Class B boys at the front of the grid, the whole grid simply gets quicker every year.

But doing a laptime that would have put me on Class B pole last year, and a best theoretical lap of 1:14.3 was enough to make me smile all evening.

Race Day dawned and it seemed the entire Irish Sea had been dumped on Anglesey as it was very wet, very wet indeed. so all of yesterdays carefully crafted settings were not now applicable. Again I have a policy of not changing the car for the wet, preferring instead to adjust my driving around what is normally a predictable platform. So we put on wet tyres we gave that a go. Nope bad idea. The car was a real handful, hugely twitchy, armfuls of oversteer, but also oddly predictable once sliding. The track was now slippery as anything except in the braking zones. The rain had stopped just before we went out and now the pressure of our braking was clearing a dryish surface in these areas. As a result you could leave your braking later and later as the session went on and of course the dry zones also moved later and later in the corner as a result, but if you ran out of the dry bit while still trying to brake hard you immediately ran out of grip. I discovered this to my cost at the banked hairpin when I pushed the envelope just a little too hard, locked the fronts and simply went straight on for a session for grass cutting on the wet grass.
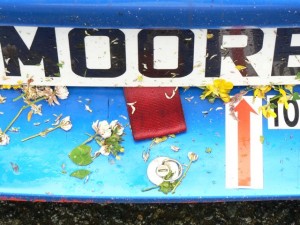
P1050264Good job the ArmCo is some way away from the edge of the track, but it was a bit buttock clenching for a few seconds, bouncing over the grass turning the wheel to no effect while the severed heads of clover and buttercups hit me in the visor! Back in the paddock I got a few ribald comments from the guys about charging the circuit for my grass cutting services. But no Harm done. And a nice bit of flower arranging done on the front splitter too.

For the first time I actually enjoyed driving in the wet and eventually managed a 1:30.9. Only 2.9 seconds off John Cutmore in Pole Position, but such is the copetitiveness of the RGB grid that I was actually 17th and directly behind Tim for both races. so overall and given the conditions I was pretty.

For race 1 the condition were again very challenging, but I have to say RGB gave a strong demonstration of how to drive fast and close in full on wet conditions. All but one of the cars that started finished, and that DNF was a voluntary one. We had no contact, no major incidents and no red flags despite being the first race of the day. It really was a credit to everyone.

Unfortunately my camera packed up again and I got no footage, This video from Bob Mortimer shows just how bad it was, and you can even see me in it from time to time.

Starting directly behind Tim I I had an enjoyable race, sliding the car around in the wet. Don’t get me wrong the conditions were atrocious and I was scared, but I’m learning to control my nerves and gaining the skills to deal with them. Before he race we had inflated the tyres by 3 lbs or so as the wet cold conditions had prevented them from reaching optimum operating pressure in practice, we also softened all the dampers by a couple of clicks and softened the front ARB to see if this helped in the wet.

It did… a lot and I was able to drive the car more predictably. In fact I was having great fun trying to find the extra grip off the racing line and was making good progress. I was even deliberately provoking some slides to try and gain some advantage. Eventually though I got overconfident and span on the exit of The Banking with about three laps to go. This let Tony Guant and a couple of other s through before I could rejoin. Having said that I did catch and pass Tony again on the outside at Rocket 1 before the end which was rather cool as he and I are usually neck and neck.

So apart from my spin I was very pleased. we had the makings of a good wet setup, and I had lost some of my fear of racing in these conditions, I’ve finally developed my skills, and confidence enough to be able to tune the chassis and feel the changes. Best of all given the nastyness of the conditions it was nice to bring the girl home in 1 piece.

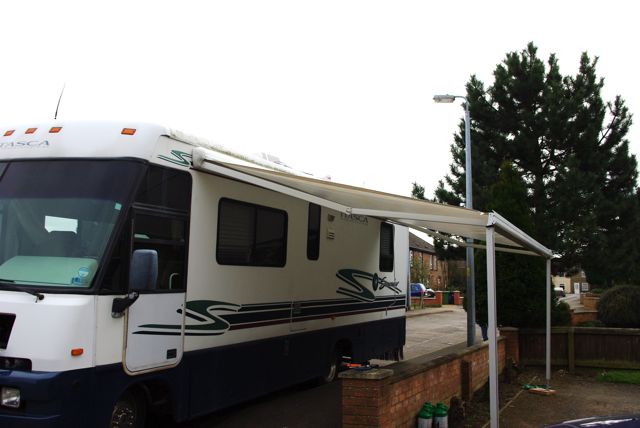
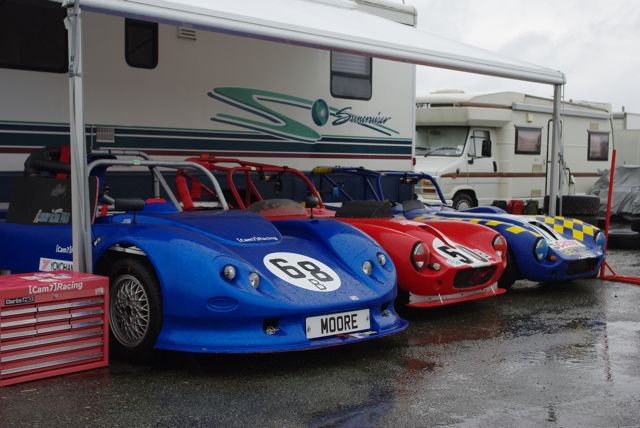
There followed a day or torrential downpours and my awning came in very useful to help shelter both Tim and Colin’s cars as well as my ownIMGP0939
Posted in Anglesey, Racing | Tagged , , , | Leave a comment

Not So Rolling Road+ Keeping the rain off.

The car spent last week on a little holiday at Power-tec to get rolling roaded. A scheduling mix up meant that they weren’t expecting me, but they could fit me in if I left the car with them – Top chaps. Unfortunately when they finally did get it on the rollers they couldn’t map it. The fuel pressure was varying by as much as 7 PSI which meant that they couldn’t get consistent results. They’d add a bit fuel in map location x,y and get it purring nicely, but when they tested it again it would be off. Injection systems assume a constant fuel pressure and you add fuel by extending the injector duration….variable fuel pressure is bad.

This is the second time I’ve tried to get the car mapped at Power tec and the second time fuel pressure issues have forced it to be abandoned :-( Its beyond a joke. It looks like the new pump I fitted last year is already failing. I’ve ordered a new pump from Andy at ABPerformance and will get it fitted before we go to Snetterton in a few days time. This may explain the overheating problems I had on track last week as running a bit lean can cause overheating. However I thought she pulled like a train and I was pretty close to Tim so it can’t be far out.

Interestingly one of the CBR1000rr tuning sites says you should clamp of the PAIR system when rolling roading the car. This system injects clean air into the exhaust to help the car pass emissions tests. On the racer this isn’t needed so the two inputs are just joined together with a link pipe, which should create a closed system but I wonder if this could be causing false readings on the Lambda gauge. Anyway I’m going to properly block it with a bung. Plus I’m going to instrument fuel pressure and feed it to the DL1 for logging at the next outing.

So somewhat annoyed and disappointed not to get It sorted we spent much of this weekend concentrating on the Winnebago. Last year I bought a larger awning off ebay and we finally got around to fitting it. Sterling exertions from Duncan and my now grown up son Chris, meant that we finally hefted it into place and fitted it. Much thanks goes to them both as it was touch and go whether we could get it up in the air, Duncan has a badish back and Chris seems to be made out of spagetti. The awning is pretty substantial and jolly heavy and we were all working at the limits of our strength 8 foot in the air, much respect to them both.

I certainly wouldn’t want unwind it without a second pair of hands to support the weight. I don’t think it would do the ‘Bago sides any good at all. Still it does look nice and neat, and oddly the extra weight seems to make the beast even stable to drive The next thing is to get some sides for it., hopefully we won’t need it at Snett but it may help keep the Baking heat of the sun off us :-) .

This led on to a diverting afternoon of wiring problems. Despite me having got the plans from Winnebago and checking that there was no wiring in the vicinity of the awning mounts it seems I may have nicked a wire when drilling. Unfortunately this constantly shorted out the main fuse for the tail lights and side markers. It took us four hours to track it down and resolve the problem.

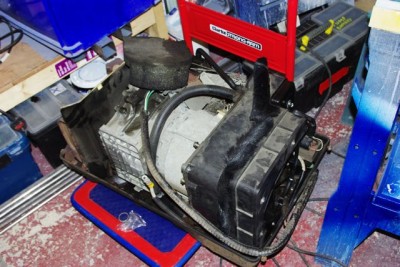
At one of the meetings last year the generator on the Bago packed up, we’re going to need it at Snetterton as the paddock is not massively well served with power points. The starter motor jammed, and emitted a large quantity of acrid smoke. So we took the beastie out of the rear locker where it lives. It’s a 4KW Onan unit which is made by Cummin(g)s.

That made me titter in a schoolboyish/blackadder way.

Anyway a new starter motor is due this week so we should be good to go before Snetterton. Good job to as the existing armature is plainly toast with at least 6 or 7 breaks in the windings.

On Sunday I did the normal suite of routine pre race checks. These revealed that I probably ought to fit some new front brake pads, as these don’t seem to owe me anything. being at 2-4mm depth and beginning to break up.

Of course this will unfortunately mean that I will be bedding pads during the practice session at Snett, but I’m afraid that appears to be unavoidable now

Posted in General Race Stuff | Tagged , | Leave a comment